We previously posted a series of case modding intro videos that were targeted at helping system builders break into case modding. The truth is, of course, that really getting in deep requires time and tools (and other expenses), so it's often easier to start with something else -- like installing aftermarket lighting kits.
This quick post-build guide aims to highlight some of the basic add-ons for gaming PCs after they've been built; these are items that can be installed with a screwdriver or a bit of manual work, but won't require more advanced case modding initiatives. You'll find product examples of each component type below.
Functional Add-Ons: Front Panels, Fan Controllers
The most popular system accessories are often light kits and fan upgrades, but functional hardware options are also available. Fan speed controllers and hubs are often overlooked or unheard of, but can bring some character to the front of your case (and help control volume).
Fan speed controllers are generally used for linearly scaling the voltage supplied to connected devices; by throttling voltage delivered to fans, a controller can slow down cooling devices, thus decreasing noise emissions within the system. This is useful if you have long system uptimes or have needs for silence (for instance, recording environments or ... sleep?).
There are two primary types of fan controllers: Linear and toggled, or non-linear controllers. Linear voltage regulation means that the dial or slider's progression toward 100% or 0% will scale the voltage as the slider moves. If you move it 20% up, the fan will go 20% faster. This is in contrast to toggled or non-linear controllers, which have thresholds and preset power delivery. For instance, there might be three predefined fan speeds (voltages) at 30%, 60%, and 100% on a non-linear controller. On this hypothetical controller, anything between 30% and 59% will still power the fan at 30% (so it gives you a false sense of extra control); once you hit the 60% threshold, the fan speeds up suddenly.
These types of controllers are used in cheaper products and a lot of low-end cases. Rosewill's R5 and Antec's GX700, for example.
Front panel fan speed controllers are often equipped with multi-channel configurations, which means the builder can set different "zones" for the case fans. If a controller has three channels, you could set the front, top, and rear of the case as different channels. This is ideal if you've got larger and smaller fans (quieter and louder, respectively) that need to be controlled as a group.
Bitfenix Recon: Internet-Enabled (Phone) Remote Front Panel Fan Controller
Bitfenix's Recon didn't exist when I wrote a similar guide to this one in 2011, so I was pretty excited when I stumbled across it during my research gathering* (caveat below). Bitfenix, of course, has become well-known for their LAN-focused cases (like the Prodigy) and other high-quality, niche-market devices.
The Recon sort of continues that trend. This 5.25" front panel controller has five channels that can control up to 10W per channel, with a polling report rate of 5Hz (pings for measurements roughly 5 times per second). Temperature alarms can be set in the 30-90C range, so if you want to be alerted when the case thermals are exceeding 50C in order to appropriately adjust fan speeds, that can be configured.
Like many other modern FP controllers, the Bitfenix Recon uses a touchscreen for its voltage regulation adjustments. Unlike other controllers I've seen, however, the Recon can be operated via software on the host machine or remote devices (like tablets and phones). If you're rendering a computationally-intense file and need fans at max, then you could set the fan speeds to maximum, walk away while it renders, and then use a mobile device to decrease fan speeds remotely once finished.
Fun stuff. At the end of the day, it's by-and-large a toy, but there's nothing wrong with having more hardware to play with. Besides, it gives a more unique look to the front of the machine.
*All this stated, the Recon has received questionable user reviews (mostly noting that the touch screen is unreliable). If you're interested in the idea of a front panel fan controller -- whether that's for bling factor or functionality -- consider these alternatives: Lamptron FC10 Steampunk controller (vacuum tubes), Kingwin Multi-Function LCD controller & media reader, or for something more straight-forward, Kingwin's 4-channel knob controller.
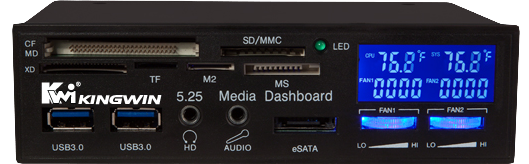
Personally, I'm a fan of the Kingwin multi-function controller, mostly because it serves as a media / card reader as well as temp monitoring and fan controls. There are a lot of cables though, so be prepared to tuck the excess away somewhere in the drive bay slots.
Aesthetic Add-Ons: Cables, Management, & Sleeving
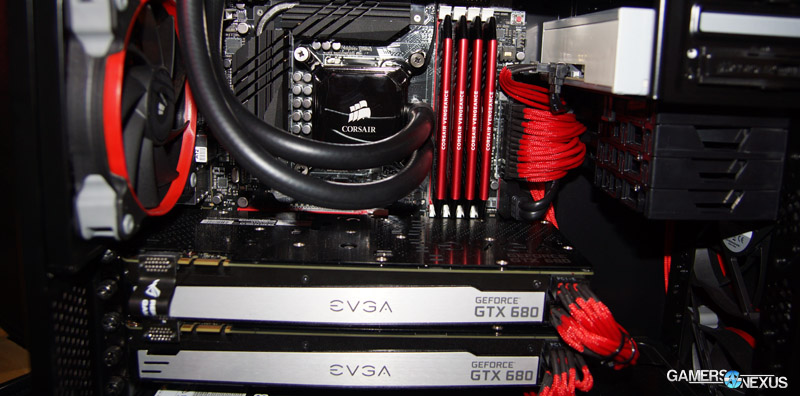
When we saw the case modding panel at PAX Prime '13 (link), Lustro0 Customs gave an overview of custom cable sleeving and the rise of a new sub-industry. Sleeving your own power supply cables (and FP connectors) can provide an overall cleaner look to a gaming PC and help tie the internals together. Here's an example:
Depending on how much you value your time, it's far cheaper to buy the DIY sleeving kits, which leave all the cutting, priming, and adhesives to you, but it can take hours to fully custom sleeve PSU cables. If time isn't available, that's where pre-sleeved kits come in, like those sold by Corsair or SilverStone -- they're much more expensive, though.
On a similar note, Corsair sells custom PSU trims for their power supplies; if you're doing a red/white build, for instance, a $10 face plate with red/white trim can help tie things together. Just something else to consider.
Aesthetic Add-Ons: Lighting & Custom Side Panel Windows
It's pretty easy to cut your own window. I've used hack saws and jigsaws, depending on where you want the cut to begin, but plastic cases can be cut with plasticutter knives. Basic plexiglass can be bought and cut to size for a quick side panel. For something a bit cleaner and clearer, acrylic panels are available in 16x16 sheets for pretty cheap; Xoxide also sells meshes for sidepanels, so if you wanted to add your own mesh "roof" or side to your case, that could be done for pretty cheap. Fans can then be screwed into that, which will overhaul your cooling system.
I particularly like using these techniques on old cases I'm modding, like those from the 90s which are no longer usable in their current state. Cut a few holes in it, add some fans, paint it, and you've got a custom, new case for pretty cheap.
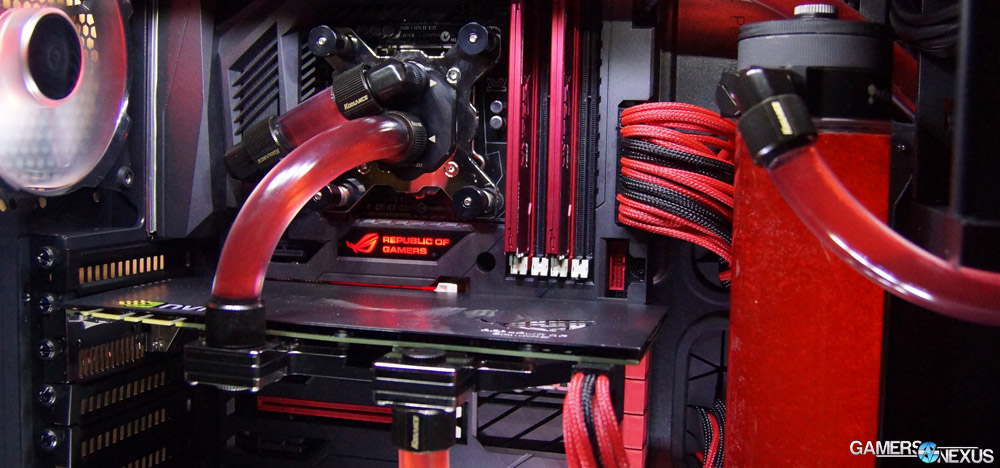
Lighting is probably one of the longest-standing system modifications in the PC world, given its relative accessibility and inherent 'cool' factor. If you're not building a sleeper rig and want something flashing, cold cathode tubes (effectively neons) and sleeved lighting kits -- when deployed properly -- can spotlight system components like a car dealer's showroom floor. Here's an example we spotted at a convention:
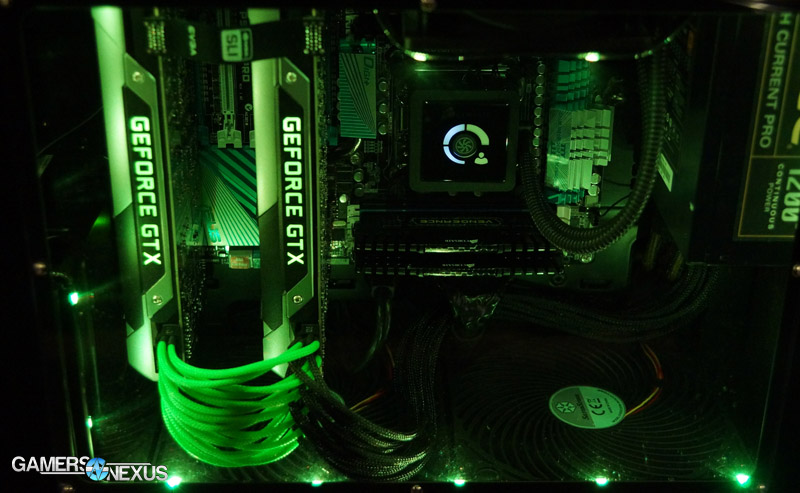
UV lights also do a fantastic job of using components' natural coloring to brighten the interior, seen here:
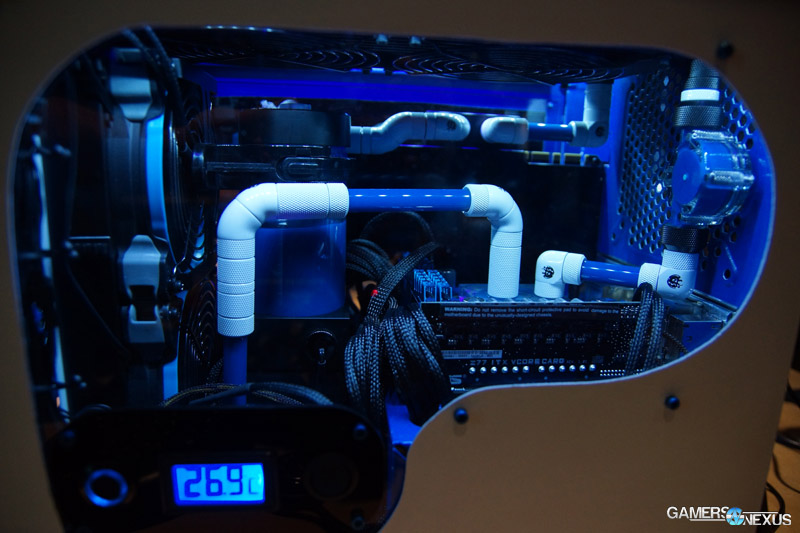
You can grab cold cathode kits (including UV lighting) over here, and NZXT has some excellent sleeved lighting cables (seen in the first image) for pretty cheap. NZXT's kit is actually very similar to what's used in their HUE lighting system, which has a front-panel controller to modulate the color output of the LEDs (dozens of colors available, as discussed in the P820 review).
Continue to page 2 for custom GPU coolers, RAM coolers, and CPU coolers.
CPU Coolers: They Matter
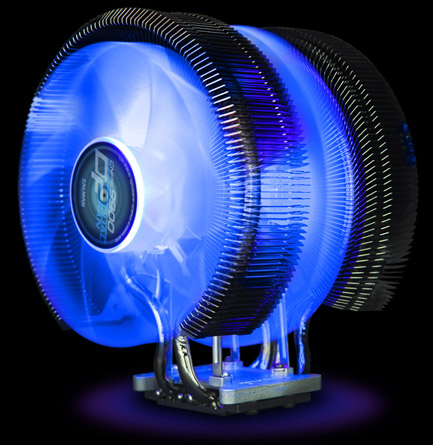
I won't go into the functional advantages of an aftermarket CPU cooler here (I already did that over in this post), but looking purely at aesthetics and post-build hardware upgrades, CPU coolers are an obvious choice. A good-looking heatsink or LED-highlighted liquid block is a lot more physically imposing, clean, and impressive than the ugly box coolers that Intel & AMD ship. Take this Zalman unit, for instance:
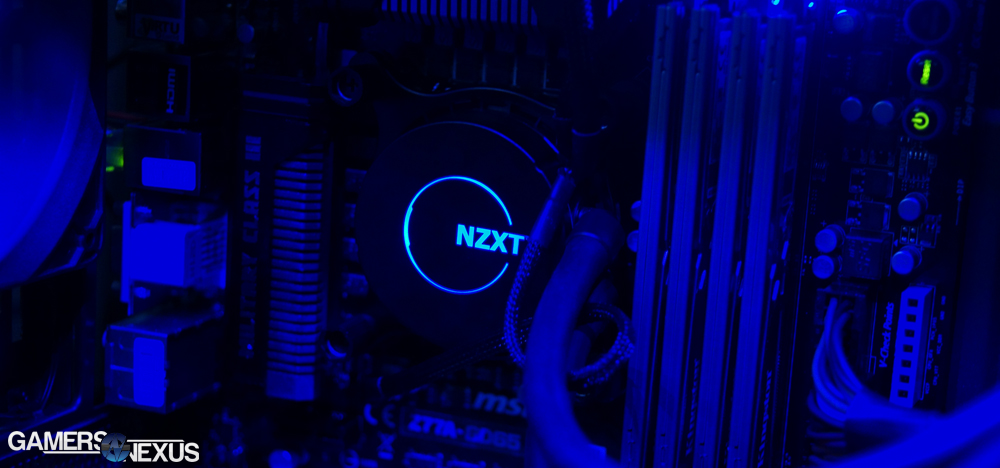
Or this Kraken cooler I reviewed:
An entry-level CPU cooler will blow away the box coolers and should look a lot better, too. For a $30 investment, you could grab almost any of the Cooler Master Hyper 212 series coolers, SilverStone's Argon AR01, NZXT's Respire coolers, and plenty more. It's an easy upgrade that looks damn good and has a major functional advantage.
Other Aftermarket Coolers (GPU, Chipset/Bridge, Memory)
A little less known from the standard CPU coolers are the similarly-constructed GPU aftermarket coolers. Much like a box CPU cooler, the stock video card cooling units often underperform in comparison to a full, aftermarket copper cooling system. We previously wrote in more depth about GPU coolers over here.
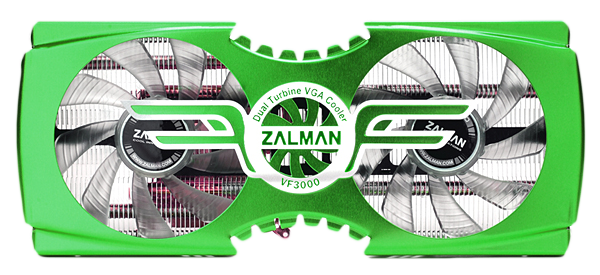
GPU coolers are advantageous if you're doing more serious video card overclocking or are running into thermal issues in your environment. Just make sure you check that the cooler is compatible with your video card, as not all board partners use reference design. Some sample GPU coolers are Arctic Cooling's Twin Turbo cooler and Zalman's VF1000. Zalman's latest coolers can be found on their site.
Bridges and chipset coolers are largely obsolete at this point. Modern chipsets don't get very hot and don't require OCs to perform well, and on top of that, most motherboards have cooling pretty well figured out for the bridges/chipsets. If you've got a cheap board and are doing some entry-level chipset OCing, or your board runs hot, they could still prove useful. Run a temp monitoring program like HW Monitor to determine if your bridge is running warm.
No matter your intentions, some basic chipset heatsinks can be found over here.
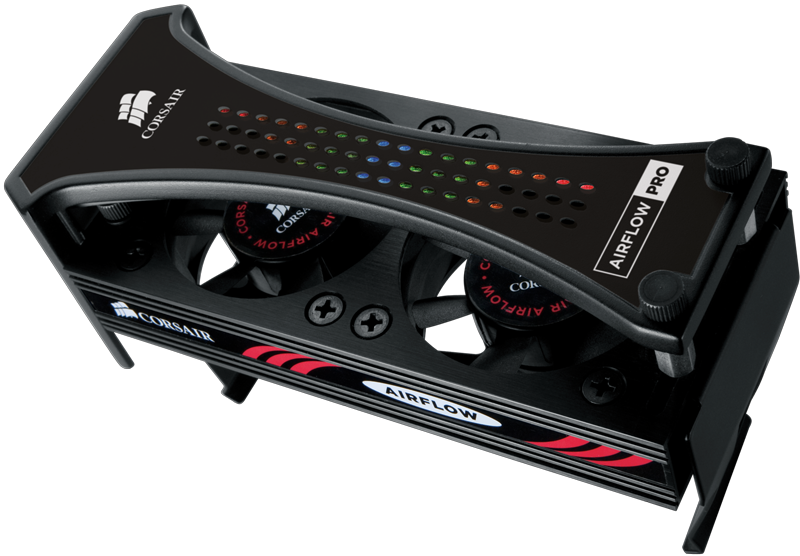 Corsair's AirFlow Pro memory cooler requires their Dominator memory, but has LED feedback for activity.
Finally, memory coolers can make your system look a bit more aggressive and will aid in high frequency overclocks and memory overvolting. Corsair's RAM Airflow Fan mounts above the modules (will cover 6 slots) and pushes air directly onto the heatspreaders/memory sticks. Generally, RAM is pretty cool at stock clocks, so this is really only necessary if you're looking to do something more extreme.
Hopefully this gives you some ideas for what you can do post-build! If you've got questions about any of this hardware, or are curious about other add-on options, leave a comment below or post on our forums.
- Steve "Lelldorianx" Burke.