The silicon powering modern microprocessors consumes significantly less wattage than consumer technology leading up to this point. Look back at the GTX 400 series (Fermi) for an example of this: The flagship GTX 480 was 250W, and it ran damn hot, too. NVidia acknowledged this when we toured their facilities, noting that the complaints of noise, heat, and power consumption directly impacted the development of Kepler units. To put things into perspective, the GTX Titan also draws 250W and has approximately 2.5x the transistors over the GTX 480 (7.5B vs. 3B).
Despite the overall trend toward improved power-to-performance ratios, a mid-range gaming machine can still easily pull 500W+ under full computational (CPU/GPU) load -- that's a lot of power. Even idle, without BIOS advanced power saving features configured, you could easily be resting on a couple hundred watts. Personally, I've got almost a constant system up-time, and that consumes a lot of power. In order to mitigate power consumption and the electric bill (~$20 / mo. with full up-time on my machine, dropped to $10 / mo after taking these steps), we can use modern advanced power saving states implemented by Intel and AMD.
Because our most up-to-date test benches use Intel products, I'll be writing most of this guide referencing those C-states and power saving options. Haswell adds a couple of very impressive power saving functions, like DevSleep for SSDs and S0iX (active idle) for the CPU itself, though
I'll also go into some of the basic video card controls found in various control panels (MSI Afterburner, EVGA Precision, etc.), including fan speed curves to minimize power consumption when idle.
Starting with the Easy Stuff: Hardware Controls & Accessories
In my recent "What Next?" guide, I provided sample hardware upgrades and basic mods for post-build systems. As a starter to power control and monitoring, a couple of these items might be beneficial to more fine-tuned tweaking; if power conservation is highly important to your usage applications (read: 24/7 uptime or home server / HTPC environments), it could be beneficial to look into:
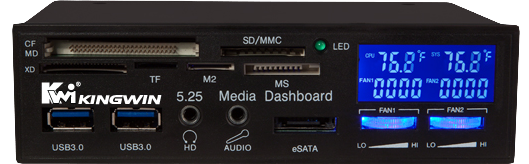
Granted, a hardware fan controller isn't at all required to modulate fan speeds. BIOS and application-layer utilities can automatically or manually control fan speeds by voltage throttling (using PWM fans, especially).
CPU & GPU Software Fan Modulation
Fair note: The fan modulation changes will largely yield insignificant power savings, but can improve the overall life of the fan bearings and decrease overall system thermals. Power delivery is more efficient when the system is cooler on the whole, so a cooler machine means higher power efficiency driven to the silicon.
These quick changes will improve the overall life of your bearings (and thus, your system), minimize noise emissions, and marginally reduce power draw. You'll need these tools:
Most UEFI BIOS menus hide their CPU and System Fan speeds under a "hardware monitor" tab. Locate that tab in your board's menu. Some configurations might have the fan speeds to 100% or other high values; by setting system fan speeds and CPU fan speeds to "auto," the platform will increase voltage delivered to the fans during times of intense load or thermals. If you've got a pretty good handle on your system's thermals and feel confident in manually setting a low speed, that can also be done through these menus. As a rule, we generally recommend always leaving the CPU fan setting on "auto."
System fan settings should also be visible in this panel (if you're not using hardware controllers to regulate their voltage). Search for "System Fan 1," 2, 3, etc. and make appropriate adjustments. If the fans are PWM (pulse-width modulated), "auto" mode will modulate voltage based upon system demand and thermals. A manual setting (like 60% or 40%) will also work, just make sure you have a good understanding of your system's thermal requirements.
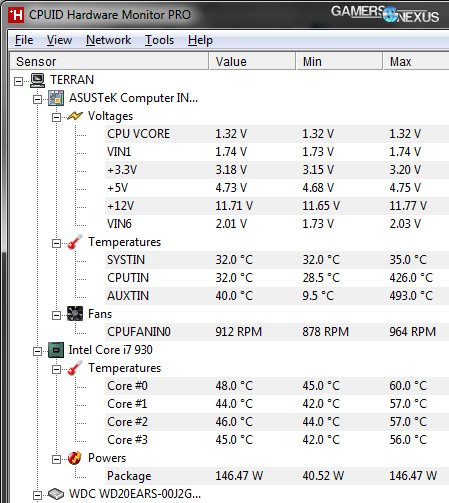
Check HW Monitor from your OS to validate the fan speeds. Min, max, and present values will be highlighted. Use these to check if your changes have applied.
Let's move to Afterburner or equivalent software. With MSI Afterburner -- which should be compatible with all cards -- users can set a custom fan speed curve to gradually increase speed with load. See below:
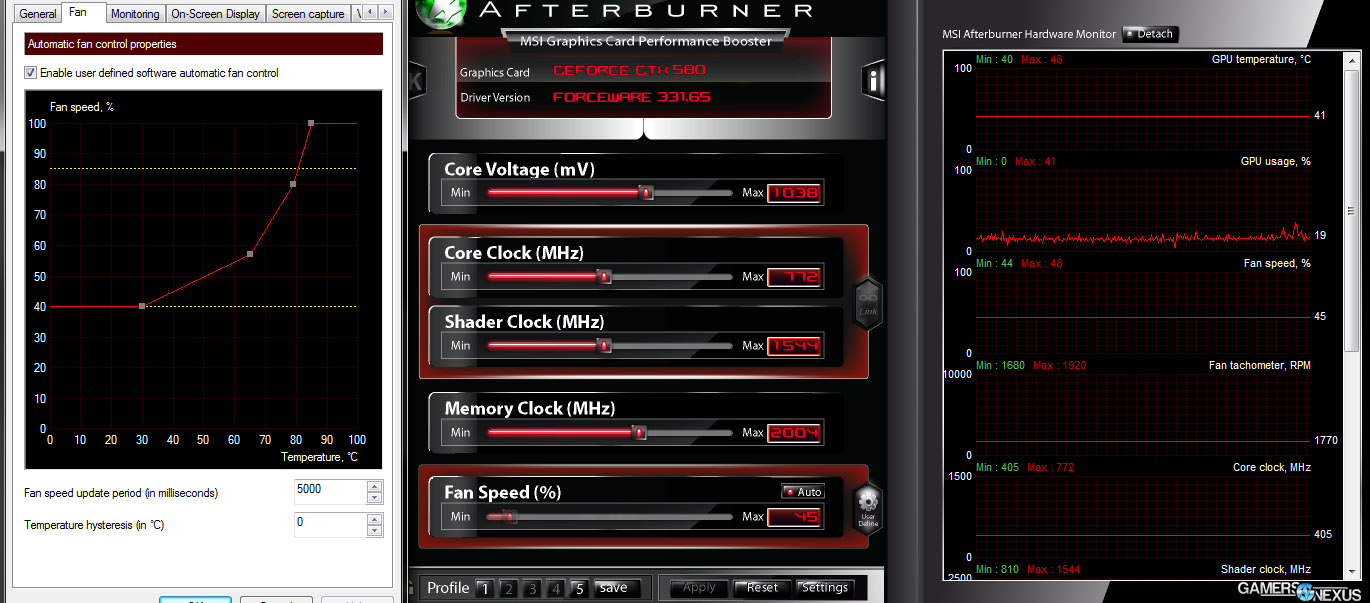
In this example, I've set a custom curve to keep the fan at 40% speed until the GPU hits 30C. Once it hits 30C, the speed very gradually increases to 55% until the GPU hits 65C. At this point, the fan speed jumps sharply to 80%, aiming to rapidly dissipate heat. The objective of a curve like this is to keep the GPU under 80C by using short, bursted, high fan RPMs to minimize annoyance to the user and maximize cooling to the GPU. It's a trade-off between noise and cooling, and a curve like this accomplishes it well.
This lowers your overall system thermals and noise, which increases power efficiency and extends fan longevity by using voltage modulation.
OS-Layer: Windows Power Saving Options
 I'm not going to get too in-depth here, since most of us are familiar with Windows, but it's pretty important to briefly mention. Windows has built-in sleep and hibernate states that can dramatically reduce power consumption by individually powering-down unutilized components. This includes magnetic hard drives (spin-down to lower RPMs), the CPU (put unused components to sleep), GPU, and even SSDs (DevSleep in Windows 8).
As many of you likely know, putting a system to "sleep" suspends its active session to RAM, so RAM will retain power while all other components reduce their own consumption. Hibernate stores data to the physical disk, and thus often requires large chunks of storage to enable (4GB+). This makes it sub-optimal for SSD usage, but if you pass hibernation through a hard drive with more storage, it's an easy choice.
Restoring from the disk or powering down the RPMs of a disk will take a while for the system to restore itself (can be seconds to a minute, depending) given the nature of a physical platter spinning-up.
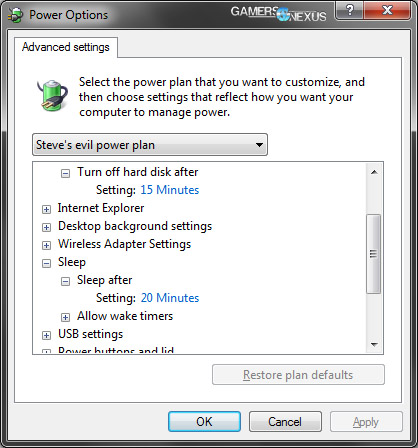
All of these settings can be accessed through Control Panel -> Power. We'd recommend configuring your own power profile that suits your needs. Disabling the screen when idle, spinning-down the HDD, and activating some level of sleep are all recommended. Hibernate is nice, but can often introduce system instability with some OS/hardware configurations. Keep in mind that S3/S4 power saving states will destabilize the system when using certain overclocking settings (check the manual for your board).
Pre-Build Buying Options
Before jumping to BIOS, I wanted to offer a couple of pre-purchase build options that could dramatically affect overall system power performance:
Time for power saving BIOS settings. Hit Page 2 for those.
Moving to BIOS
This section of the guide will cover proprietary power saving settings (like ASUS' EPU) and industry-wide settings, like C-States, voltage controls, power limits, and more. All settings covered here will be located in BIOS. If you're looking for a guide on overclocking, you can find one of those over here.
BIOS: ASUS Motherboards - EPU Power Saving Mode
ASUS boards have an in-house power-saving solution that won't be found on competing brands, though other boards often have their own take on similar features. ASUS has built what they call an "Energy Processing Unit," or EPU, into their modern motherboards.

The EPU monitors system load across various critical devices (CPU, chipset) and then regulates voltages and power delivery to those systems accordingly. If the EPU doesn't think your CPU requires full voltage to deliver a reliable clockrate at your present load, it'll decrease power delivery to better conserve power. This setting is recommended to be left disabled if overclocking, as it will introduce instability and variability to the system. If not doing higher OCs, enabling the EPU will seriously mitigate power consumption when under minimal load.
BIOS: EIST (Enhanced Intel SpeedStep Technology) - On or Off?
EIST has previously been a subject of debate on overclocking and enthusiast forums, but as a concept, is pretty straight-forward. In theory, EIST automatically monitors and adjusts VCORE (CPU voltage) and BCLK/multipliers (frequency), aiming to reduce power consumption and lower the thermal signature of the processor. When the system demands greater processing capabilities, EIST allows more voltage to flow to the CPU and increases frequency accordingly.
In practice, EIST intentionally throttles the CPU when load is low; for the average consumer, the impact is unnoticeable, but for performance users, it could directly affect benchmark results. For this reason, most reviewers (including GN) and enthusiast overclockers disable EIST when running benchmarks. In everyday and gaming (non-performance) use, EIST is good to leave enabled to help minimize power draw.
BIOS: CPU Load-Line Calibration Levels - Overclocking vs. Power Saving
LLC, or Load-Line Calibration, is a BIOS feature that helps prevent or minimize voltage drops to the CPU during load changes (called vdroop). When a CPU modulates voltage as it transitions from idle to load (or vice versa), the voltage drops during the transition; this could potentially destabilize a highly-volatile overclock, and so Load-Line Calibration was introduced. Higher levels of LLC will help control vdroop with much greater accuracy, but also increases power draw by maintaining a higher, more stable voltage.
A high LLC setting can threaten CPU life under extreme OC conditions, but lower LLC settings will give the CPU greater tolerance for vdroop and voltage modulation. If the CPU isn't being put through any serious overclocking procedures and doesn't need a constant, high-voltage supply, LLC can be set to lower levels to conserve power and decrease thermals. Consequently, this can extend the life of the CPU.
BIOS: CPU Power Phase Control Settings
We often talk about power phase design when comparing motherboards (guide here). High-quality power phase design can seriously impact a motherboard's ability to maintain a stable overclock. We don't talk about it much in a power saving sense, though.
The CPU power phase control setting in BIOS can often be set to various levels of extremes. Maximum power phase control (often called "Extreme") will ensure all power phases dedicated to the CPU are maxed-out constantly. This serves as an important tool for serious OCs, again, but isn't desirable for power conservation or mainstream/gaming (non-OC'd) builds. If you've got a down phase option in BIOS, set it to the "optimized for power saving" setting. BIOS varies so widely between boards that we can't be comprehensive here, but leave a comment if you can't find this setting or are confused by it.
BIOS: DRAM Power Phase Control
Similar to the CPU power phase control setting (see above), except for the phase(s) dedicated to DRAM instead.
BIOS: Power Decay Mode
With Power Decay Mode enabled, the CPU's integrated VRM passes lower voltage to the CPU to diminish power consumption at idle times. This is similar to some of the other at-idle BIOS settings, and further conserves power when the CPU doesn't demand high frequencies and voltage.
BIOS: C6 & C7 Power States
Intel C-States are similar in top-level concept to Windows S-states, or sleep states. In Windows, S3 and S4 represent sleep/suspend and hibernate, respectively, with various other S-states preceding them (S0 is full operation, S0iX is Intel Active Idle, etc.).
C-States are much lower-level, though, and directly interact with the CPU through firmware. Like Windows, C0 means full operation and higher numbers (like C7) represent a "deeper" sleep of the hardware. C6/C7 power states in Haswell CPUs tend to conserve roughly 10-13% of the wattage.
Not all power supplies support C6/C7 power saving states due to efficiency requirements on behalf of the PSU (power supply must be able to wake the CPU from >1W draw). Check for compatibility on your PSU.
BIOS: Idle Power-In Response
This setting goes hand-in-hand with Power Decay Mode. As the name suggests, it's the speed or latency with which the integrated VRM reduces power levels when the CPU idles. A "fast" setting means the CPU will drain power more quickly when idling, which saves power, but also introduces instability to the clock when overclocking.
That covers most of the relevant BIOS options. If we missed one that you're curious about (or know about), leave a comment below! Oh, and don't forget that underclocking is always an option if you're building a specific-purpose HTPC and need lower power draw.
That should get you started off pretty well on reducing the power draw footprint of your PC. If you've got any suggestions or questions, post 'em below! Our forums often get more detailed and faster responses, so also consider posting there.
- Steve "Lelldorianx" Burke.