Subscribers of our YouTube channel will know that we’ve been hastily assembling a gaming HTPC for the last few days, dedicated as a gift for Andie (my sister, and also occasional tester for the site). We started on the 21st, with limited time to order any missing parts, and finished just today (24th). The goal was to replace her current HTPC, catalogued many years ago on GN, which uses an A10-5800K, upgraded MSI GTX 960 Gaming X, and is struggling to operate high framerates.
No surprise.
The A10-5800K was an excellent CPU for the original build (which had no GPU, and later added a 750 Ti), but it’s not so powerful 4 years later. We wanted to pull parts for this build that could be readily found in GN’s lab, without shipping requirements (where avoidable), and without pulling parts that are in active or regression testing use.
| Part | Price, Source | |
| CPU | Intel i5-3570S (forced turbo) | EOL, GN stock |
| CPU Cooler | NZXT Kraken X52 | $150, GN Stock |
| Motherboard | Gigabyte H77N-WiFi | EOL, GN Stock |
| RAM | Avexir Core 8GB 1600 | $55, Newegg |
| GPU | MSI GTX 960 Gaming X 4GB | Old HTPC |
| SSD | Crucial MX300 525GB | $112, Amazon |
| HDD | Seagate 4TB BarraCuda | $130, Newegg |
| Power Supply | Rosewill Photon 650W | $80, Rosewill |
| Case | NZXT Manta mITX | $140, GN Stock |
| Peripheral | NZXT HUE+ | $60, GN Stock |
Parts 1 & 2 of this series served as a combined mini-tour and build log, in this regard. We ultimately piecemealed together an Intel i5-3570S with Gigabyte H77N-WiFi motherboard, decided to keep the MSI Gaming X 960 4GB (to be transplanted on Xmas eve), and add a ton of lights. This is a build for one user, which means we’re not doing this as some public service guide or how-to. This also means that benchmarks are limited only to the use cases which matter for the particular build, not for the whole internet. In that regard, treat this as a build log with some testing.
The lights were an important feature, here; Andie likes neon lights, and this is a good year to like such things. We went with an NZXT Hue+ and Kraken X52 – a bit ambitious, as we later found out, because the mini-ITX board only supports 1x USB2.0 header. Fortunately, this problem was resolved by routing a USB cable out of the case (from the Kraken) and into the motherboard directly. Took a while to think that up, but it worked.
Originally, we’d attempted to use the NZXT internal USB hub, but that just didn’t seem to communicate with CAM. The Kraken and HUE+ would light up their white LEDs, so they got power, but could not be controlled or detected by the software. We also had issues with CAM attempting to flash firmware on the first HUE+ we used (first-run retail sample) and ultimately bricking the unit. This happened because CAM reported 0% progress for the entire update, and we eventually gave up and unplugged the unit. Turns out, it was updating – silently, slowly, and with no user feedback. The second HUE+ we used, a later retail sample that ships with the Aer fans, actually reported update progress and worked fine.
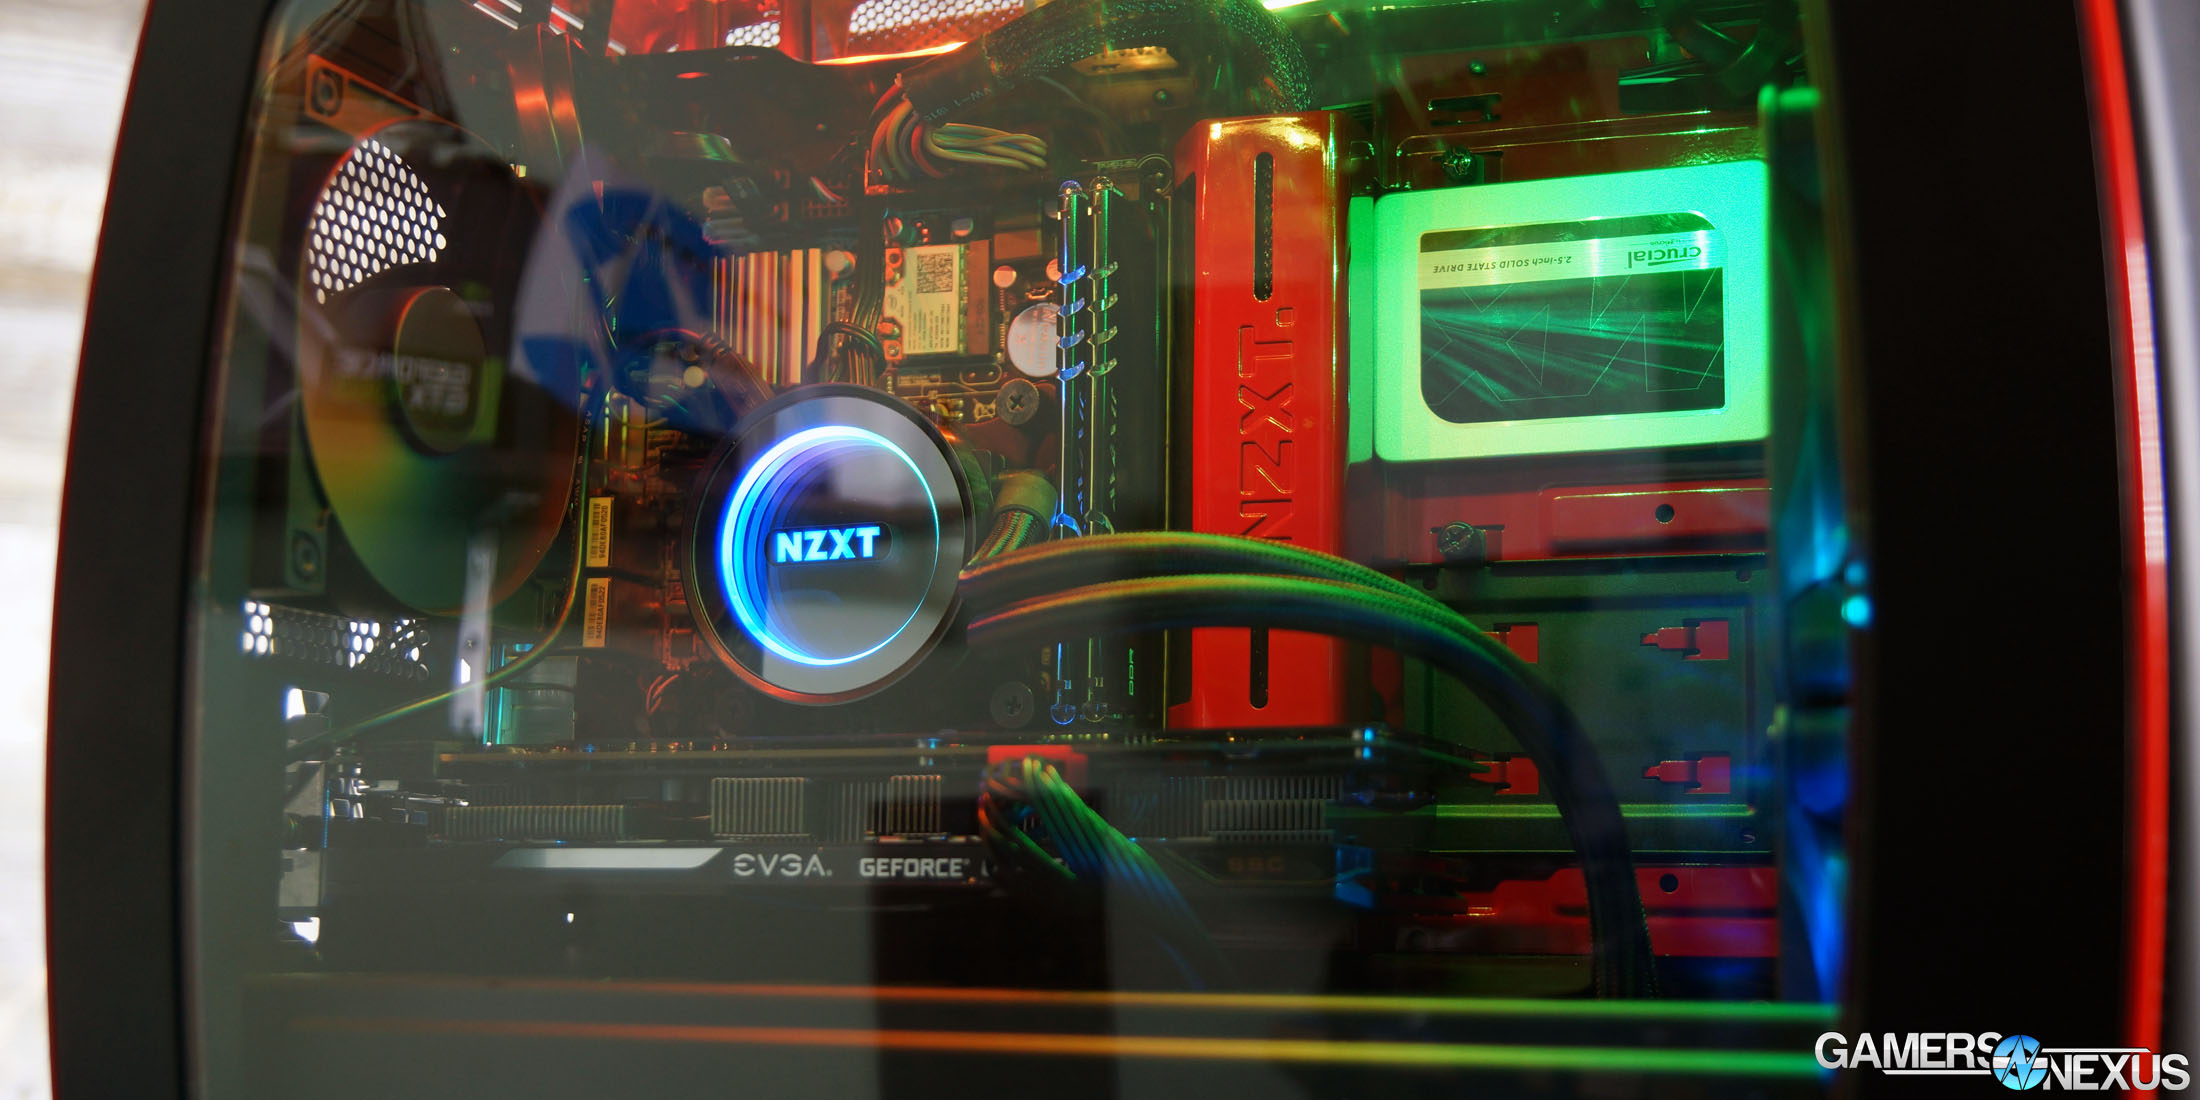
Anyway, routing the HUE+ cable to the board and the X52 cable to the rear USB did ultimately result in functioning lights, and CAM eventually shut up and complied with our requests. We don’t normally do much with RGB LEDs, but this system came out looking damn good. The HUE+ strips were positioned above and under the top steel railing in the Manta case, in the front (pointed at the radiator, so the light bounces out of the front mesh), and on the inside-front wall of the case.
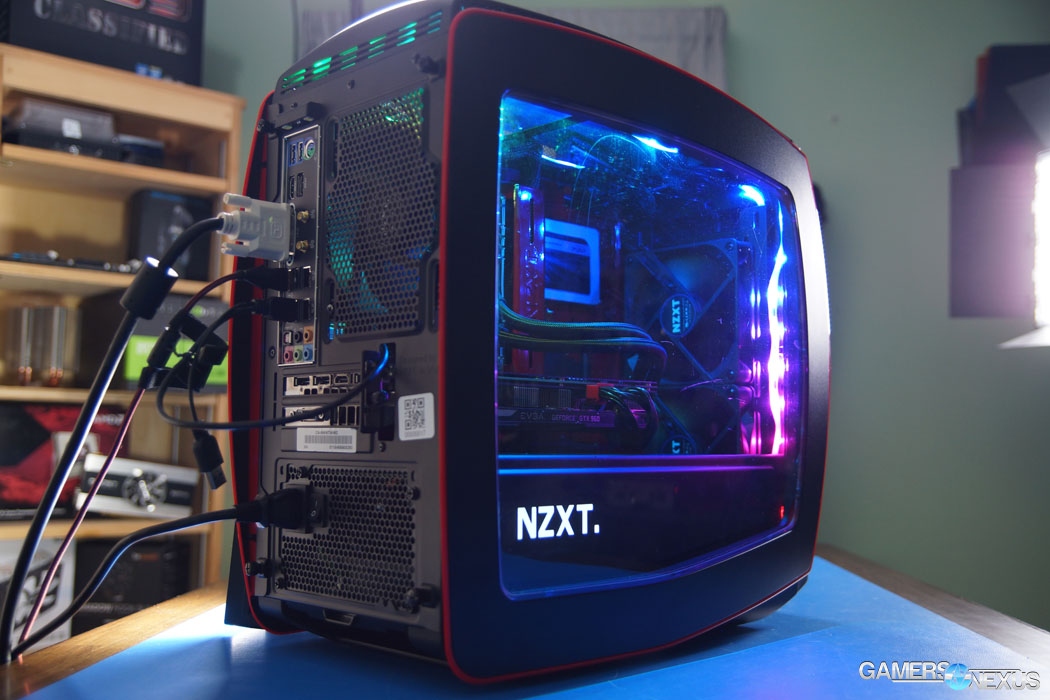
Our original plan was to use an In Win 901 mini-ITX box, since it’s got tempered glass and a somewhat unique look, but we requested that too late and didn’t receive it until today (24th). As shown in the video, our solution was to check GN’s inventory sheet and find a mini-ITX box somewhere. The Manta has lived in attic storage since its review on our site, and so was retrieved for a second chance at life as a gaming PC.
Building in the Manta was a bit of a challenge. Like the rest of this build, the goals were ambitious – cramming that many cables and USB-enabled devices into one case turned out to be non-trivial, but we pulled it off. The inside looks clean, the back is… acceptable. You could find stuff if you had to, but it’s probably best to leave the panel on.
Tube routing was done without kinking them, managed through the PSU shroud front cut-out. This was done to position the tubes at the bottom of the radiator, thereby eliminating most pump noises and preventing air from being sucked through the pump. Doesn’t look bad, either. The fans were mounted inside of the front steel frame, with the radiator outside the frame (but boxed-in by the dust filter and front panel).
The CPU is forced into a constant 3.4GHz turbo state through BIOS, and kept cool with the X52. Not that thermals were ever really a concern anyway (S-class ~65W TDP), and the X52 was mostly used for the LEDs, but still a good outcome. This also helps keep our GPU cool, since the warmed intake from the radiator is not hot enough to significantly impact GPU temperatures.
Here’s a look at temperatures:
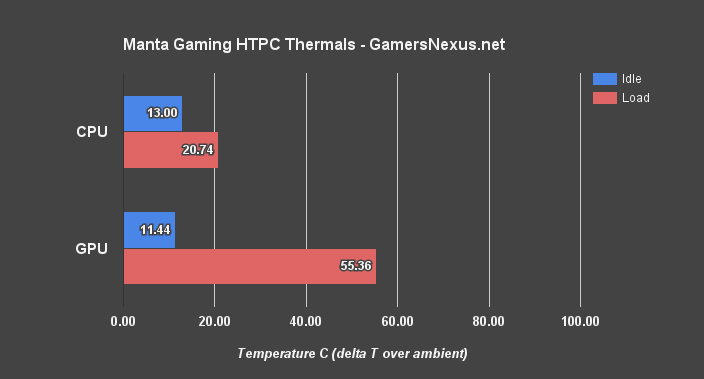
That’s delta T values, which we explained here. The GPU is a bit warm, but not bad. 75C-ish with a ~1400RPM fan speed. We might later pull a retired 980 Ti and liquid cool it for lower fan RPMs, but this will do for now. The bigger reason for a GPU upgrade would be FPS:
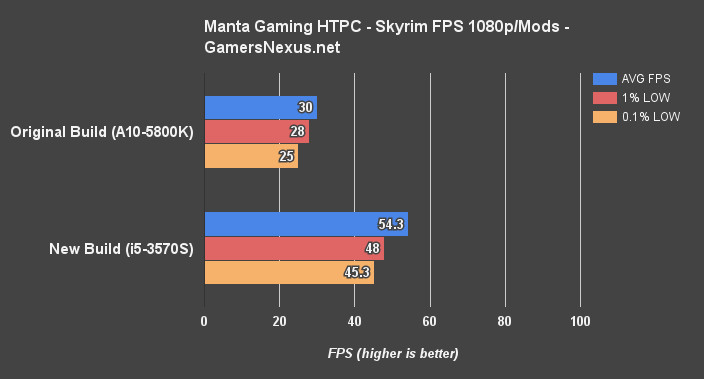
We see a +24FPS AVG gain in Andie’s heavily-modded Skyrim install. As explained in the video, this version of Skyrim has over 250 mods installed, and we simply don’t know what they all are. That wasn’t the point of the content; it’s not a standardized benchmark. All that matters is that we keep the same conditions between the two platforms, and that was done.
Testing was done in Markarth, looking at sconces that plume heavy (also modded) smoke. The mods installed seem to impact the CPU heavily, and so our upgrade to an i5-3570S is a large one.
0.1% lows are now in the 40s, meaning that noticeable stutters in gameplay are largely eliminated by the upgraded build.

Watch Dogs 2 is the game for which I suspected the biggest improvement, given its CPU-intensive nature. With the GTX 960, it turns out, we’re still heavily limited by the graphics card and the CPU change isn’t coming into play as hard. This is because Andie prefers to play with her graphics around High, with San Francisco fog enabled, and doesn’t much mind FPS in the high 30s and 40s as long as she gets the better graphics.
The new build is a measurable improvement, but nothing substantial. The worst measured 0.1% value was 15FPS with the original build, where the new build’s worst value was 21 – that’s something, but we’ll have to look into GPU upgrades for any more than that.

Black Flag is a bit old, but a game that Andie plays often – so it gets benchmarked. Gains are ~8~9 FPS in averages, about 10FPS in 1% lows, and about 7FPS in 0.1% lows. Marked and measurable overall. This was with high-ultra settings.
As for drives, we did have enough foresight to purchase those: A Crucial MX300 525GB SSD for the primary drive, and a 4TB Seagate BarraCuda Compute drive for the bulk storage. Together, these are a substantial upgrade over the old HTPC’s Kingston V300 120GB & WD Blue 1TB. Keep in mind that, although the user is somewhat of a power user, we didn’t want to impose storage concerns by opting for smaller storage. This is the same reason laptops are often sold with “over-storage” – it’s just easier to let the user do whatever the hell they want, even if it’s not the most storage-conscious.
The build was entering into territory of questionable completion, but we pulled it all off. Huge thanks to GN’s Andrew for following me around the office while we assembled everything. View part 1 here and part 2 here.
Editorial: Steve “Lelldorianx” Burke
Video: Andrew “ColossalCake” Coleman