Custom PC builds are fairly straight forward: Screw together the eight core components (including the case), install some software, and start gaming on your new budget build (if you don’t have a build yet, our guides are an excellent starting point). That said, even master builders can trip up on occasion and miss a cable or connector, and new builders can feel overwhelmed by the potential to inflict damage to expensive components.
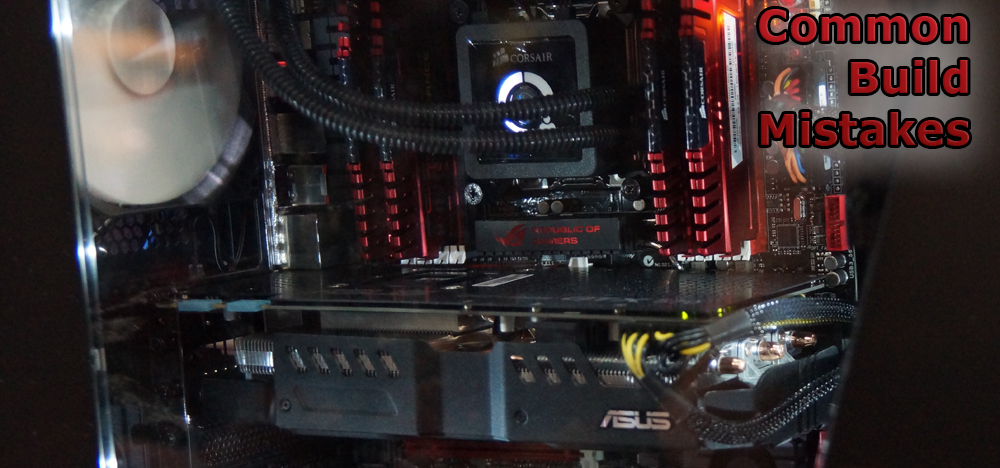
This Common Build Mistakes guide explains how to assemble a computer and avoid shocking or damaging components; we’ll also explore some of the easy-to-overlook crevices of a high-end rig (like surge protection!).
Overview
A lot of failures can be chalked up to hardware defects and RMA-resolvable issues, but there’s always some level of user involvement (don’t worry, we won’t tell). Some of the topics covered on the next page will include:
- Mechanical mistakes and errors.
- Improper cooling techniques.
- Thermalpaste tactics!
- Component-level errors (including all major components), and…
- Configuration-level / BIOS conflicts and compatibility issues.
Getting Started: Tools and Components Needed
If you’re an experienced builder or have worked on at least one machine in the past, you can probably skip over this subsection and jump to the actual common mistakes, found on page 2. This section is intended to help guide newer builders in the right direction.

For the most part, any PC build will require a simple screwdriver to get the job done; most cases now include tool-less setups and allow for minimal screwdriver-ing, making even a screwdriver less significant. That said, your job can certainly be made easier with a basic toolkit (this cheap Belkin one is a pretty common starter kit, but if you have some extra cash, these are also really nice sets) and some twist-ties, zip ties, or adhesive cable mounts (all of which can be found here).
If you’re feeling insecure or are an extremely electro-static-y person (or have carpet and a penchant for wearing shoes and/or socks), you may want to consider acquiring one of these anti-static wrist straps. There are a lot of these available, but generally speaking, just searching for ‘ESD wrist strap’ or ‘anti-static wrist strap’ should find one. Some have a single ground prong that plug into the wall, others have clips that attach to metal surfaces or case interiors. Just make sure what you’re clipping to is actually connected to ground – many case interiors are painted-over metal or otherwise non-grounded sources, so clipping to a table may be more reasonable. We’ll have more on how ESD works and how to avoid it on the next page.
“Don’t Afraid of Anything”
As a final note of advice before we get started, don’t be afraid to build a system. Seeing all the exposed circuitboards (or PCBs) and wiring can be off-putting for new builders, but don’t let that throw you. Is it possible to kill parts by touching them incorrectly? Absolutely. But if that’s the only thing stopping you from building, you can levy those fears by buying the aforementioned $7 ESD wrist strap.
General Warnings – ESD, Power, and Compatibilities
Some of these warnings are pre-build steps (like when you’re actually picking out parts), but they’re still very important.
Let's start with ESD: Electrostatic Discharge can happen to anyone. If you're not interested in wearing an ESD wrist strap, make sure you occasionally ground yourself by regularly touching a metal object that has a direct connection to ground (a metal lamp pole or table leg might work). When working on a motherboard outside of the case, set it on the surface least likely to hold a charge. The best bet is the pink anti-static foam that normally accompanies the board or a hard, solid surface (the cardboard box the board came in also works, though it is preferable to use a harder surface or a dedicated test bench).
Building a system on, say - a carpet, is just asking for failure.
Regarding compatibilities as a pre-build issue, simply keep in mind that you want the Motherboard and CPU's CPU Socket Type to match (i.e., LGA 1155, LGA 2011, AM3+, etc.), the memory frequency shouldn't exceed the motherboard (it can, but there's no point), the memory channels are limited by the CPU (dual channel unless you have an LGA 2011 CPU, which has quad-channel capabilities, or LGA 1366, in which case it's triple-channel).
If you're unsure about compatibilities among parts you've selected, post your list below (please include links) in the comments and we'll help you out!
Mechanical Mistakes – Risers, Airflow, Seating, Oxidation
Mechanical accidents in system building are normally user-initiated, but they're also simple to reverse: with a back-twist of the screwdriver, an entire fiasco can be undone or avoided.
Risers (or "standoffs")
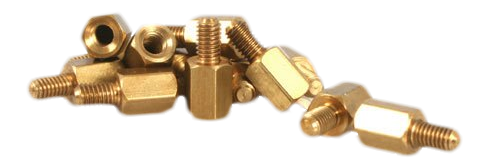
One of the very first steps in PC assembly is also one of the easiest to neglect: Risers. All cases should ship with 1/8” risers that should be screwed into the appropriate motherboard slots (this depends on the case and the form factor of the board) prior to mounting the actual motherboard. If this step is skipped and the board is screwed directly into the case, a direct short could occur and would almost certainly brick the board. Make sure you have those risers in first!
Screws
Don't leave ANY loose screws in the case AT ALL! Loose metal shavings, screws, plates, covers, screws, and so on can cause shorts should they fall between a vital component and the case itself. If you drop a screw, stop everything you're doing and listen/look for where it lands.
Don't compensate by over-tightening the screws, though. Stripping a screw in a motherboard can make for a painful extraction process. If you do have to resort to a drill to remove a stripped screw from a motherboard, you can use compressed air to blow metal shavings out of the case and off the board. Be extremely thorough.
Airflow and Fan Directionality
If our extremely in-depth, three-part fan analysis series wasn’t enough for you – wherein we discussed fan placement theory, quiet mechanical cooling, and bearing technology and differences – this short section will be a recap that focuses down on fan directionality.
Pre-installed fans are generally positioned properly for maximum mechanical cooling efficiency, but adding aftermarket fans or swapping fans out risks non-optimal positioning. As a quick recap of our fan placement guide – and this will vary to some minimal degree based on cases – a strong basis for fan orientation would be:
- Front: Intake
- Side: Intake
- Bottom: Intake
- Rear: Exhaust
- Top: Exhaust
Now you might be asking yourself, and by yourself, you mean me, “Steve, how do I tell which way the fan is facing?” Well, it’s quite easy – there’s a trick, you see, and it takes years of practice to hone… or common sense, whichever comes first – do you have your fan? Good. Now look at it (do this with your eyes, preferably the ones on your face). See it? Good. Notice the fin shape – the fan only scoops air from one direction and shoots it out the other; the fins are shaped so they slice the air and carry it through the other side. This is exceedingly difficult to describe, so I’m going to use a bit of internet magic and employ an image:
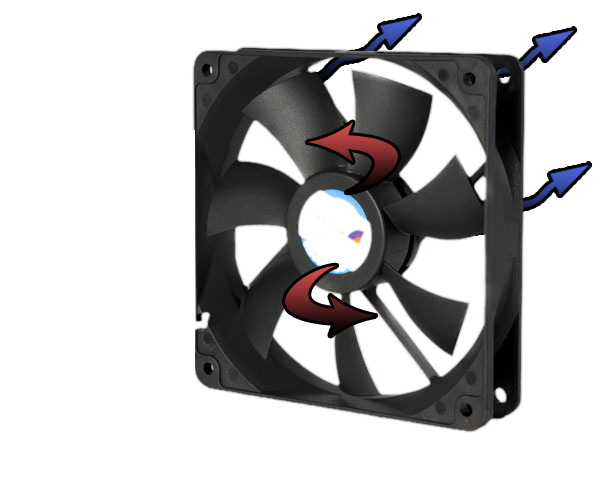
In lieu of spending ten minutes second-guessing your fan orientation, you could also look at the label and look at the way the arrow is pointing.
Take a Seat – Memory and Expansion Card Seating
If you frequent our forums, you’re no stranger to some of our first troubleshooting: “Re-seat your video card,” we’ll say, “Try the RAM while you’re in there,” we add. It’s true. Expansion card are fidgety devices, and even if it’s seated perfectly, it still may require a firm re-seat to be properly recognized. This is true for memory as well, especially when dealing with the horrid red DRAM LEDs on some motherboards.
One of the easiest steps in troubleshooting is to re-seat everything (and also make it a barebones system).
Contact Oxidation
This isn’t something you’ll likely run into in a new build, but if you’re working with any older components at all, it’s completely possible that the contacts or slots have some level of oxidation in them (if they’ve been left undisturbed for a number of years). If you’re having trouble getting memory recognized, as with the above, this is an easy first step.
It’s an easy fix. Just locate the oxidized contacts (they normally have a heavy gray layer on top of the gold contacts) and use a pencil eraser to start rubbing away the oxidation. Once you've gotten most or all of it off, plug it back in. Done.
Component-level Mistakes -- Memory Slots, Connectors, and Thermalpaste
Component-side mistakes can normally be fixed quite easily and without any permanent damage. The most common mistakes we've seen on the component-level are related to memory slots, power connectors, and thermalpaste.
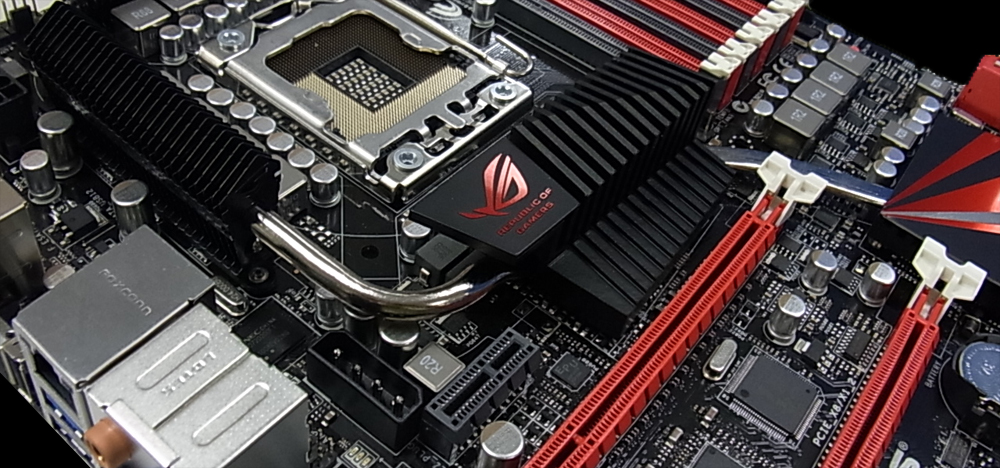
Memory Slot Choices
You'll notice your motherboard, assuming it has four or more slots, has two different colored sets of memory slots. These are sometimes further signified by "A" or "B" identification that is either in the manual or printed on the board. Memory slot usage must match! If you have two sticks of memory, set them both in either A or B (blue or black, red or white, etc), not both. Failure to do this will often result in failure to boot, but not permanent damage. If you're not sure which slot to pick, refer to your motherboard's manual to determine which slots to use for single modules (if applicable) or which are optimal for multiple modules.
Just make sure the sticks are in matching slots.
If you find that a large heatsink is obstructing usage, short of using the other slots, you could resort to purchasing low-profile memory that is more compatible with heatsinks (like this G.Skill low-profile RAM).
Speaking about RAM in general, you should *always* check the list of officially-supported memory for the motherboard you're using. Some motherboards interact strangely with different types of memory, whether that's a result of voltages or just a general incompatibility issue, it does happen quite frequently. Always check supported CPU and RAM listings. These can be found on most major motherboard manufacturers' websites.
UPDATE: We've had some reports of newer Z77 motherboards that want two-stick RAM arrays to be installed into slots A2 and B2 (as an example), so you should refer to your motherboard maunal for full instructions on this.
Power Connectors & Supplies
Let's get this out of the way immediately: There are two primary power connectors for most motherboards and all gaming-grade boards -- 1x24pin (or 20+4pin) connector and 1x8pin (or 1x4pin, depending) power connector. Both are on the board. The 20+4/24pin connector is located near the SATA and RAM slots, while the 8pin or 4pin connector can be found near the CPU, often in some atrociously inaccessible location.
Don't forget to plug in the 8pin connector! This is a mistake that a lot of our forum users have forgotten -- hell, even our expert builders have left it out in the midst of the excitement of a new build -- and it can be the root of startup problems and will definitely stop a proper boot.
On the same note, don't use PCI-e connectors for the motherboard power drop; you'll want to use the power cord that is designated for motherboard power on your PSU for that (it may also be an unmarked cord that is simply 8 pins).
Regarding the power supplies themselves, keep in mind that you should never skimp with a PSU -- cheap PSUs are prone to failure, as with any cheap product, and a blown PSU can potentially take down other components in its path. Tread carefully.
For wattage, we often recommend the Thermaltake Wattage Calculator, found here. I tend to add an extra 100W to the top for assurance and maximum efficiency. PSUs tend to hit peak efficiency at 40-60% load.
Oh, and as a final note, make sure you mount the PSU in the right direction. It sounds dumb, but we've seen it on our forums before. The fan should, as logic might suggest, be toward an open port (either in the bottom or face upward). You should be able to read the words (i.e., they aren't upside-down) when the PSU is mounted. Bottom-mounted cases are often lifted from the ground and have a bottom intake vent for the PSU.
Thermalpaste & CPUs
We tweet about Thermalpaste way too much. It's a funny subject, for some reason.
Stock heatsinks will generally include enough thermalpaste for non-OC'd builds, but anyone applying new thermalpaste or installing an aftermarket heatsink should pay attention to this section. It's easy to want to apply extra thermalpaste when unsure, but this can actually hamper the cooling process and cause higher temperatures (not much, maybe 2-3C on average). Thermalpaste is a compound that's meant to fill tiny divots between the CPU's cover plate and the actual pipes on the heatsink. The actual thermalpaste spread should be less than a finger nail's width, in an ideal world. Go for as little as possible, but be sure to still cover the central surface of the CPU's roof.
Removing thermalpaste isn't a big deal, either: Just use a bit of rubbing alcohol (70% is fine, but 90% is better) and a Q-Tip to clean it off.
While we're talking about CPUs and CPU accessories, we may as well visit the issue of an over-tightened heatsink: Some motherboards and systems will automatically fail to boot or shut down if they detect that the CPU heatsink is too tight. It should be tightened enough where screws won't fall out and cause a short, but not so much that it bends pins. It normally requires a tool to get that tight, so if you're using thumb screws, you should be in good shape.
Be sure that you plug the CPU fan into the motherboard's designated slot for full utilization of power modulation and monitoring.
As an extra note to the power points -- if you've built an expensive system, you should probably consider a surge protector. Just saying. Protect your investment!
BIOS & Configuration Mistakes
The default BIOS settings for many boards can actually underutilize your resources; be sure you go through BIOS and check the system info tab to determine what needs to be clocked up!
Memory Configuration & Frequency
We've built a mountain of PCs here at GN and nearly every single one has the default memory speeds clocked down too low. Check your motherboard, CPU, and RAM's maximum supported / native frequencies, then hit the memory tab and set it to that frequency (if it isn't there by default).
SSDs and AHCI mode
SSDs, like the Kingston 3K HyperX that we reviewed, need to be set in AHCI mode to properly utilize their full speeds. HDDs are fine in IDE mode, but SSDs need AHCI. Head into BIOS and locate the SATA / drive configuration option. Set it to AHCI if you're running fast drives.
It is recommended that AHCI mode be set prior to OS installation, but if not, a registry value can be tweaked to help get things back on the right track.
Boot Order
If you turned your system on and didn't see anything but a POST message, it may be an issue with your boot order. Be sure to check the boot sequence tab and set your preferred device first.
BIOS / CMOS Resets
If any of the above or other changes inadvertently lock you out of your system or cause failures, this can be easily resolved by resetting the CMOS battery. For the unfamiliar, the CMOS battery is the tiny, circular, silver battery that's clipped into the board.
Disconnect your power sources from the board, remove the battery for a few minutes (long enough to ensure all capacitors are drained, though realistically, 15-30 seconds should be plenty), and then re-insert the battery and power. This should reset CMOS and BIOS for you. Some ASUS and other motherboards come with rear-panel reset switches.
Additional Links and Resources
If you're still curious about different aspects of system building, you may want to try out some of our other resources at these links:
- Support Forums -- Get full support from our staff and community!
- Comments below -- get quick questions answered... quickly.
- Defining system requirements for a new build.
- Cutting Corners in a System Build.
- Ivy Bridge Spec Comparison.
- How to Read a CPU Die.
Confused about specs? Try these reference guides:
Final Thoughts
System building is pretty simple, but this guide is meant to serve as a quick-reference guide as you're building a rig. If you are ever hesitant about -anything-, please ask us in the comments or forums. We have a pretty quick turn-around rate with questions and it'd be better to ask before anything goes wrong. Don't ever feel like you're asking too basic of a question!
Think we missed some common mistakes that others should know about? Please write them in a comment below and we'll add 'em to the guide!
Be sure to like us on Facebook, follow us on Twitter, and subscribe to our RSS feed for more useful guides and posts! We'll also be giving away the Thor V2 we reviewed soon, so those are good channels to get updates on that giveaway.
-Steve "Lelldorianx" Burke.