The Lian Li DAN A4-H2O focuses on liquid cooling in a compact package.
The Highlights
- The A4-H2O is designed by DAN and manufactured by Lian Li
- A lack of cable management features makes tidy builds more difficult
- Clever airflow from the top-mounted CLC keeps GPU thermals under control
- Original MSRP: $155
- Release Date: February 9, 2022

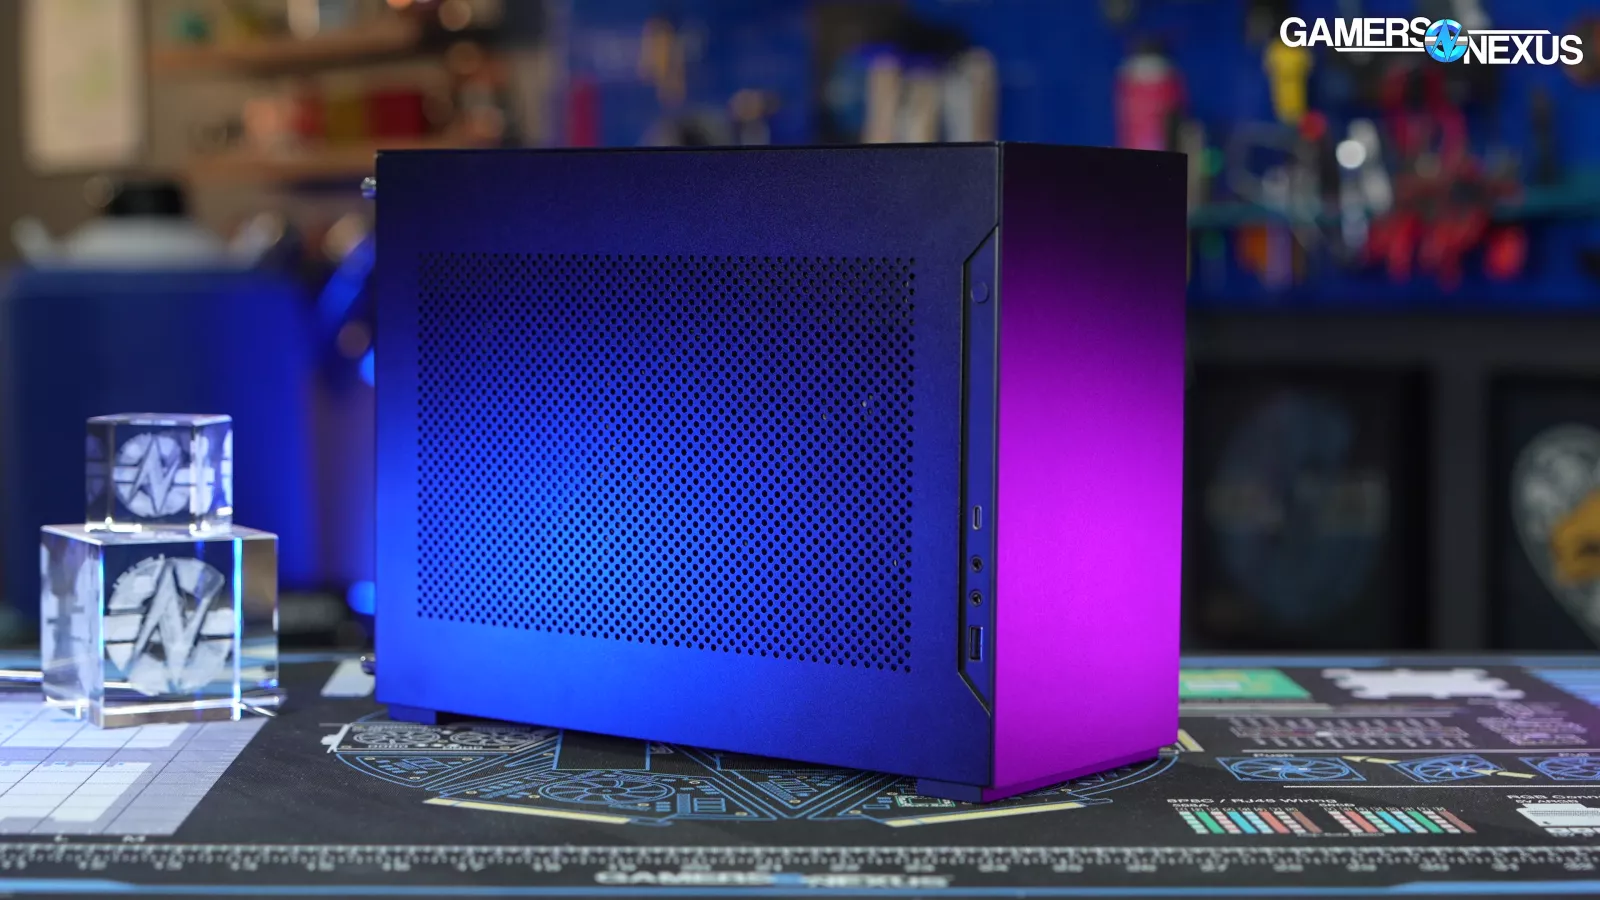
For the second of our revised Mini-ITX case reviews, we’re looking at the Lian Li DAN A4-H2O. It’s specifically designed for accommodating, as the name suggests, liquid cooling in the form of a 240mm CLC. The name is H2O, despite the fact that Lian Li’s website contains multiple instances of both H2O and H20. It also has some impressive GPU thermals for the size due to clever airflow management, but there are drawbacks, including the cable management.
It’s available for $155 at the time of writing, putting it up against options like the Fractal Terra (that we recently reviewed) and the Cooler Master NR200P, with comparable prices depending on the exact model. At the time of writing, the Terra tends to be around $180 and the NR200P is around $145. There are tons of Mini-ITX cases out there these days and we’re only getting started rolling into more reviews of them. We wanted to get to this one next because, as another sandwich-style Mini-ITX box, it has managed to position itself as one of the mainstays.
Credits
Host, Writing, Testing
Steve Burke
Writing, Testing, Web Editing
Jeremy Clayton
Testing
Patrick Lathan
Camera, Video Editing
Vitalii Makhnovets
This design has roots that go way back, and Lian Li has brought it forward over the years, so this is going to be an important one for us to keep developing our test methodology. We’ll continue to iterate on our process, but we need to test a good cross-section of cases to establish future test parameters and conditions. There’s an exploratory phase to methodology development, and that’s what we’re doing now with Mini-ITX. The A4-H2O makes a good fit to follow our Terra review then, since it’s a more ‘traditional’ ITX design. Check out our Terra review for more discussion on how specifically we’re approaching ITX reviews as a whole.

Lian Li DAN A4-H2O Mini-ITX Case Specs
| COLOR | Anodized Black Exterior Silver Exterior |
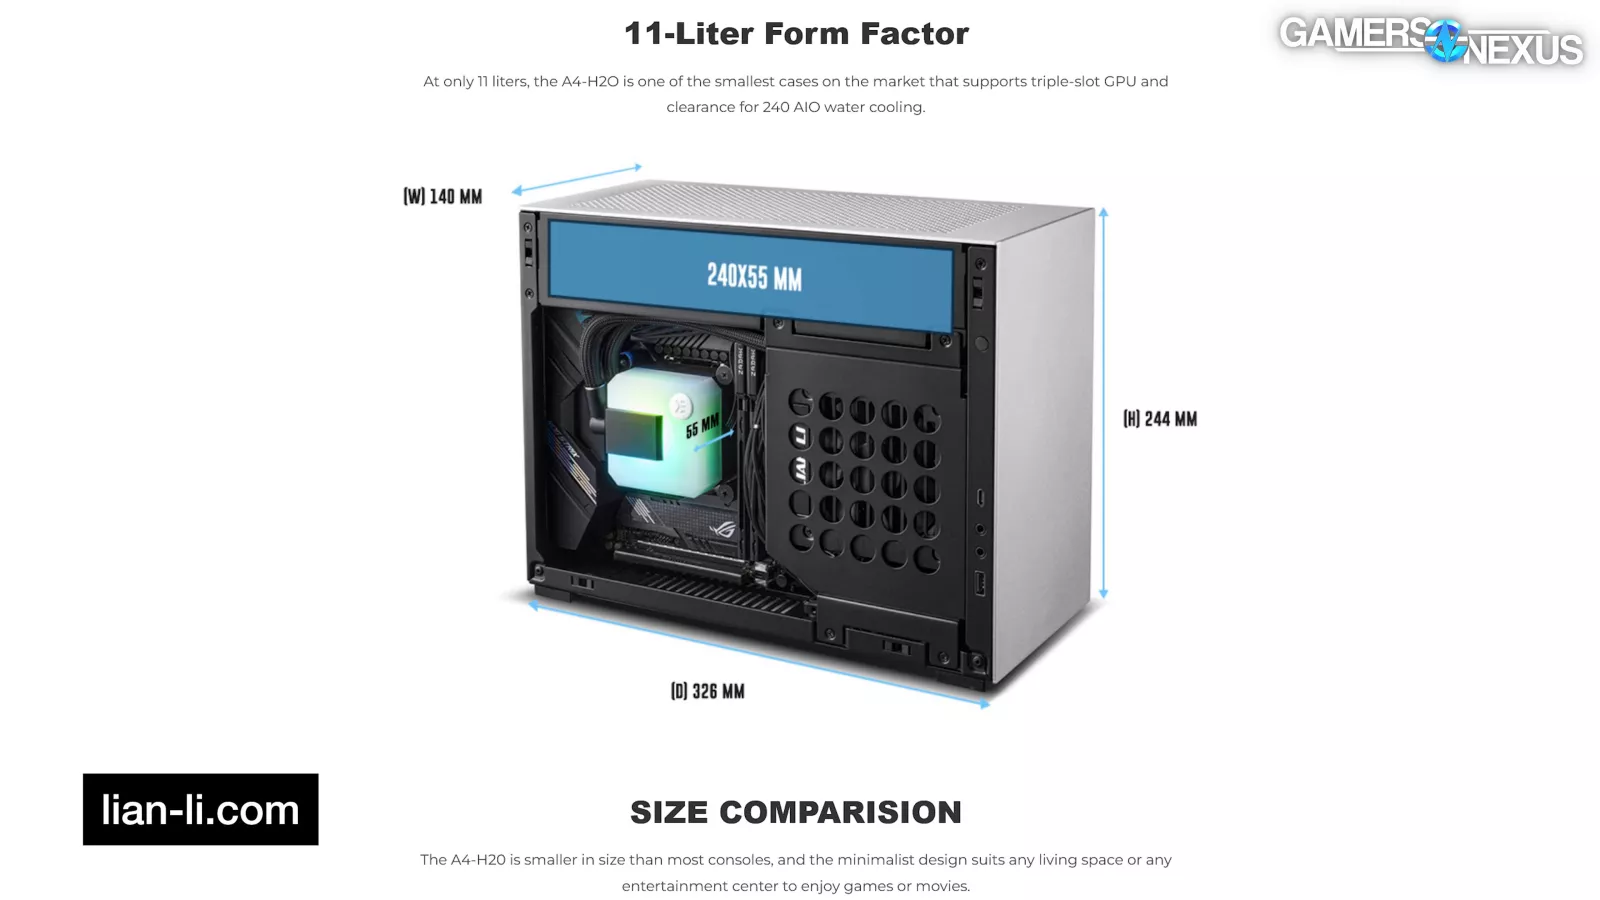
| DIMENSION | (D) 326mm x (W) 140mm x (H) 244mm |
| CAPACITY | 11L |
| MATERIALS | Aluminum Exterior SPCC Steel Interior |
| MOTHERBOARD SUPPORT | Mini-ITX |
| FAN SUPPORT | Top:2x 120mm |
| RADIATOR SUPPORT | Top:1x 240mm (55mm. max total thickness with fans) |
| PSU SUPPORT | SFX, SFX-L |
| GPU LENGTH CLEARANCE | Max 322mm |
| CPU COOLER CLEARANCE | Max 55mm |
| DRIVE Support | 1x 2.5” SSD |
| EXPANSION SLOT | 3 |
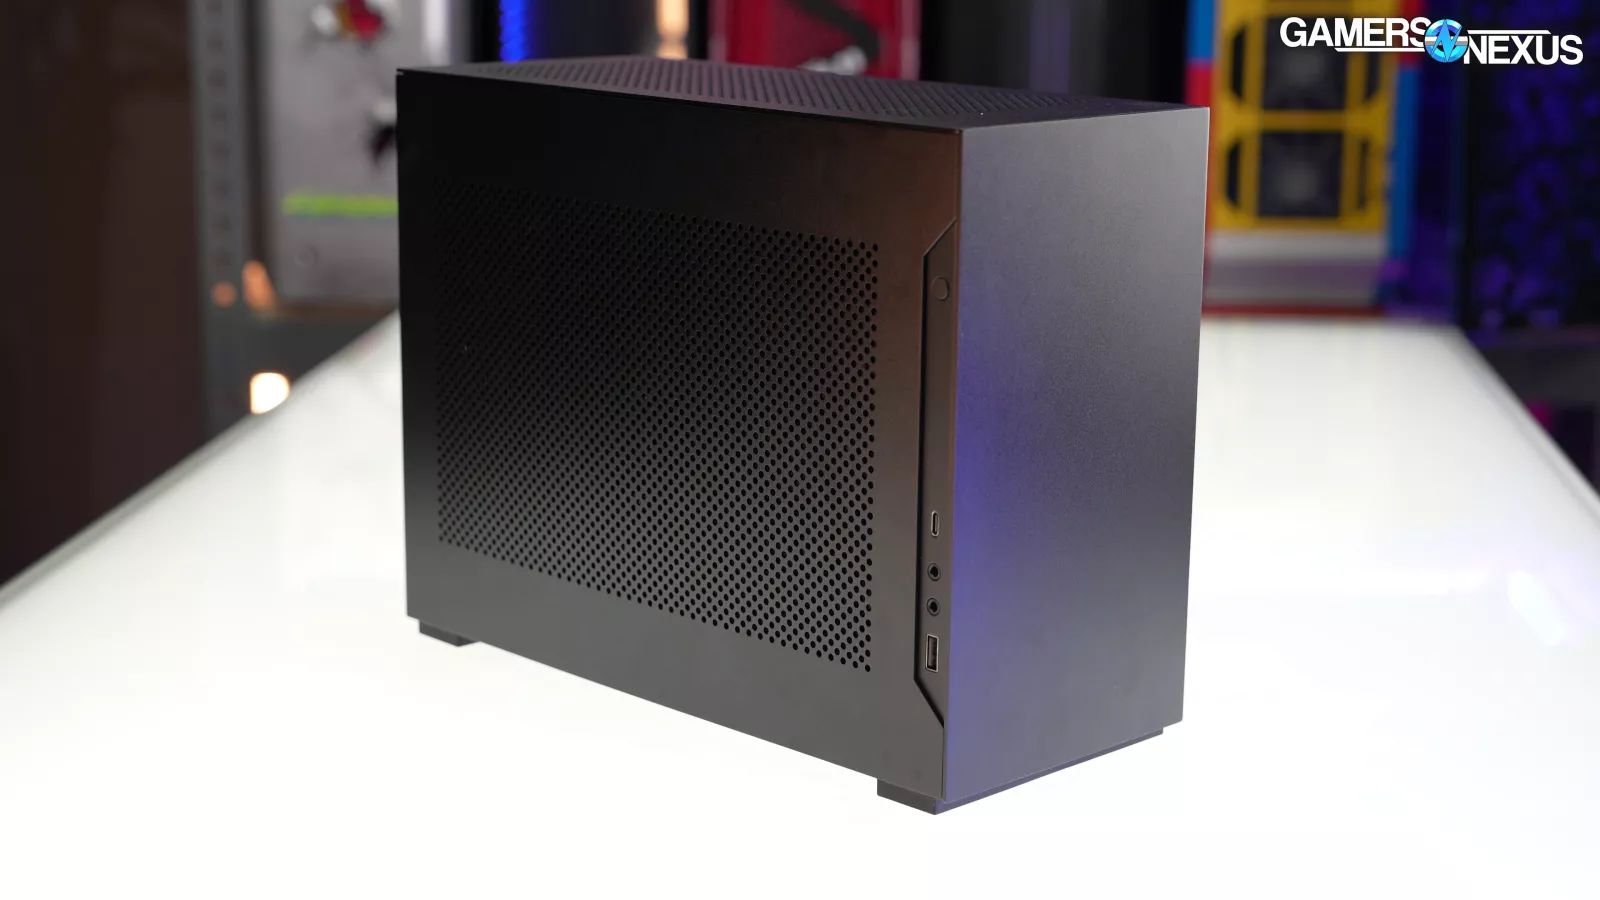
| I/O PORTS | 1x USB 3.0 TYPE-A, 1x USB 3.1 TYPE-C, 1x Mic, 1x HD Audio. |
Overview
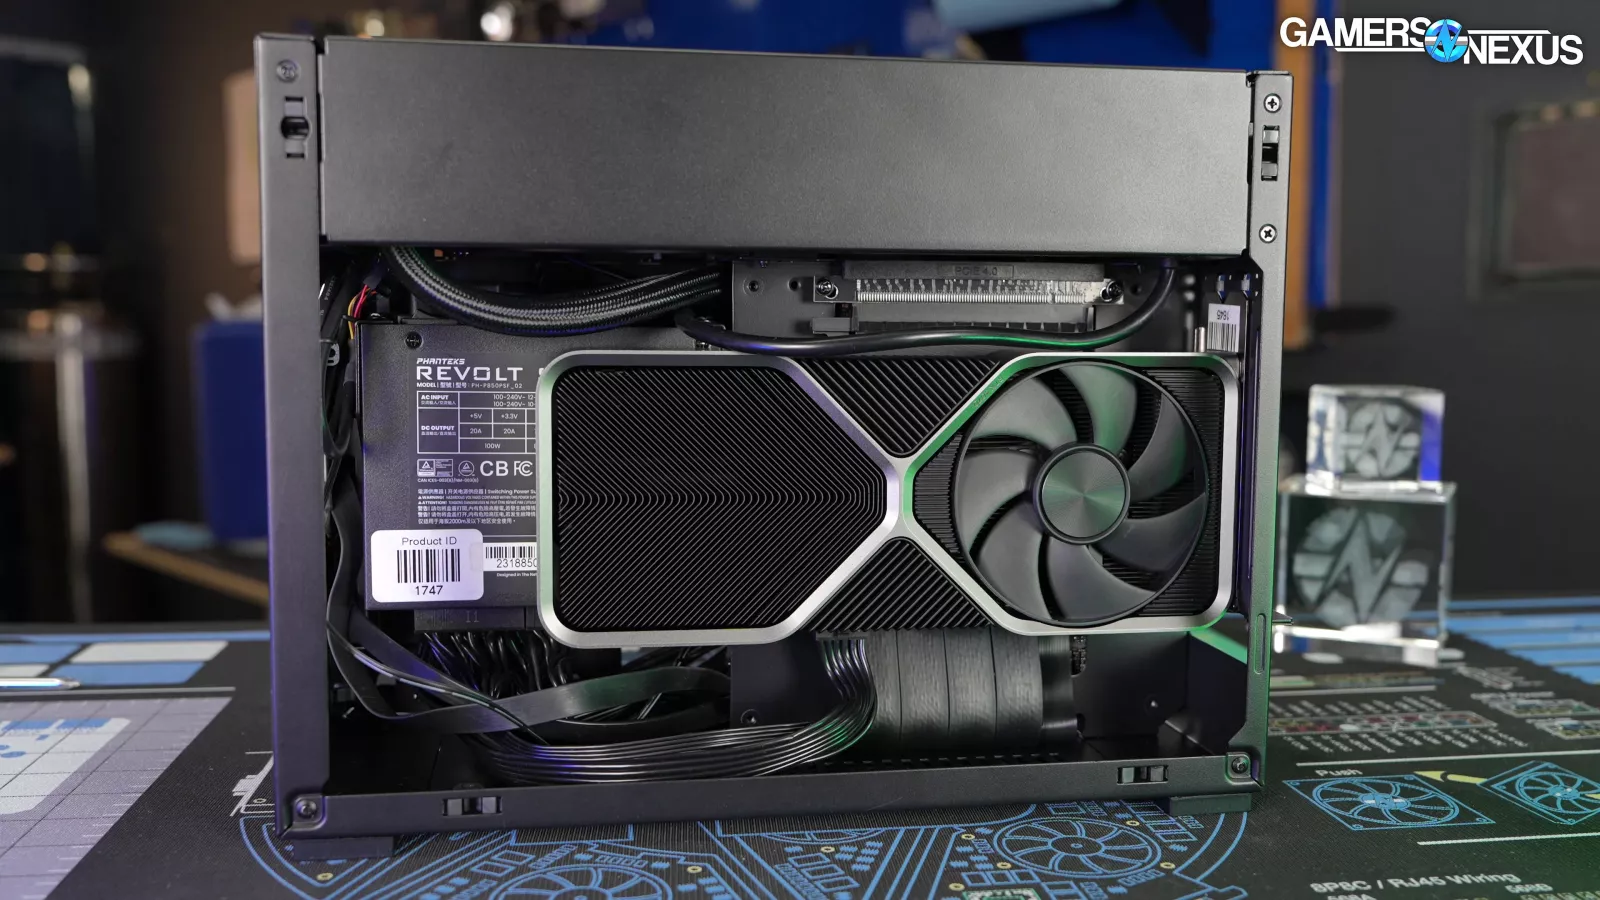
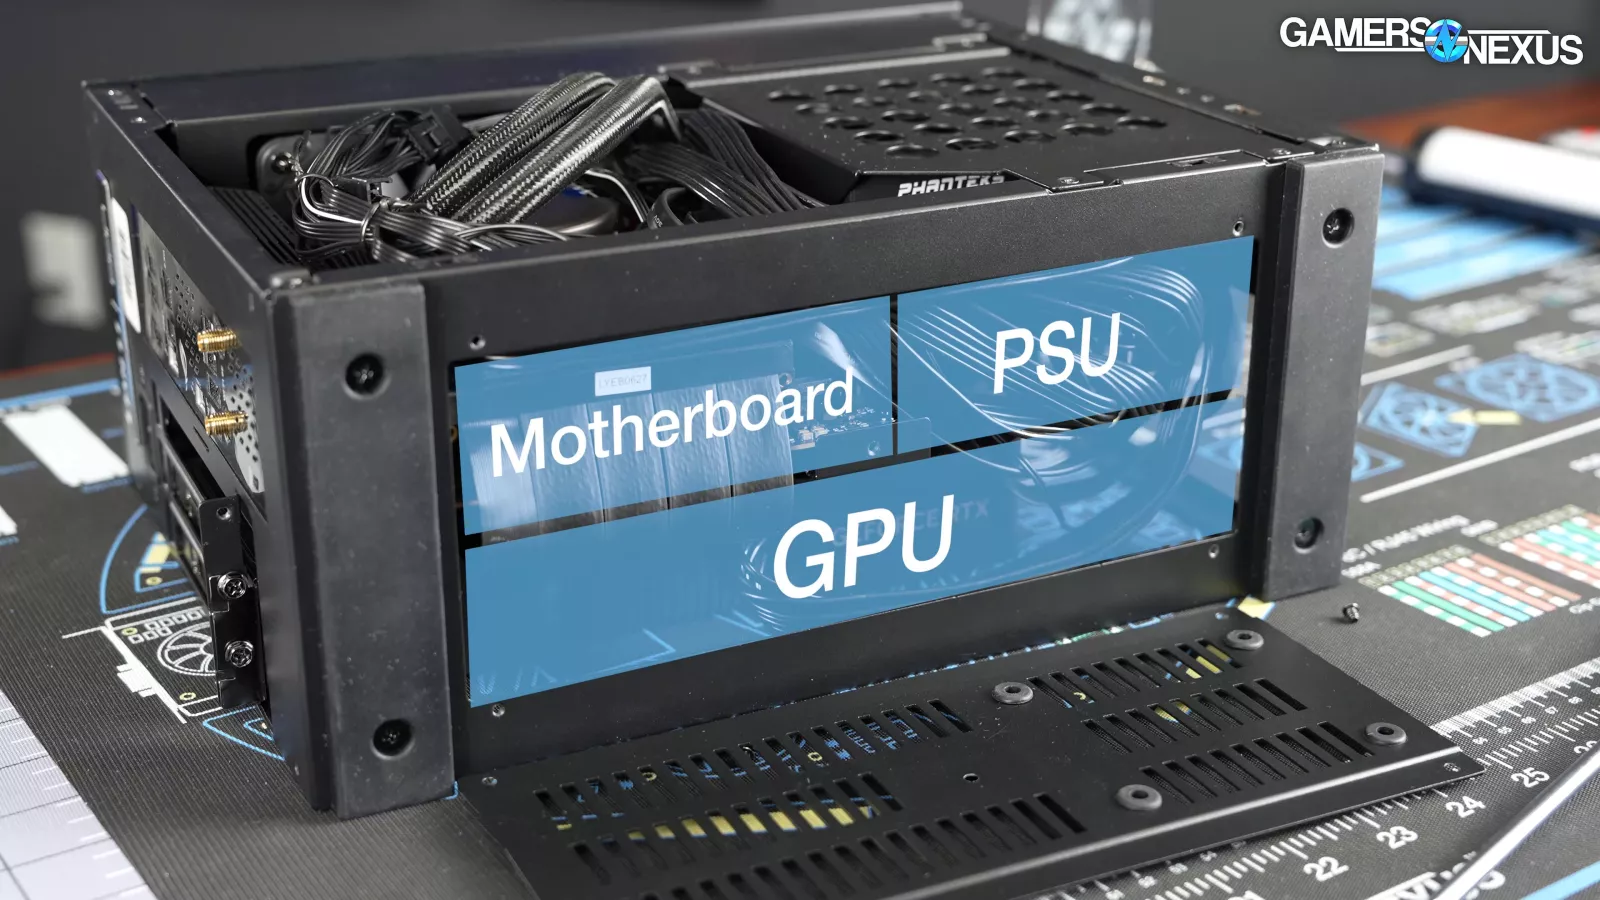
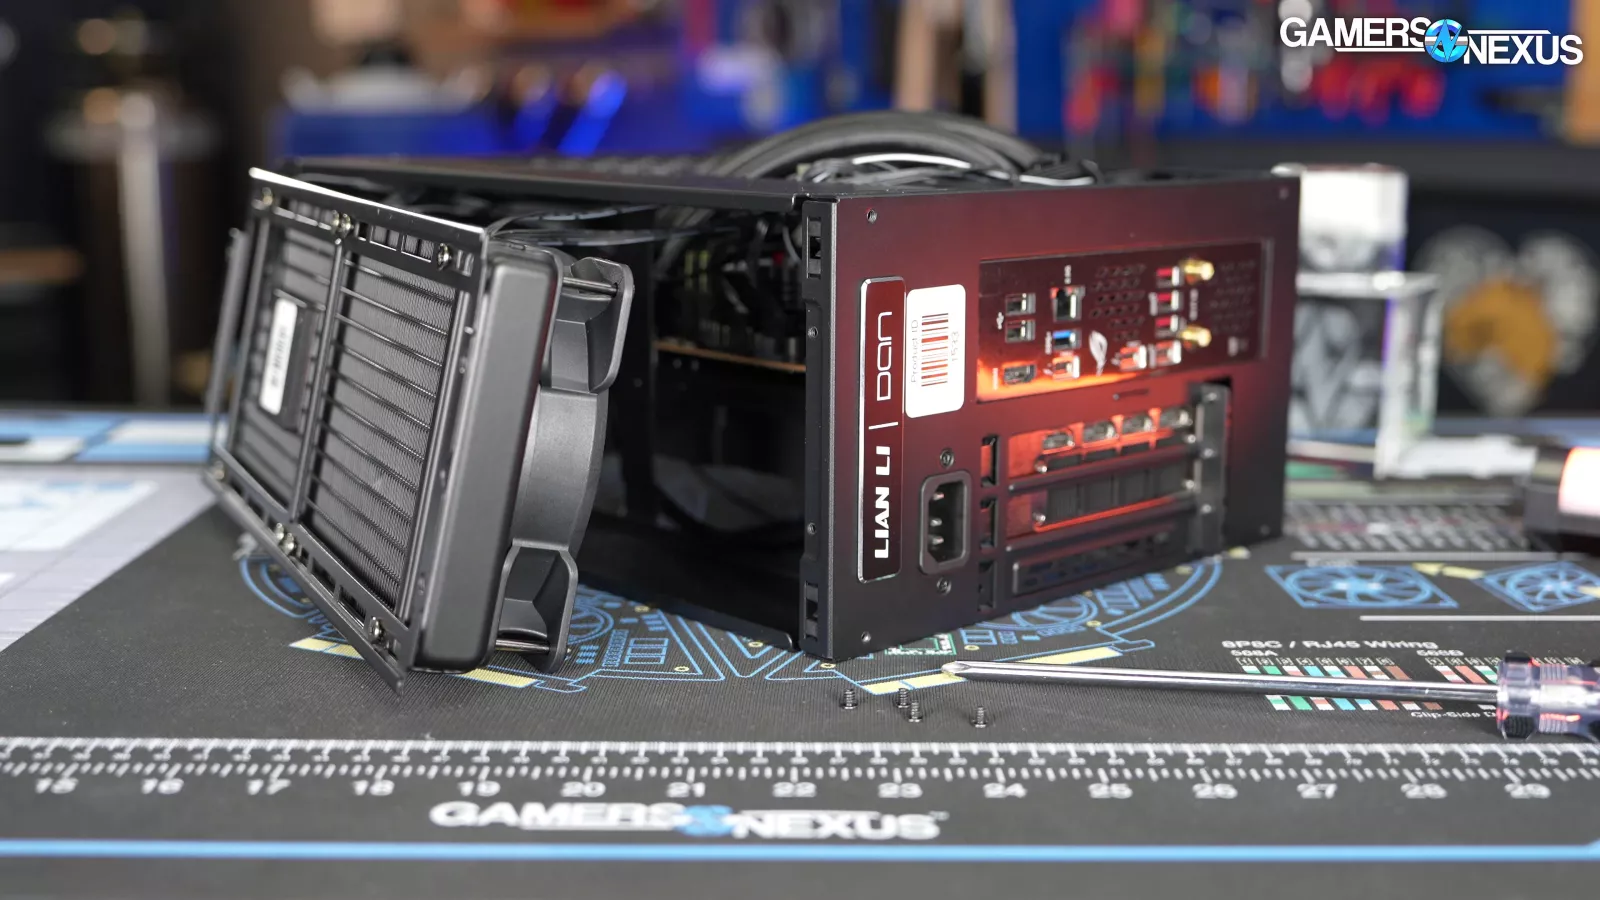
The A4-H2O has the components compartmentalized on two sides – similar to the Terra only in that respect, but without the moveable spine. They’re mechanically very different, and thermally of course, because of the cooler support. This deviates quite a bit from the Terra, which means some of the components in the test bench have changed, like the cooler. Interestingly, the video card actually ends up upside down inside the case, and it’s attached via a PCIe riser cable. The power supply mounts on the same side as the motherboard.

The A4-H2O is a direct descendant of the original A4-SFX, but with what it calls “improved hardware compatibility,” which mostly means it’s larger to allow things like a triple-slot GPU. The main difference is in the H2O part – the ability to mount a 240mm liquid cooler radiator in the top of the case. The original A4-SFX only supported either 92mm or 120mm liquid coolers with heavy compromises. There are other tweaks versus the H2O’s precursor, but most of the focus is on the liquid cooling, given the name.
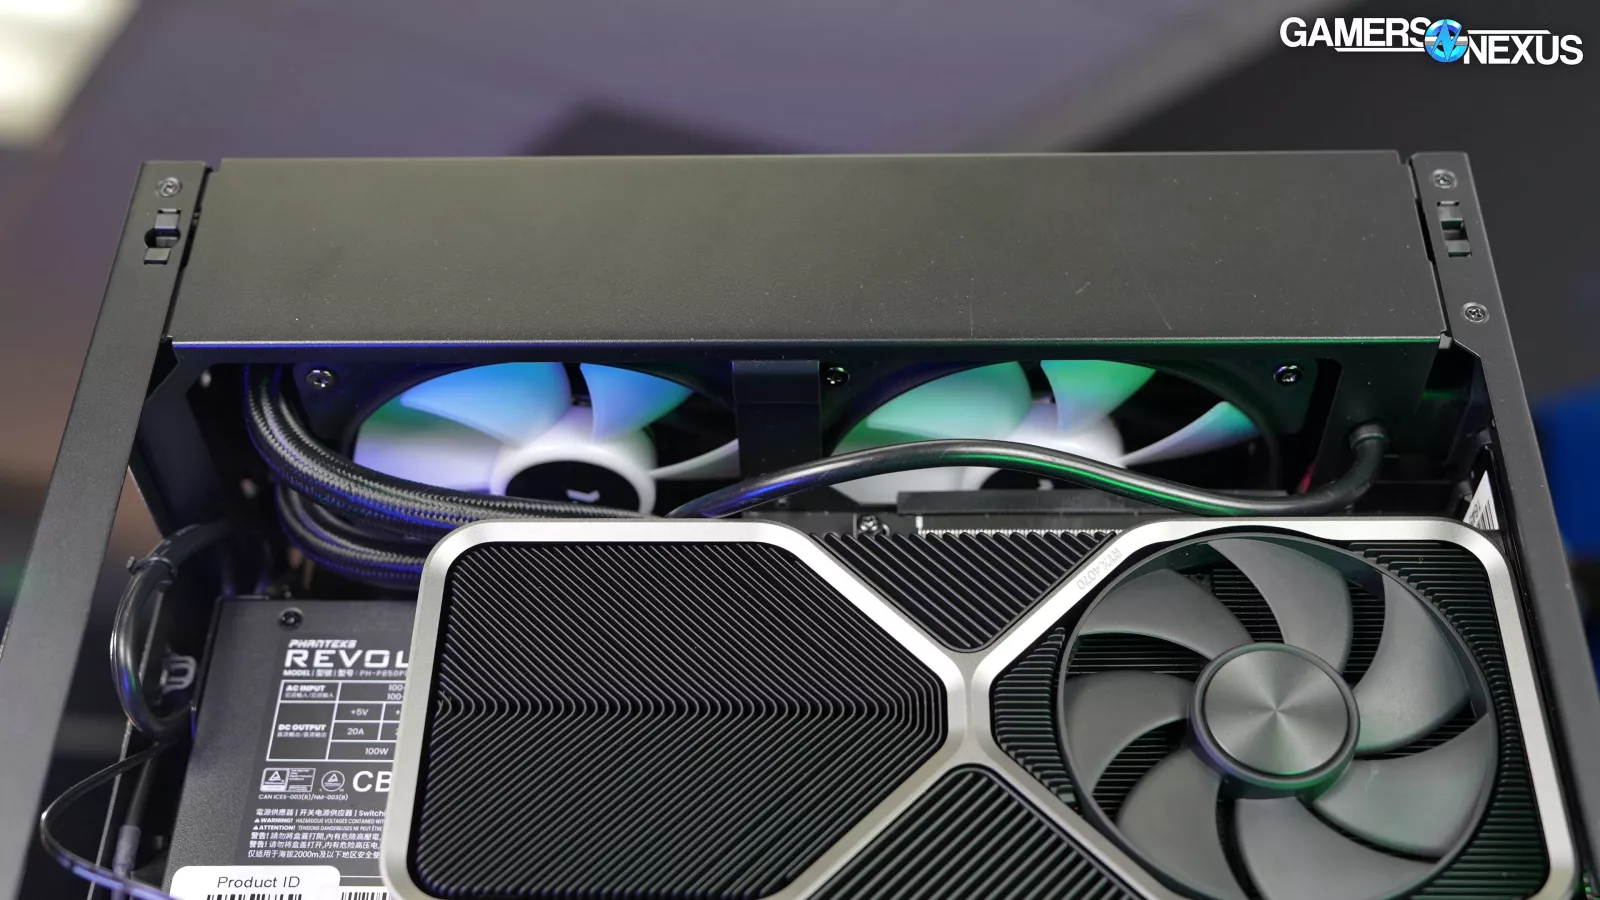
Aside from the obvious potential for keeping CPU thermals more in check versus a small air cooler, having the 240mm CLC take up essentially the entire top of such a small case helps to prevent hot air from lingering inside. This has an impact on other components in the case that we’ll see the effects of in the thermal section.
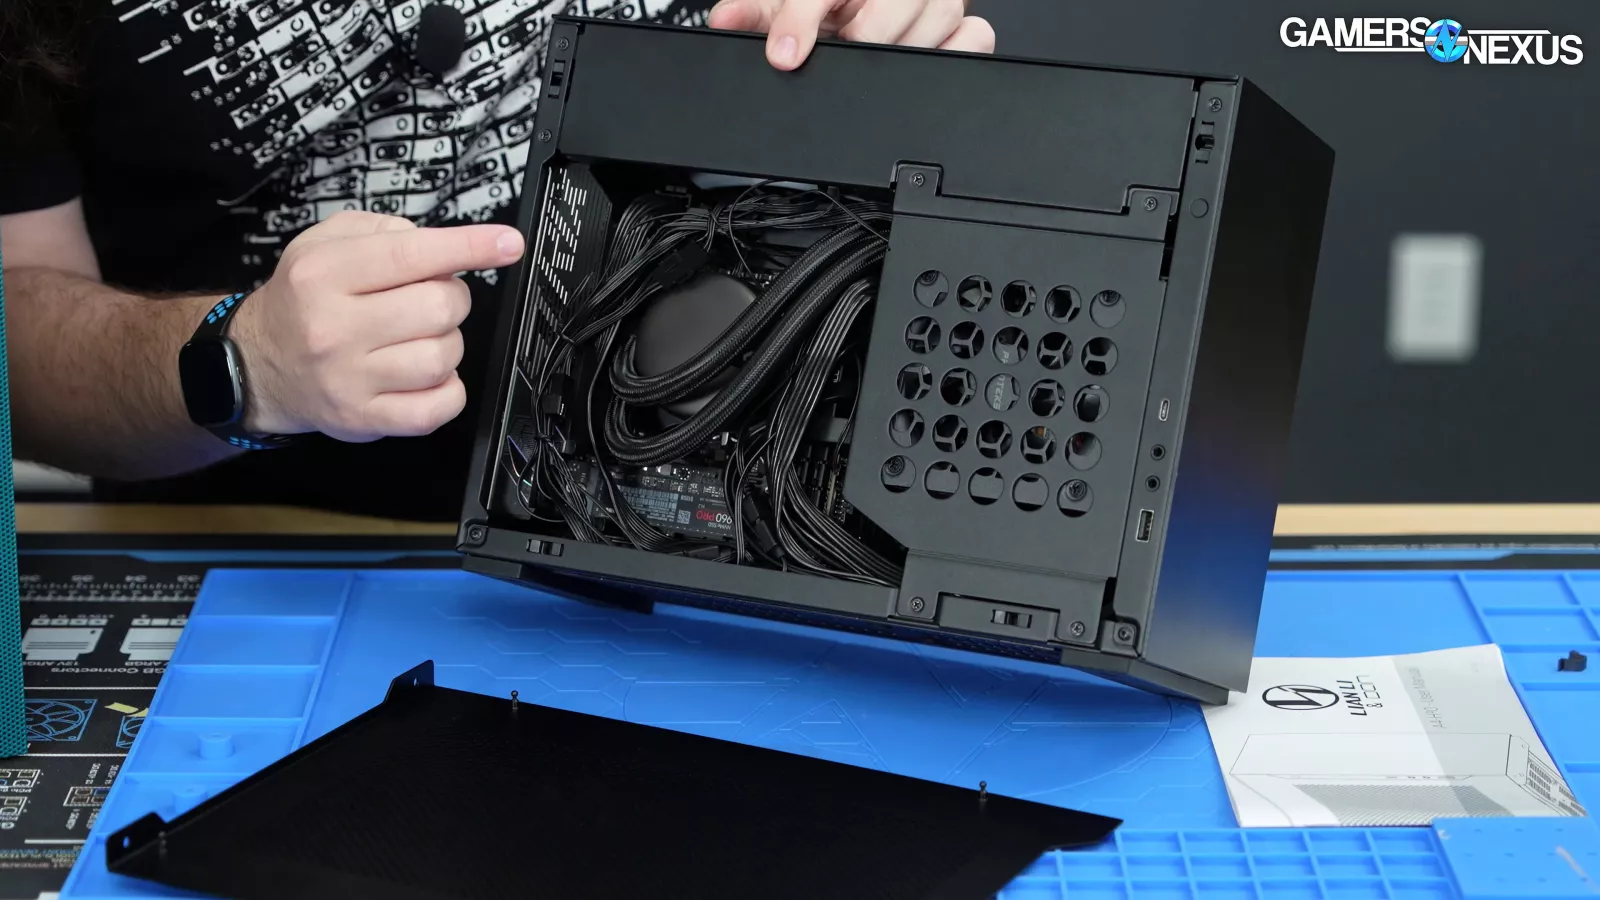
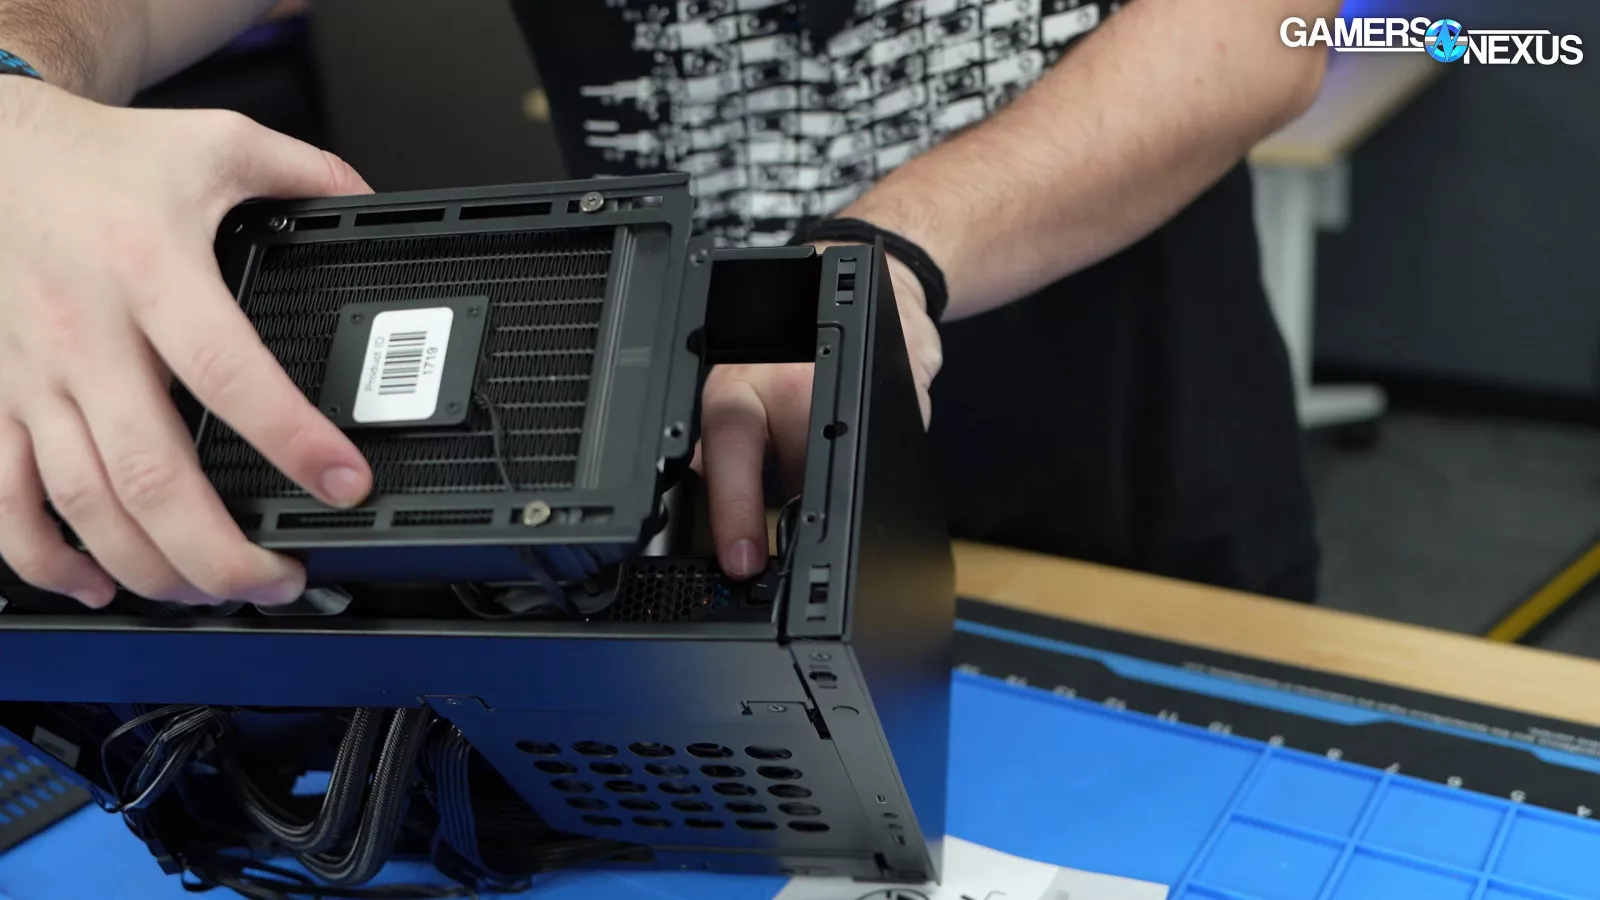
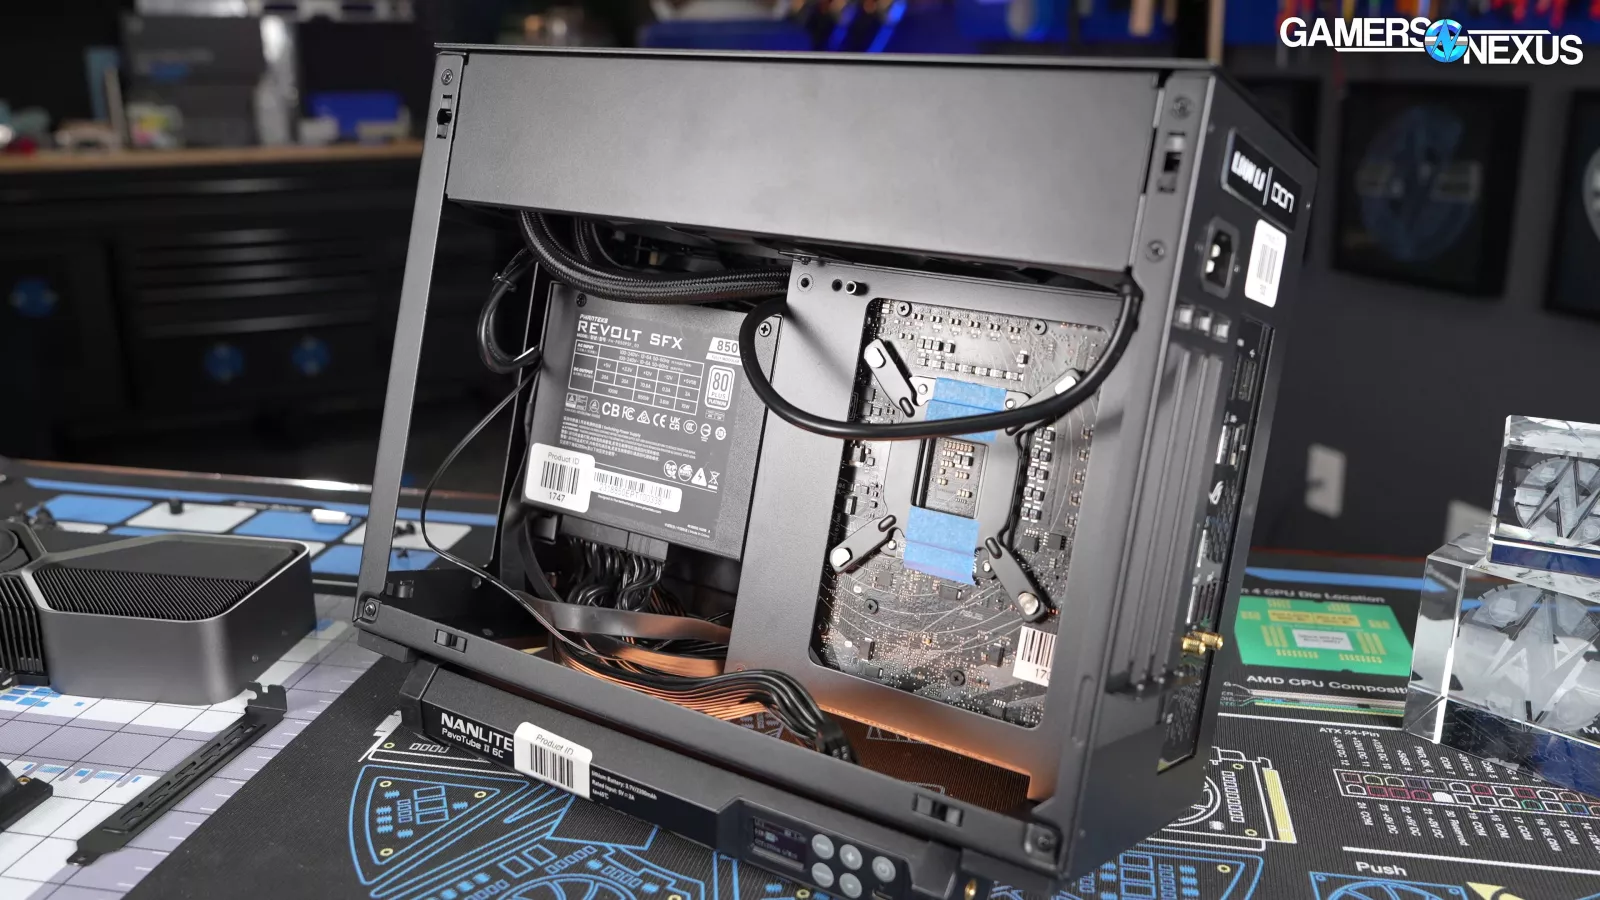
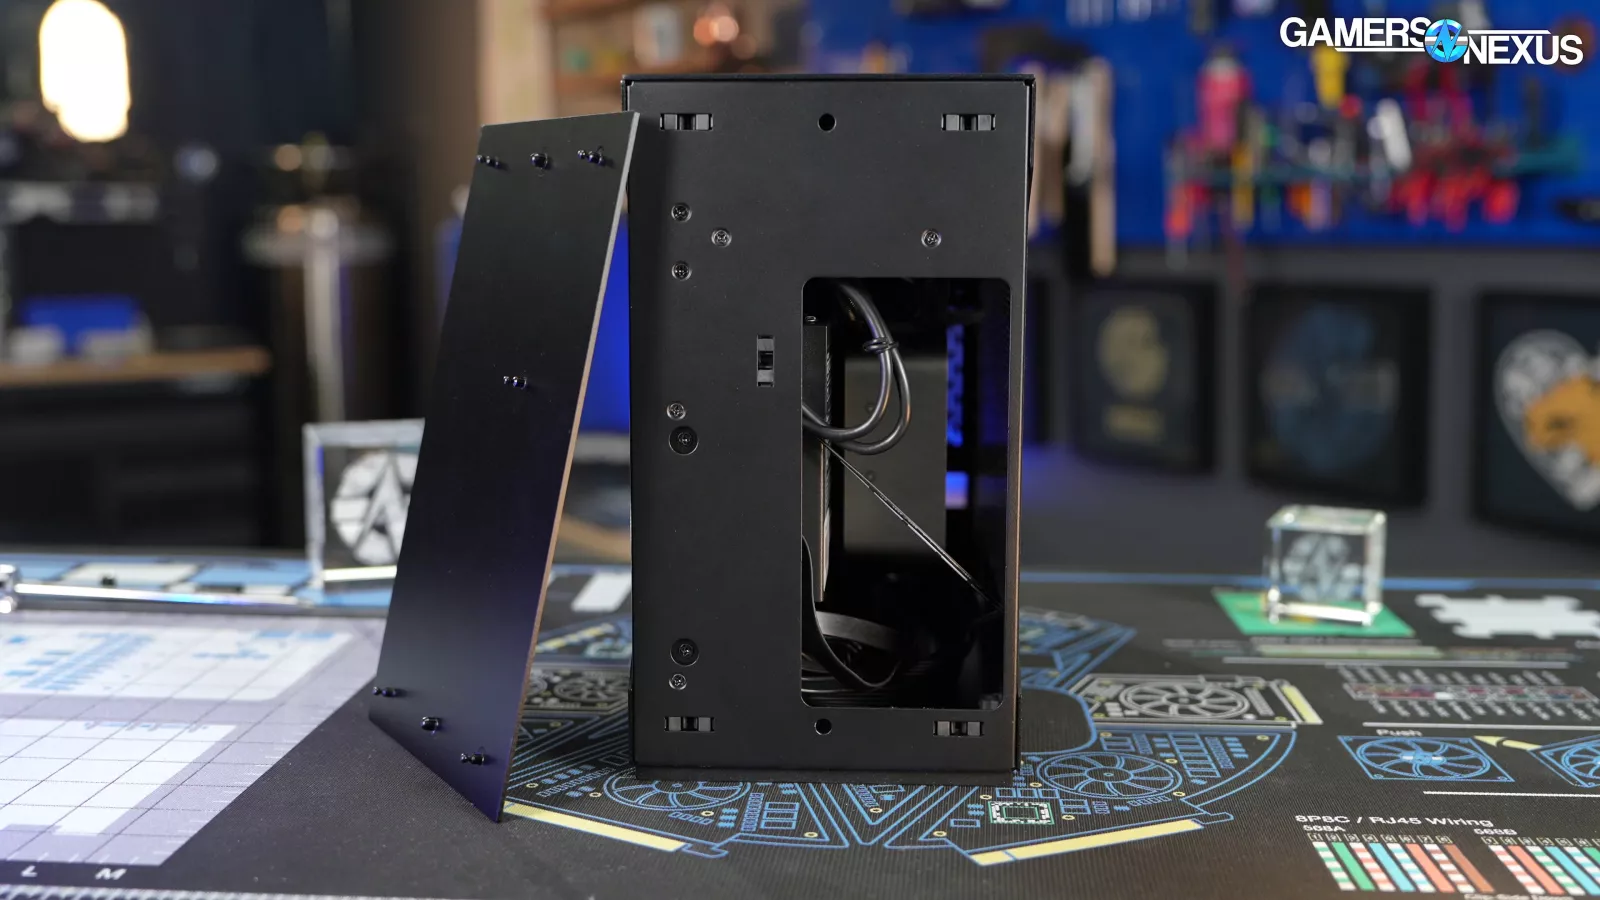
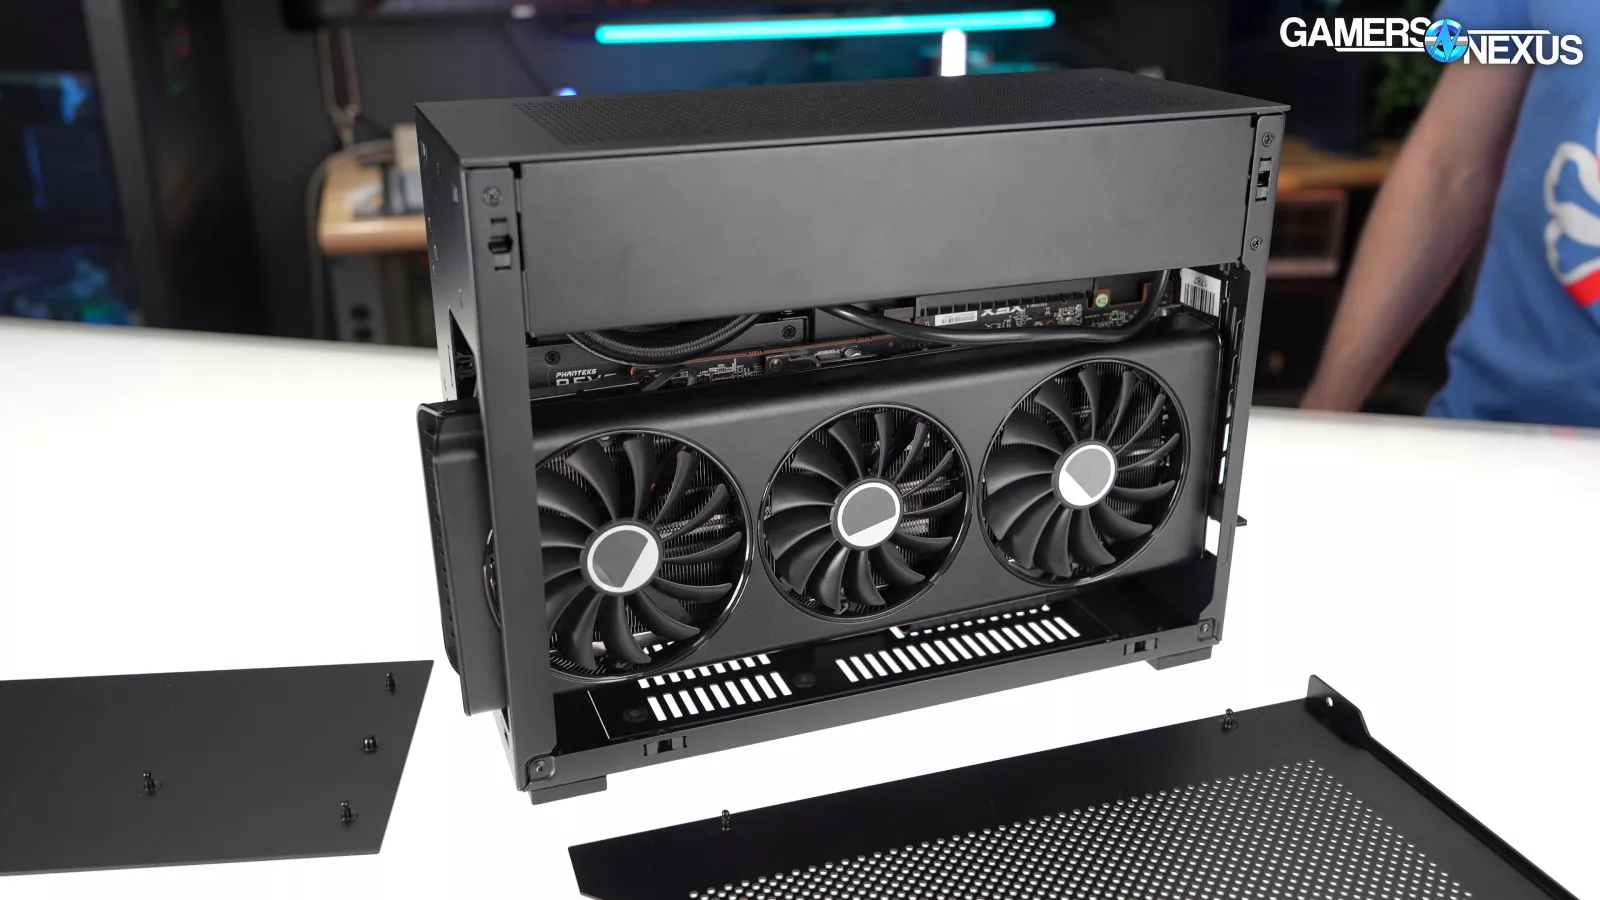
The biggest other feature is the removable bottom panel, which helps with access to the bottom edge of the motherboard and the limited cable management area under the PSU.

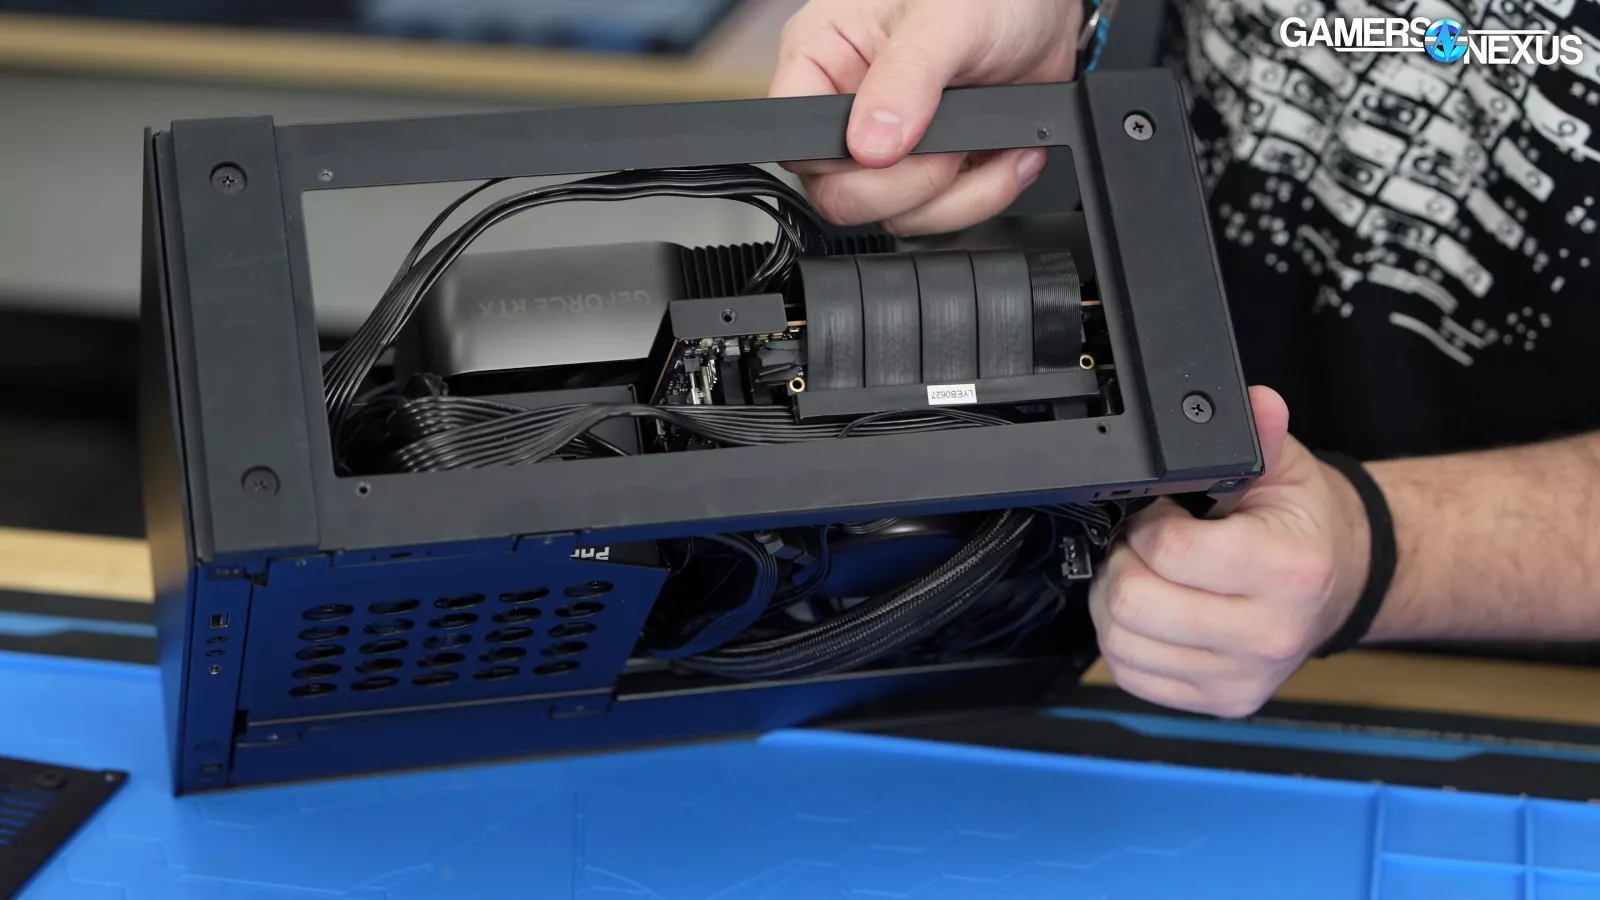
This makes it possible to add and remove modular power cables without removing the PSU. The panel comes off easily with 5 screws, although we’d like to see a larger hole here. It was still a little difficult to plug or unplug some of the PSU cables, and more clearance would help. Every millimeter counts in these small cases.
Dimensions
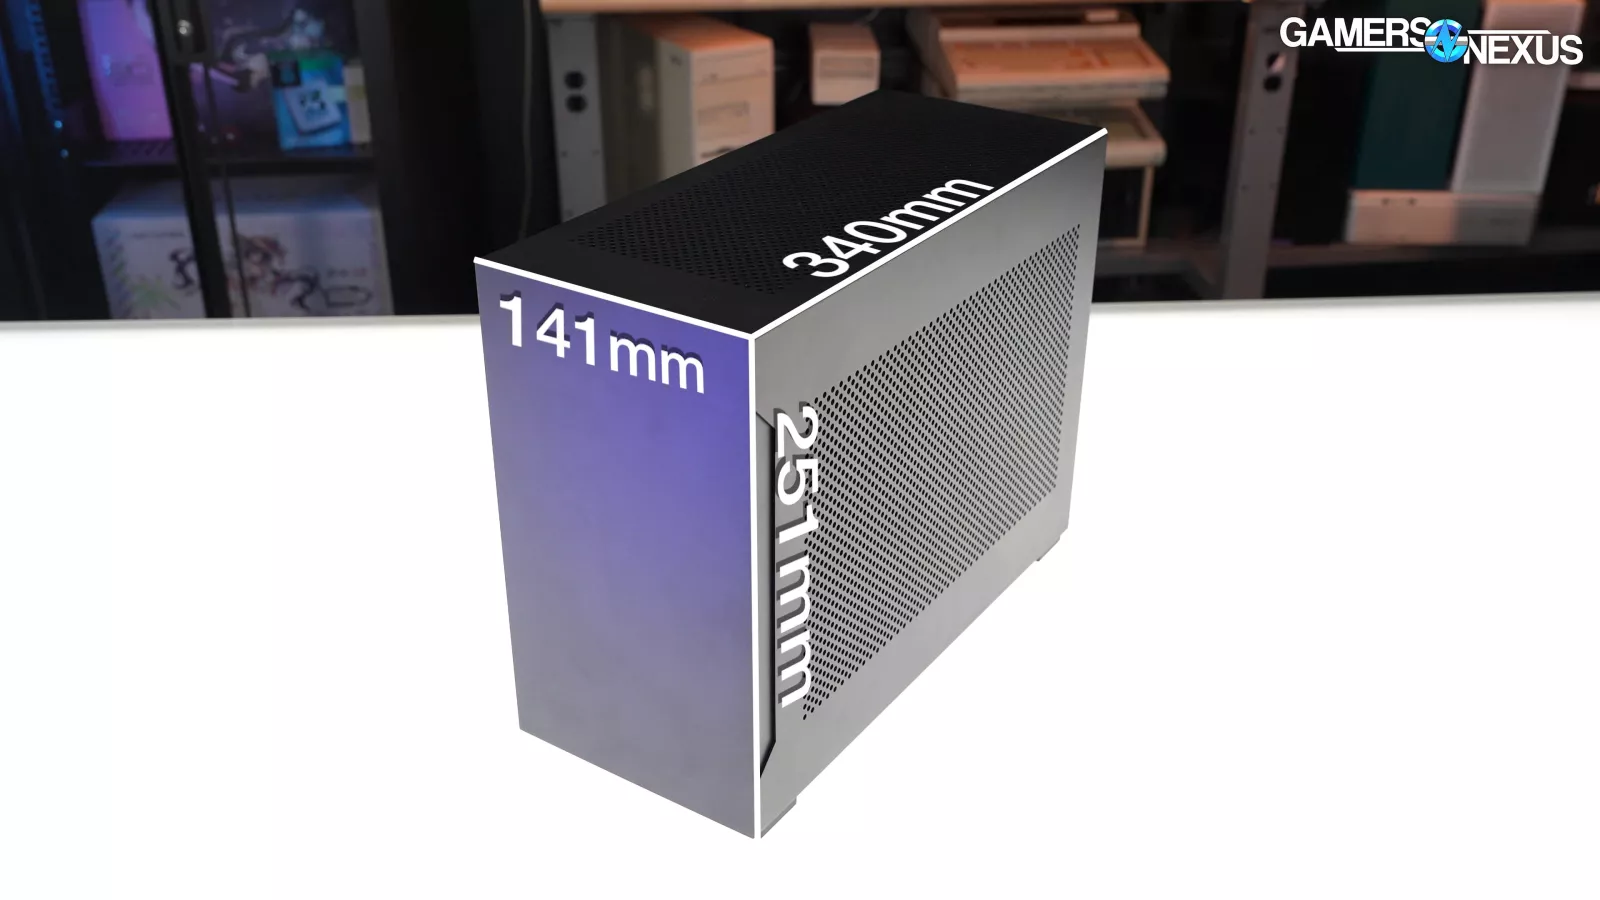
The case measures in at 340mm long, 141mm wide, and 251mm tall, which is larger than the advertised 326x140x244mm. The difference between advertised and actual dimensions also means the calculated overall volume is 12L rather than the 11L number that Lian Li declares. This is another example of the manufacturer choosing to ignore protrusions like screws and case feet almost arbitrarily, and we again stand by our decision to include those protrusions.
This is a gripe we have with cases in general, this isn’t just a Mini-ITX thing. Sometimes they choose to ignore things that stick out the back of the case. There was one such instance at Computex this year. We saw a case, and we'll see if they come to market like this, where they were electing to not count an additional 1 inch protrusion out the back because it wasn't part of the structural case, it was just a hard drive cage or something.
When it comes to these protrusions, using the case without them isn’t realistic. Even if not counting them toward volume, they should be counted towards exterior measurements. To choose to ignore certain protrusions is not only a slippery slope, but could mean someone just barely isn’t able to fit a case in a media console or corner.
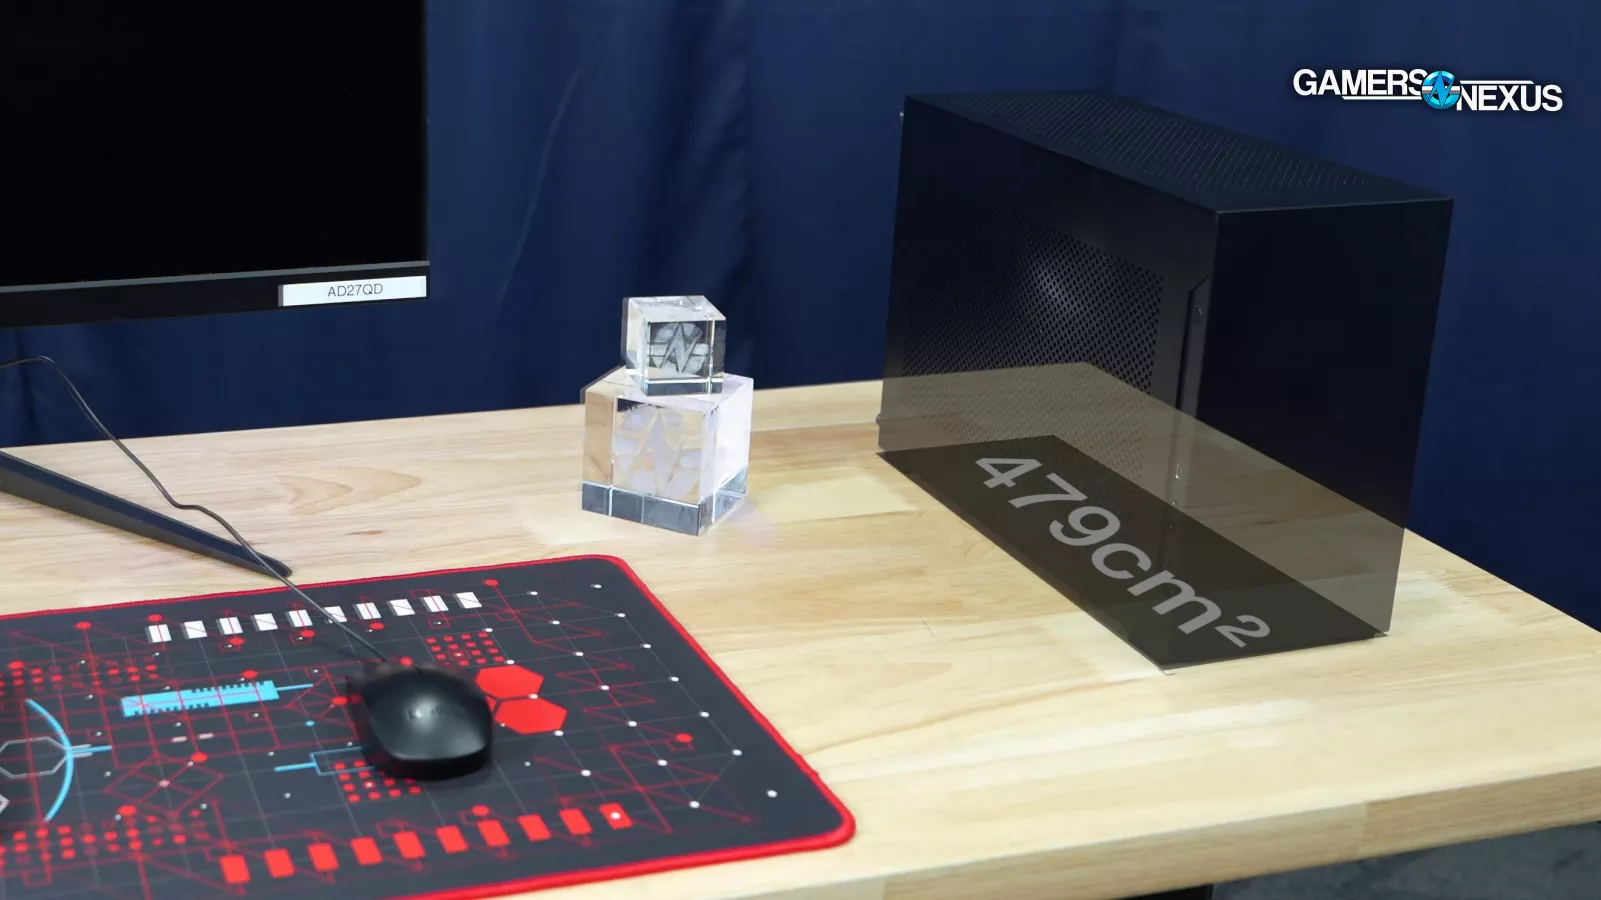
Part of the feedback we got on the Terra review was to include a “footprint” figure – meaning the 2-dimensional area the case takes up on a desk. We integrated a lot of the feedback from the community, as you’ll see in this review, like switching power supplies. However, there are some things we’re not integrating, and we wanted to use this as an example. An area calculation, in this instance, doesn’t make much sense as a review metric. Really, what you need is just simple length by width, and that’s kind of it.
The A4-H2O’s footprint calculates out to 479cm2 – try to visualize that. We think it’s even less intuitive than volume, and that it mostly serves as a semi-arbitrary way to create a single number to rank cases. Footprint loses the directionality of length and width measurements, which are what matter for visualizing the area a case will take up on a desk. A theoretical case that measured 50mm wide by 400mm long would have roughly the same 200cm2 footprint as one that measured 141mm by 141mm. It doesn’t really tell you anything.
Sometimes, we don’t need fancy reviewer metrics -- just plain old length by width already tells us the footprint, and it’s something you can read in the spec sheet and measure without needing us. Assuming the manufacturer is being honest about the dimensions, that is.
Let’s get into the build quality details.
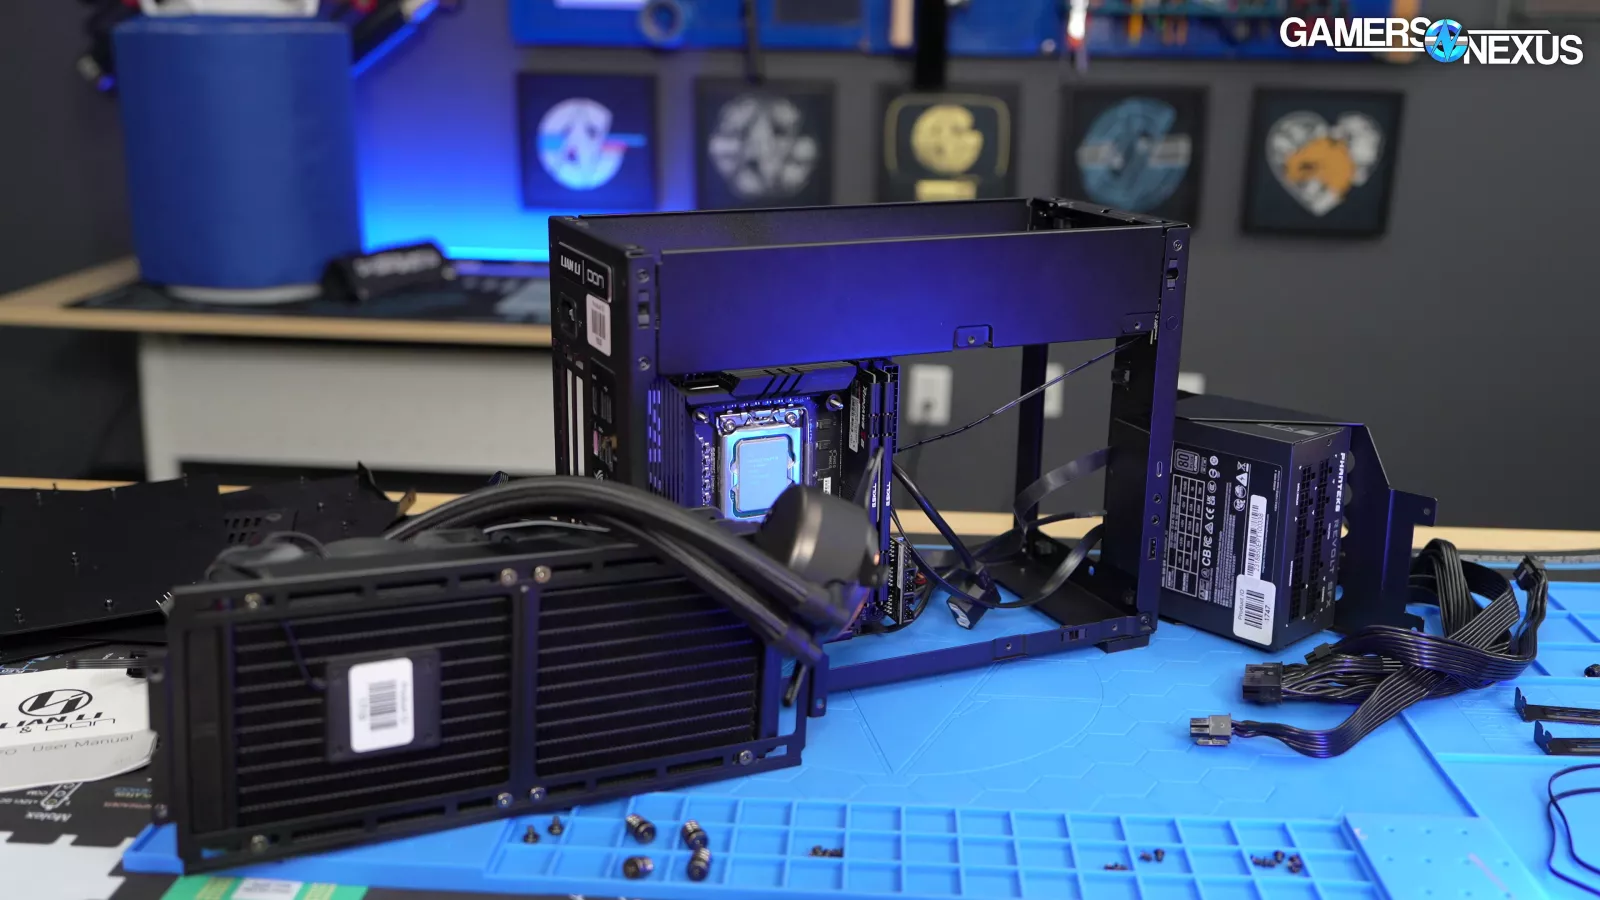
The Build
The A4-H2O is designed around one specific type of build, resulting in a focused and intentional overall package. This is evident throughout the build process and the manual – it has limited options and choices. That’s not a bad thing though, as we can appreciate products that do one thing well over trying to do too much at once and failing.
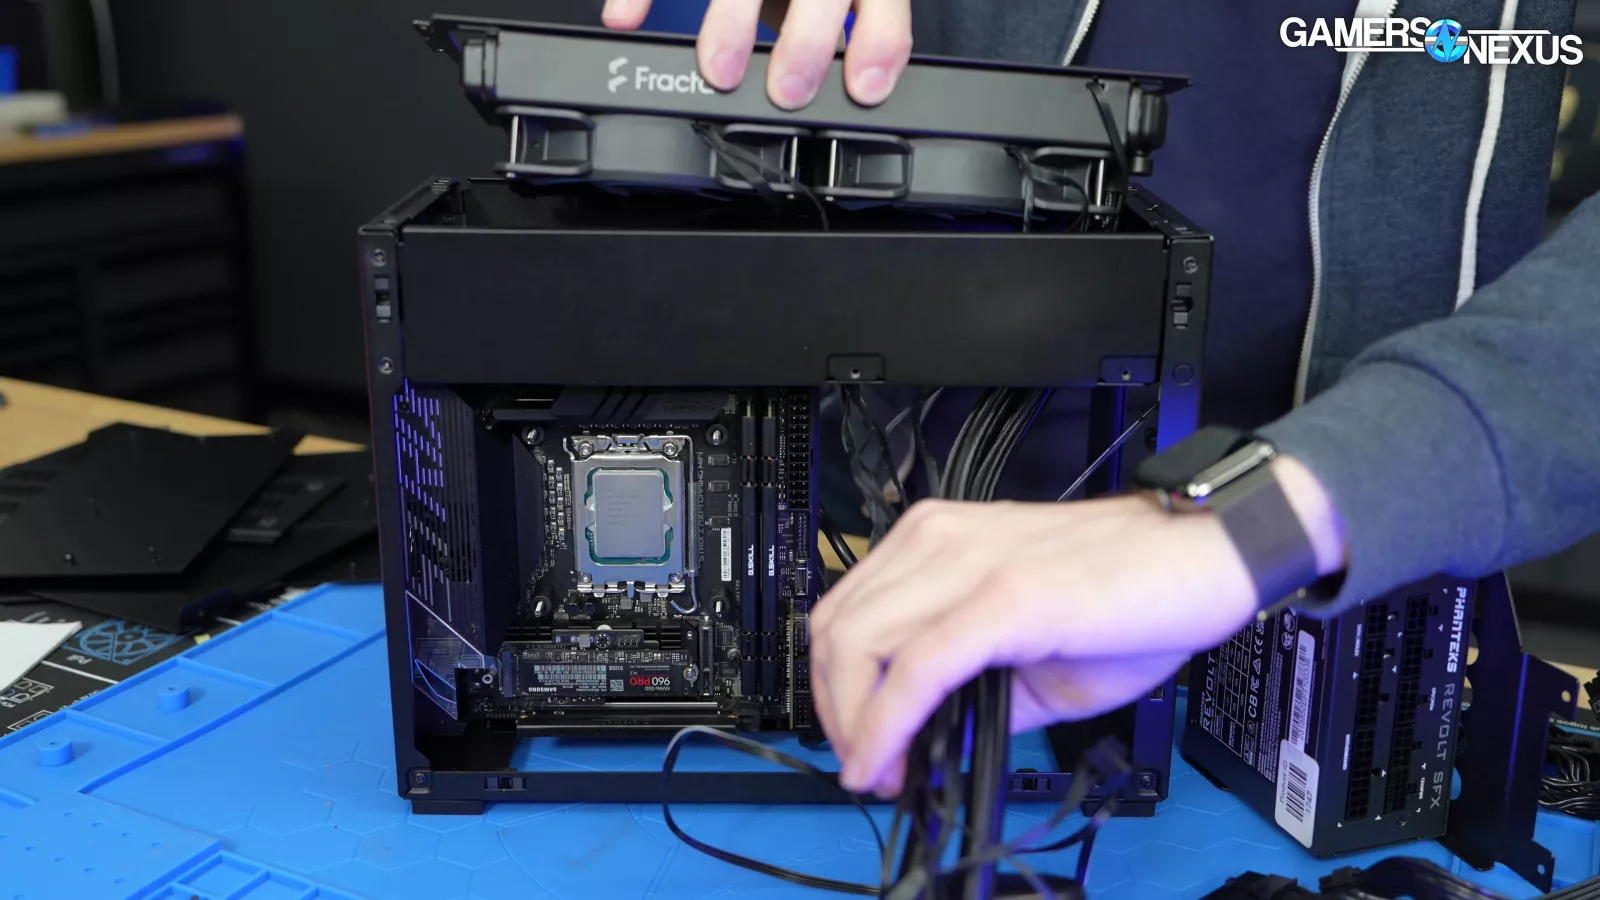

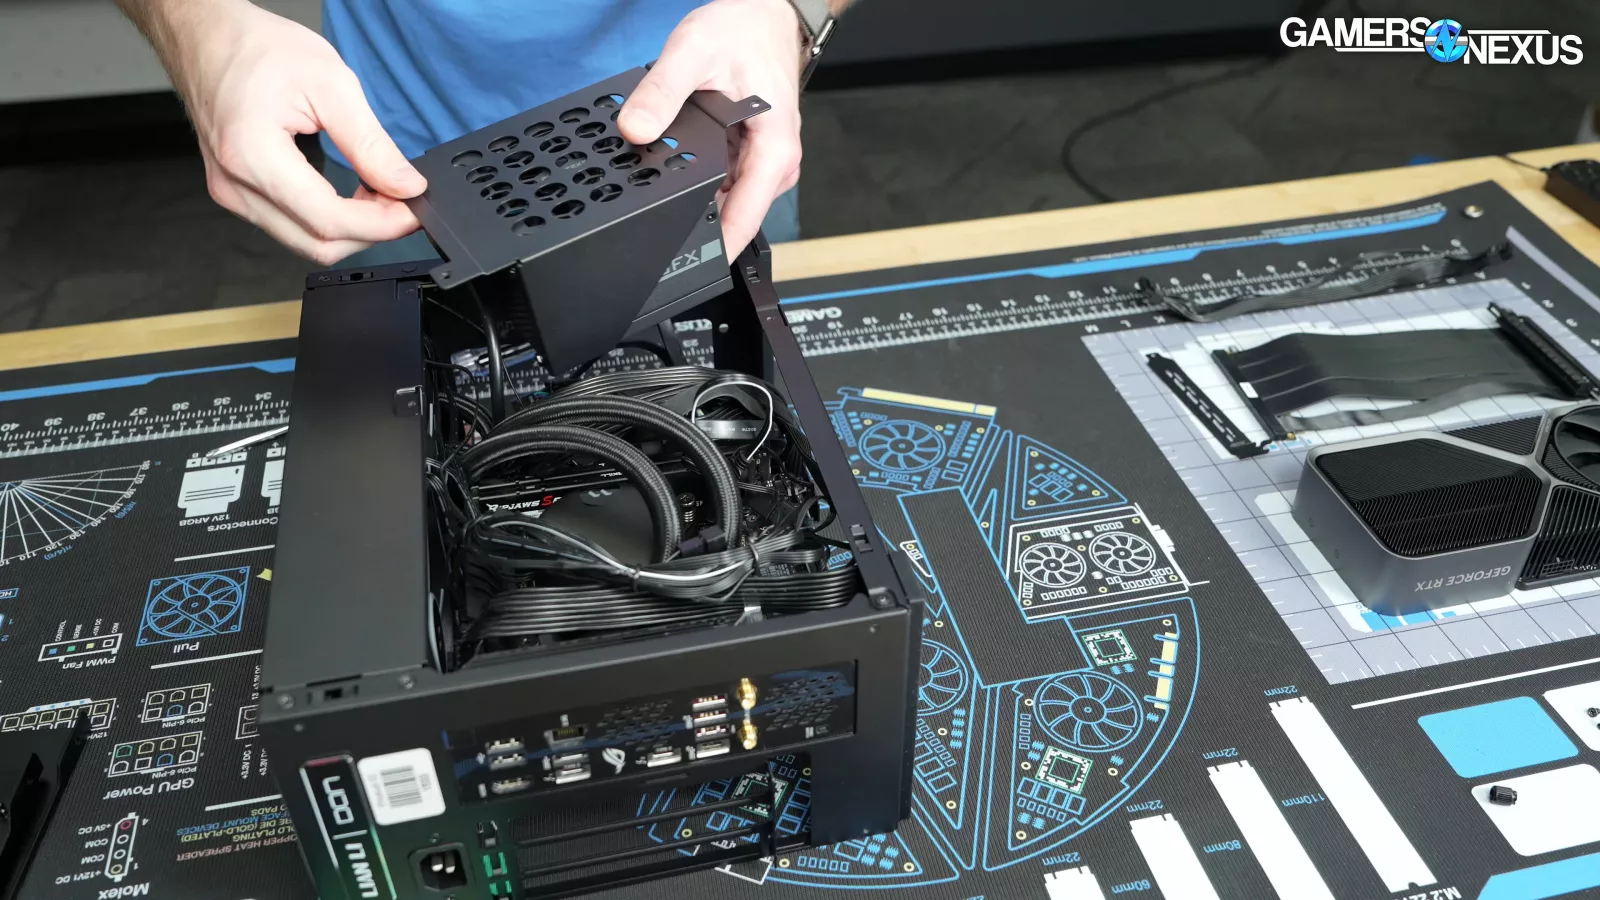
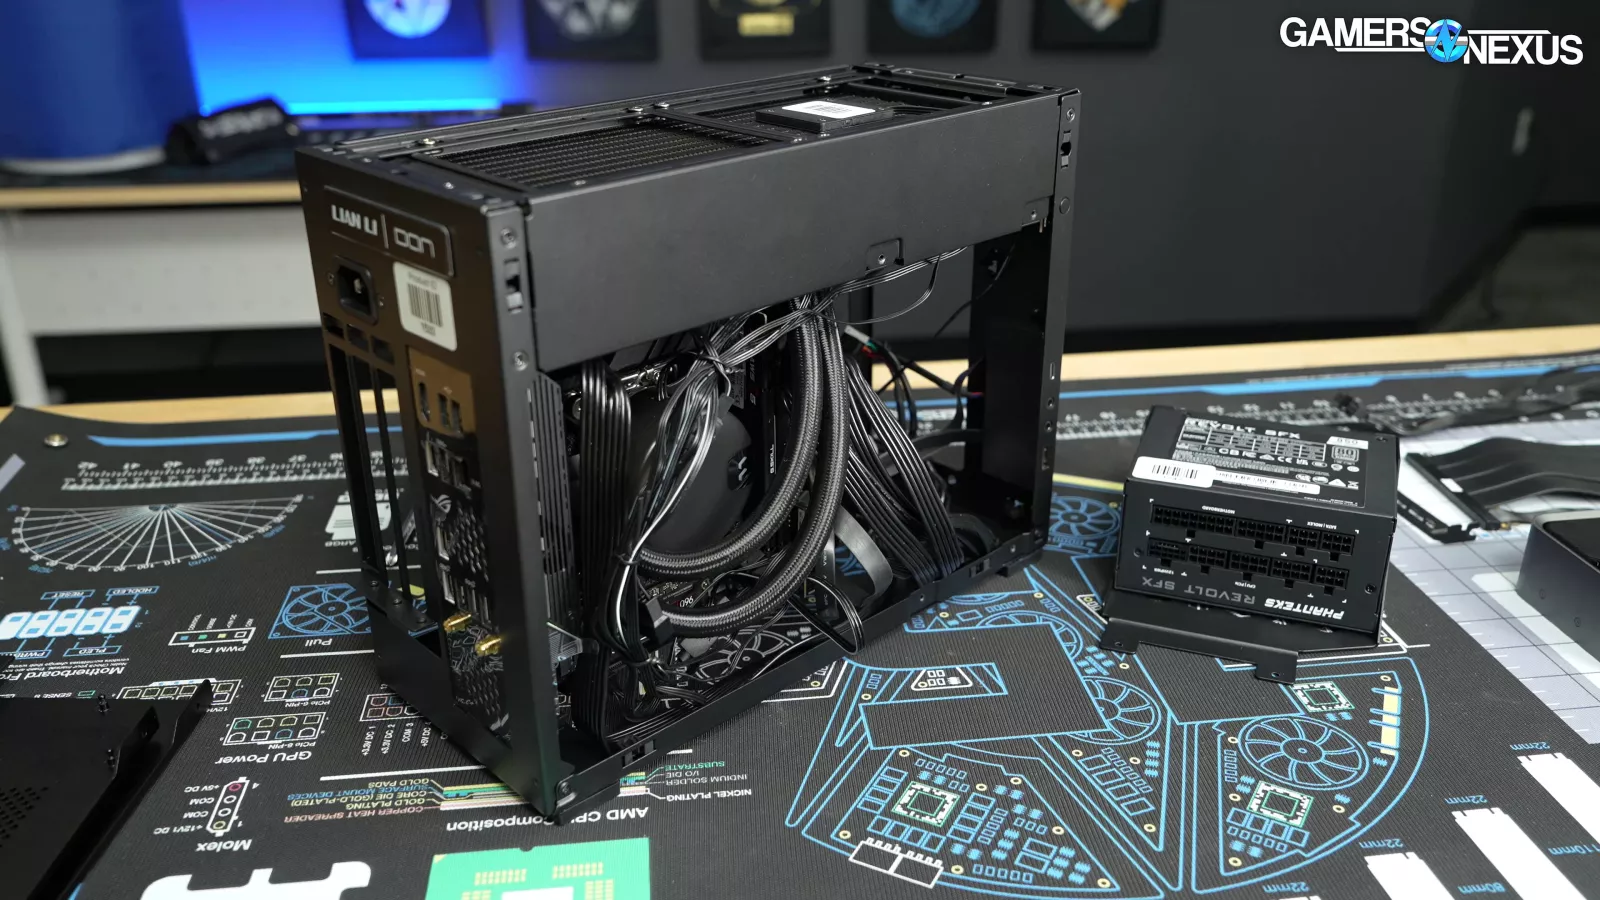
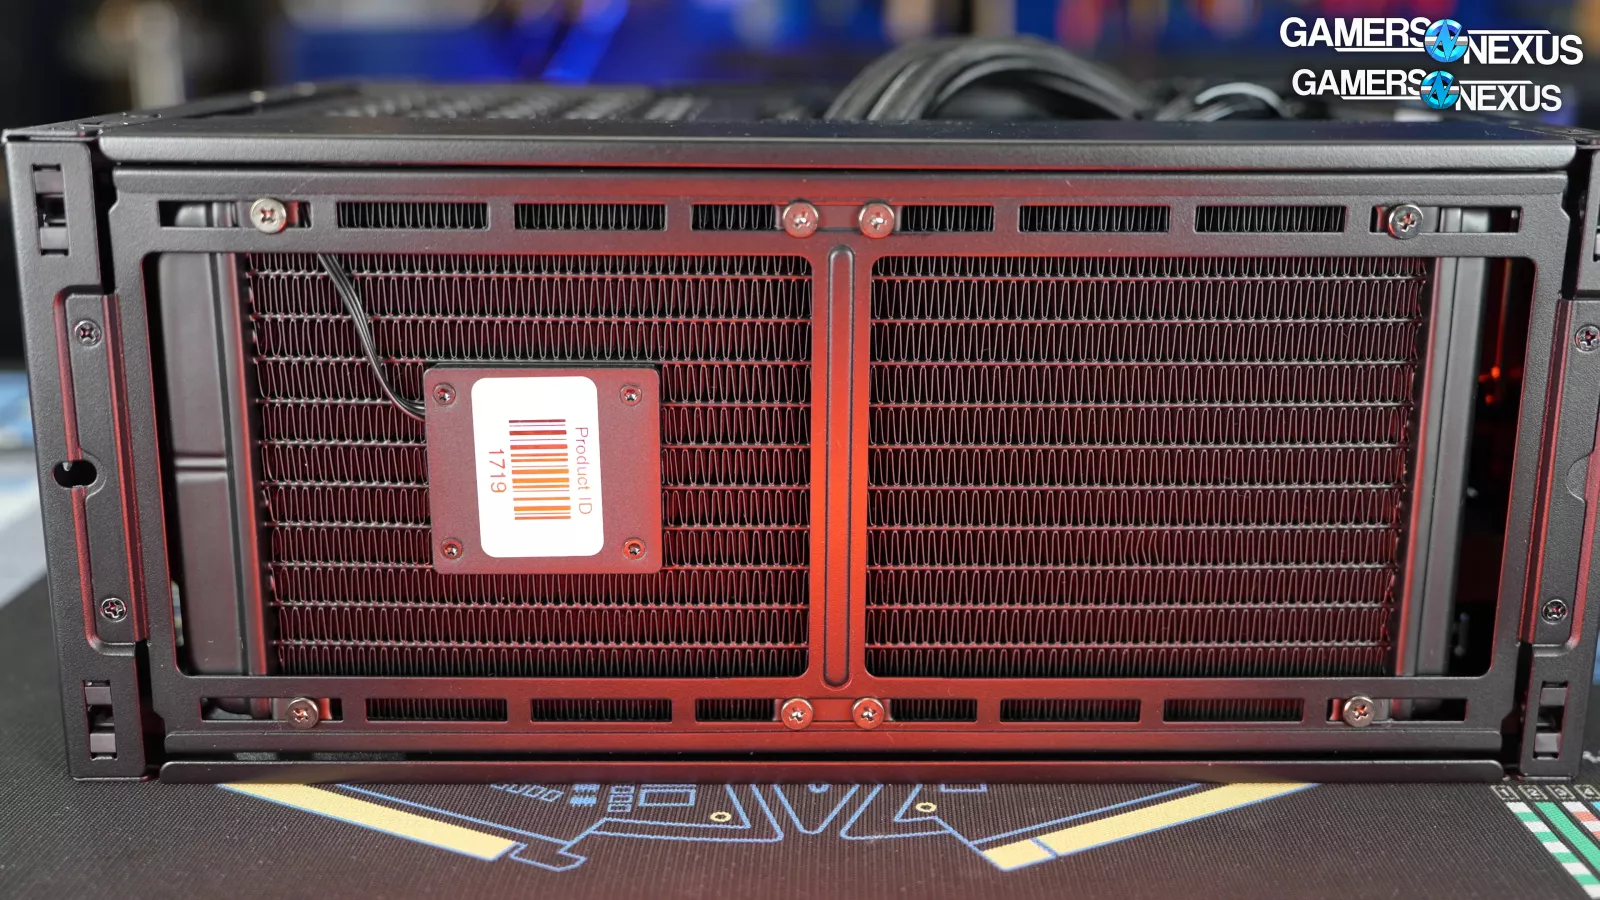
Both the PSU and the radiator mount to removable brackets within the case, which has become a popular approach in small and large cases alike. It gives flexibility to the designer and can have ease-of-use advantages for the builder.
Once assembled, the radiator and bracket install without much hassle – as long as there aren’t too many wires to manage. These fans act as the only active airflow for the rest of the case as well, and there are no additional fan mount locations.


There’s basically zero wasted space in the motherboard side of the case – everything fits extremely snugly. The ASUS Z790-I we’re using has a particularly bulky rear I/O cover that barely clears the radiator section at the top, and we had to angle the board in from the bottom edge first to make it fit.
The top edge of the board is barely accessible with the radiator and fans in place, but that can be mitigated by leaving the cooler out or not fastened in place until finished with the motherboard.
Power supply installation is pretty straightforward, except for one note. Depending on where the on/off switch is located on your power supply, the thickness of the cooling solution, the size of the GPU, etc., it can affect the accessibility of the power switch itself. We would recommend toggling it on before you install it. However, if you didn't toggle it on, you can remove the four screws from the cooler bracket to get access to the power switch. With the cooler installed, we can still just barely access the outer edge of the PSU. Depending on the choice of power supply, and more importantly the length of the GPU, it may become less accessible.
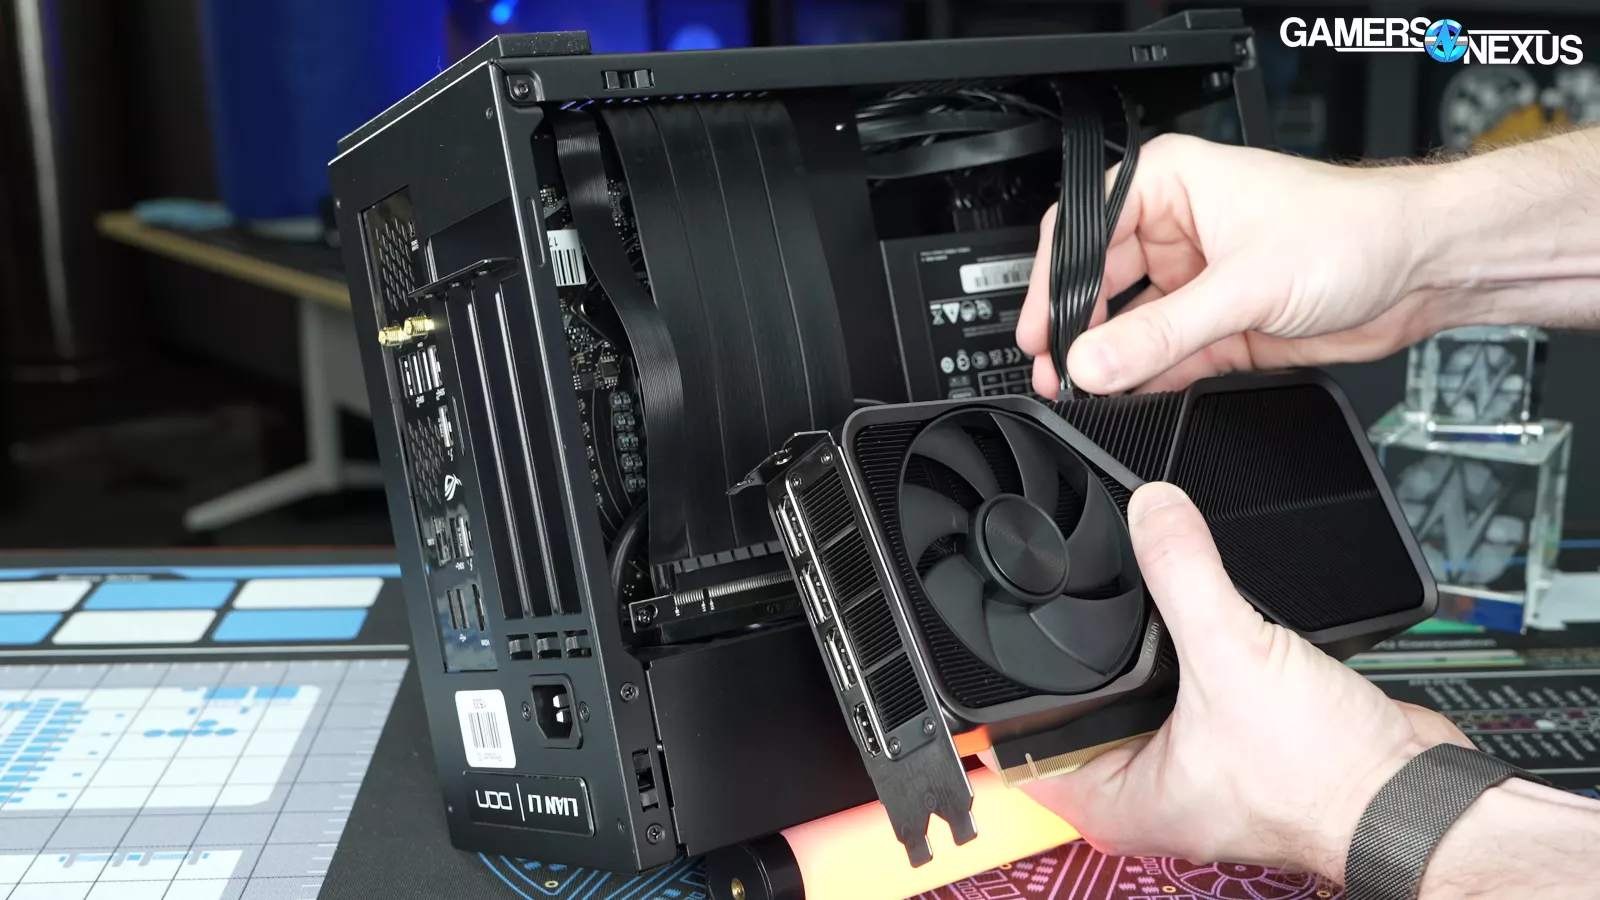

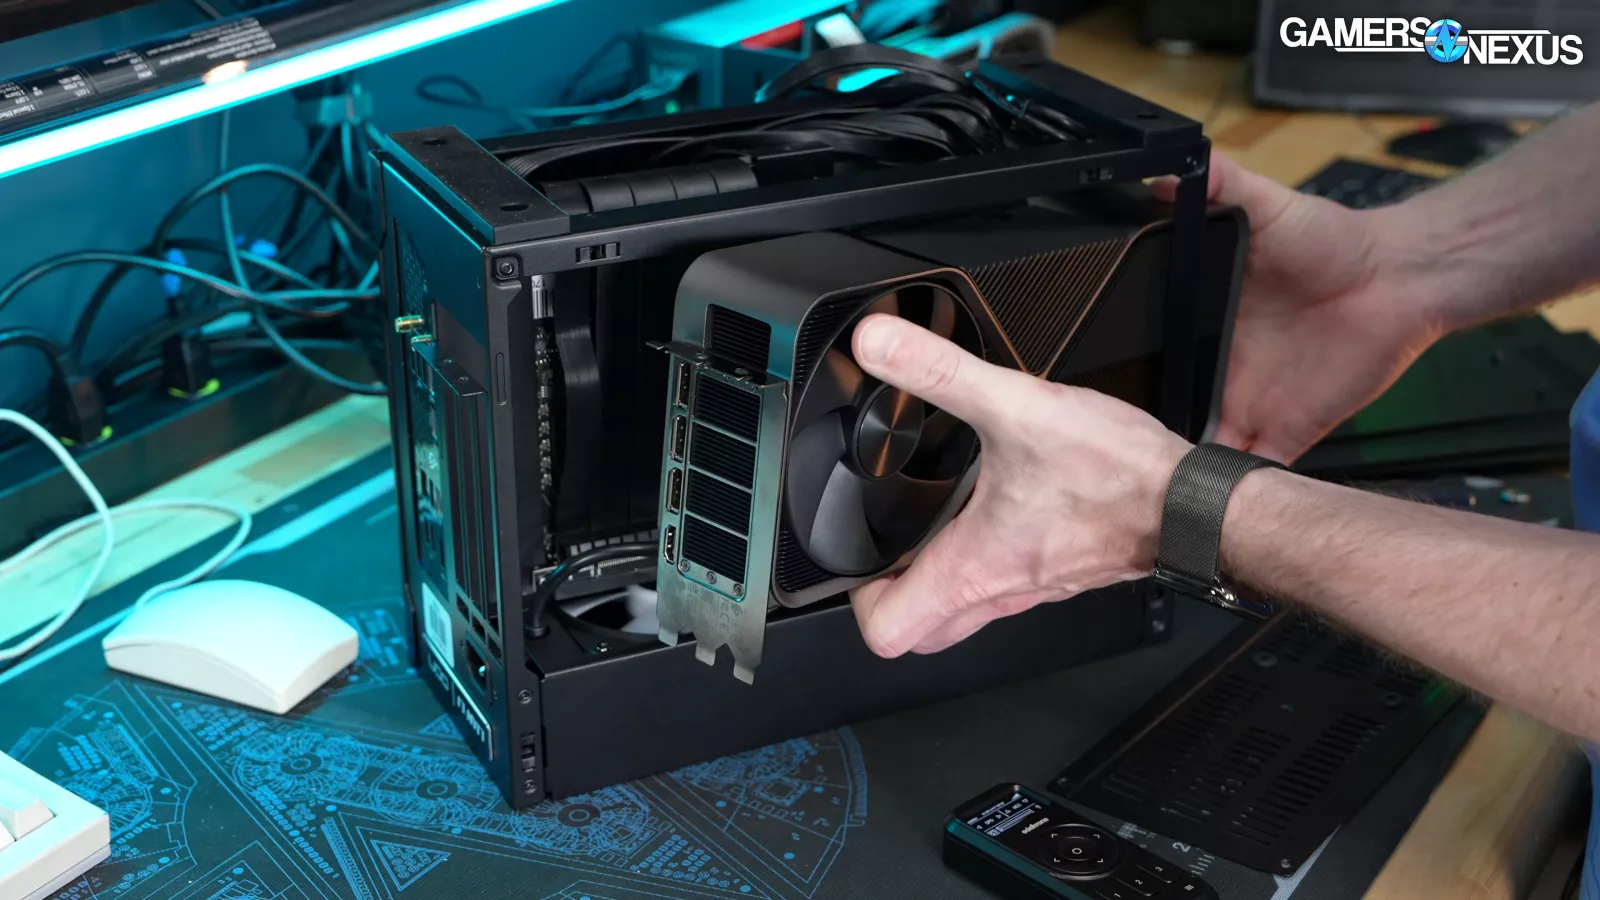
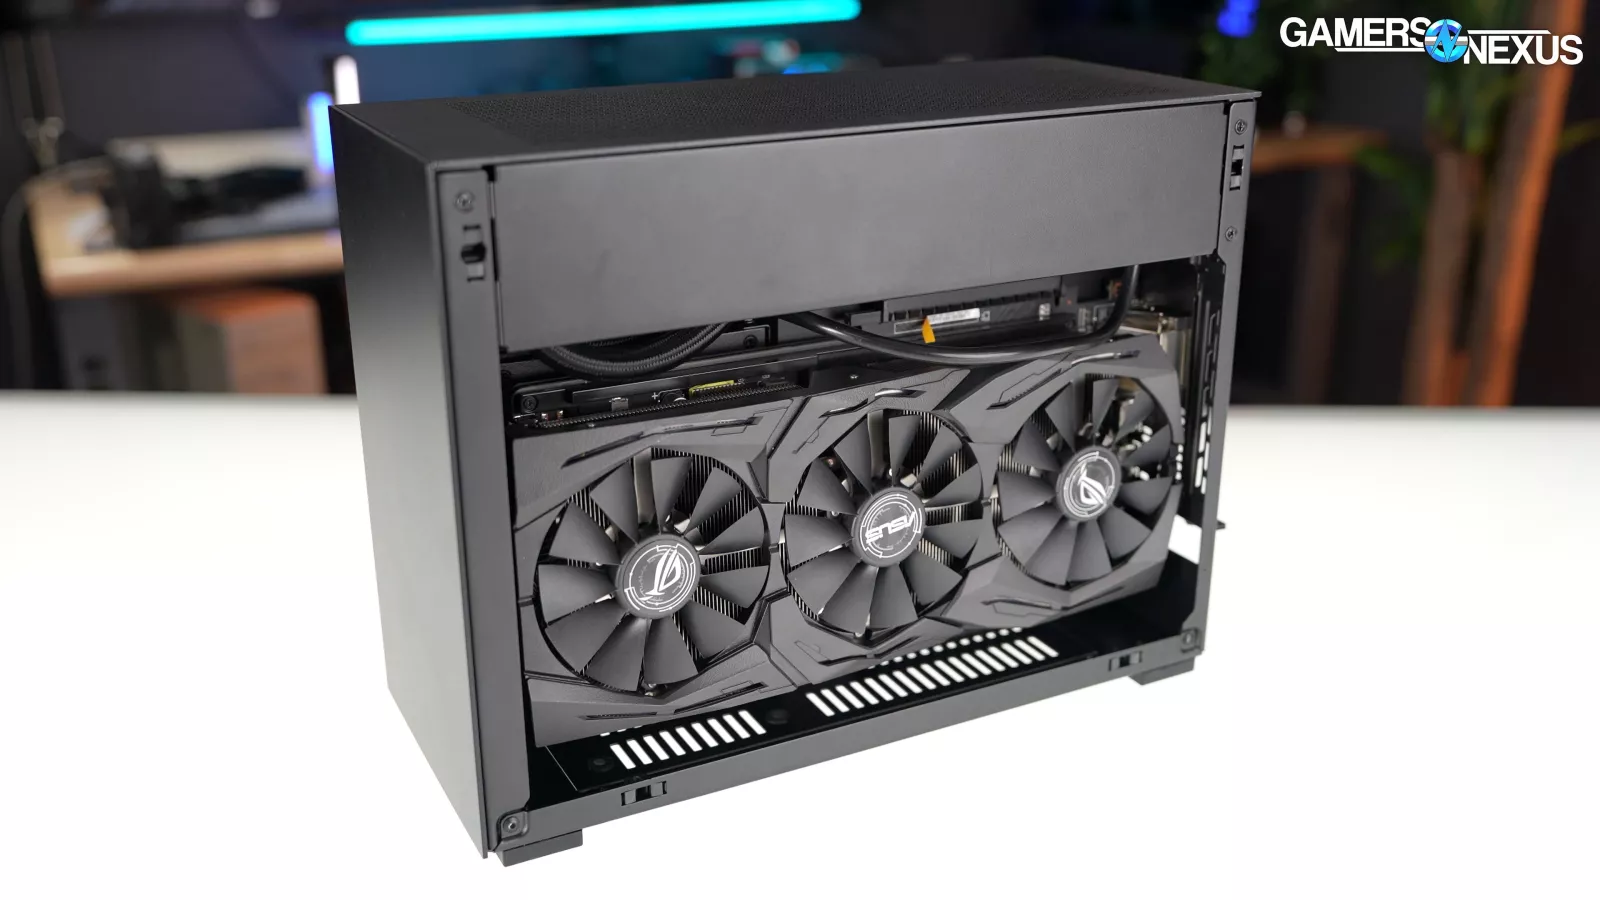
Installing the GPU into position on the included riser cable is made easiest by turning the whole case upside down. We didn’t encounter any real problems with this process, and the space within the GPU chamber is generous considering the overall size of the case and the size of modern video cards. We’ll talk more specifics about GPU fitment a little later. Once the card is screwed in and the case is upright in its final position, the GPU ends up upside down.
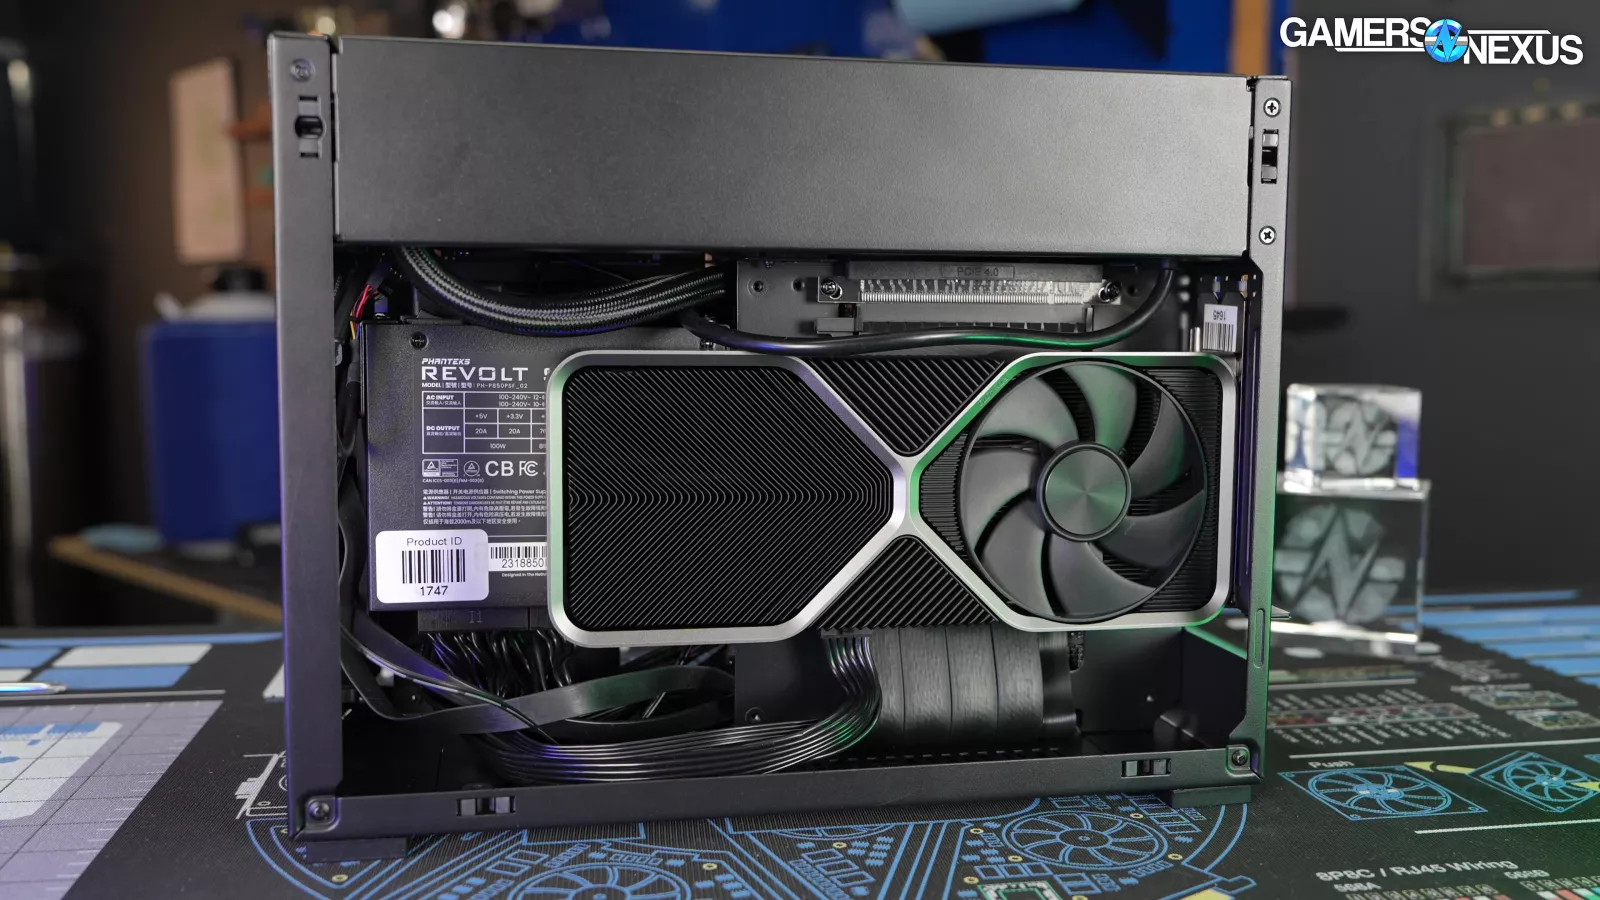
Thermally speaking, in most instances being upside down like this won't really hurt anything. A GPU with a vapor chamber is already in effectively its worst orientation when it's installed in a standard ATX case horizontally, because it’s fighting gravity at that point. So, the GPU being upside down in a vertical orientation like it is in the H4-H2O isn't going to hurt the performance of the cooler in any meaningful way – at least not based on what we've researched. You can see our interview with NVIDIA's thermal engineer Malcolm Gutenburg for more discussion on the topic.
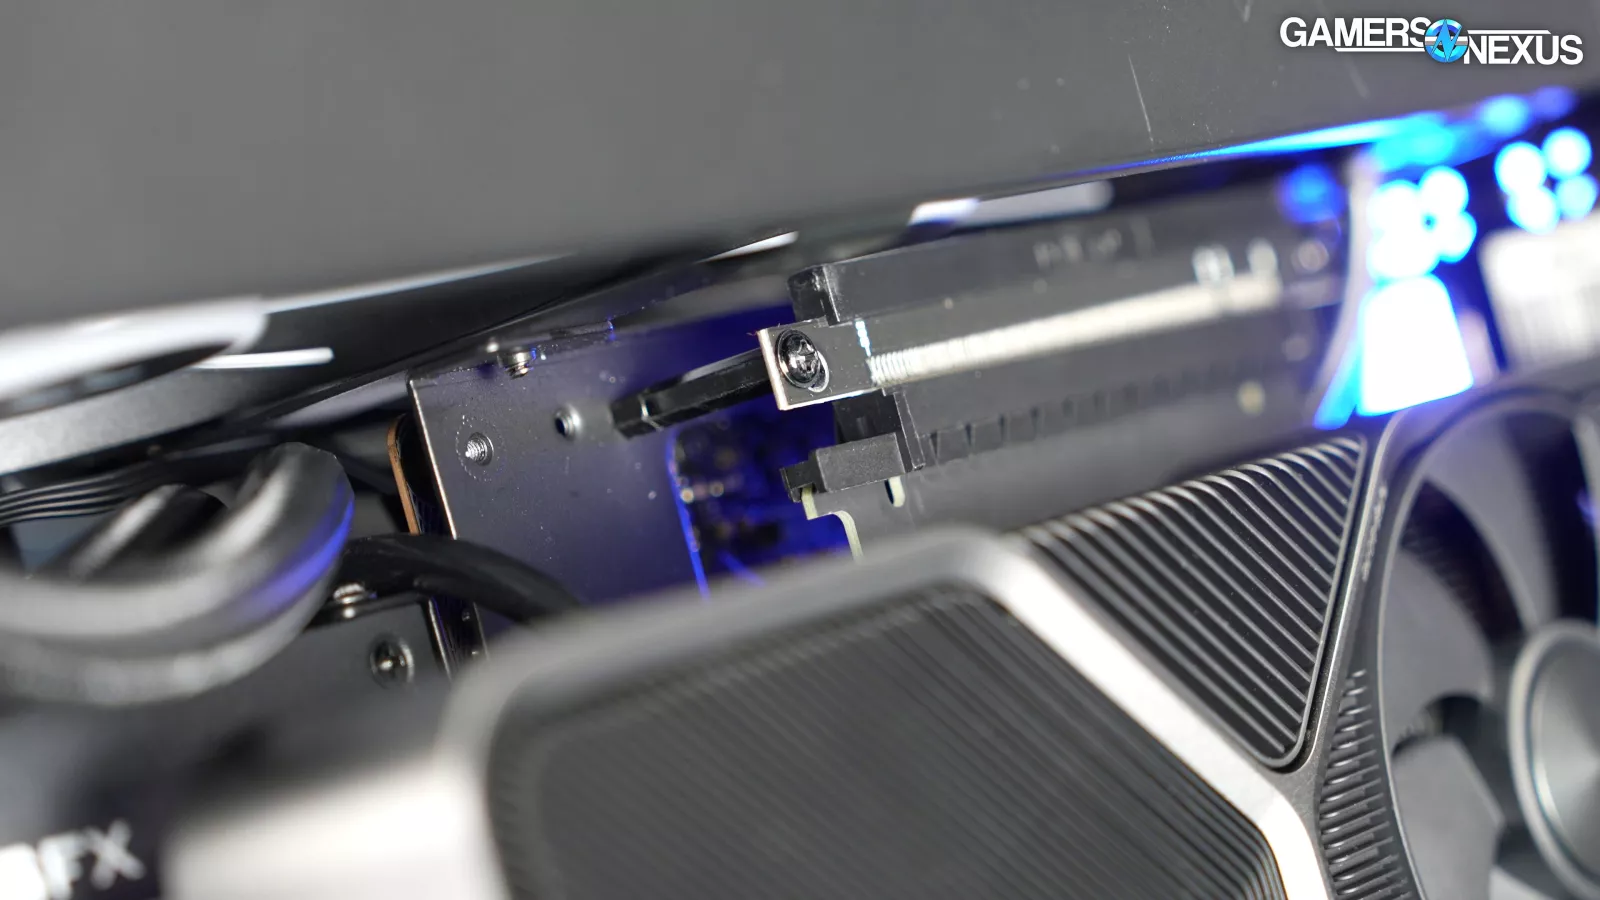
There’s some flexibility for 2-slot cards – two standoffs are included that allow the user to mount the GPU into the outer two slots rather than the inner two. This is intended to help by giving the GPU more direct access to fresh air through the side panel. We tested in both configurations for the thermal section later.
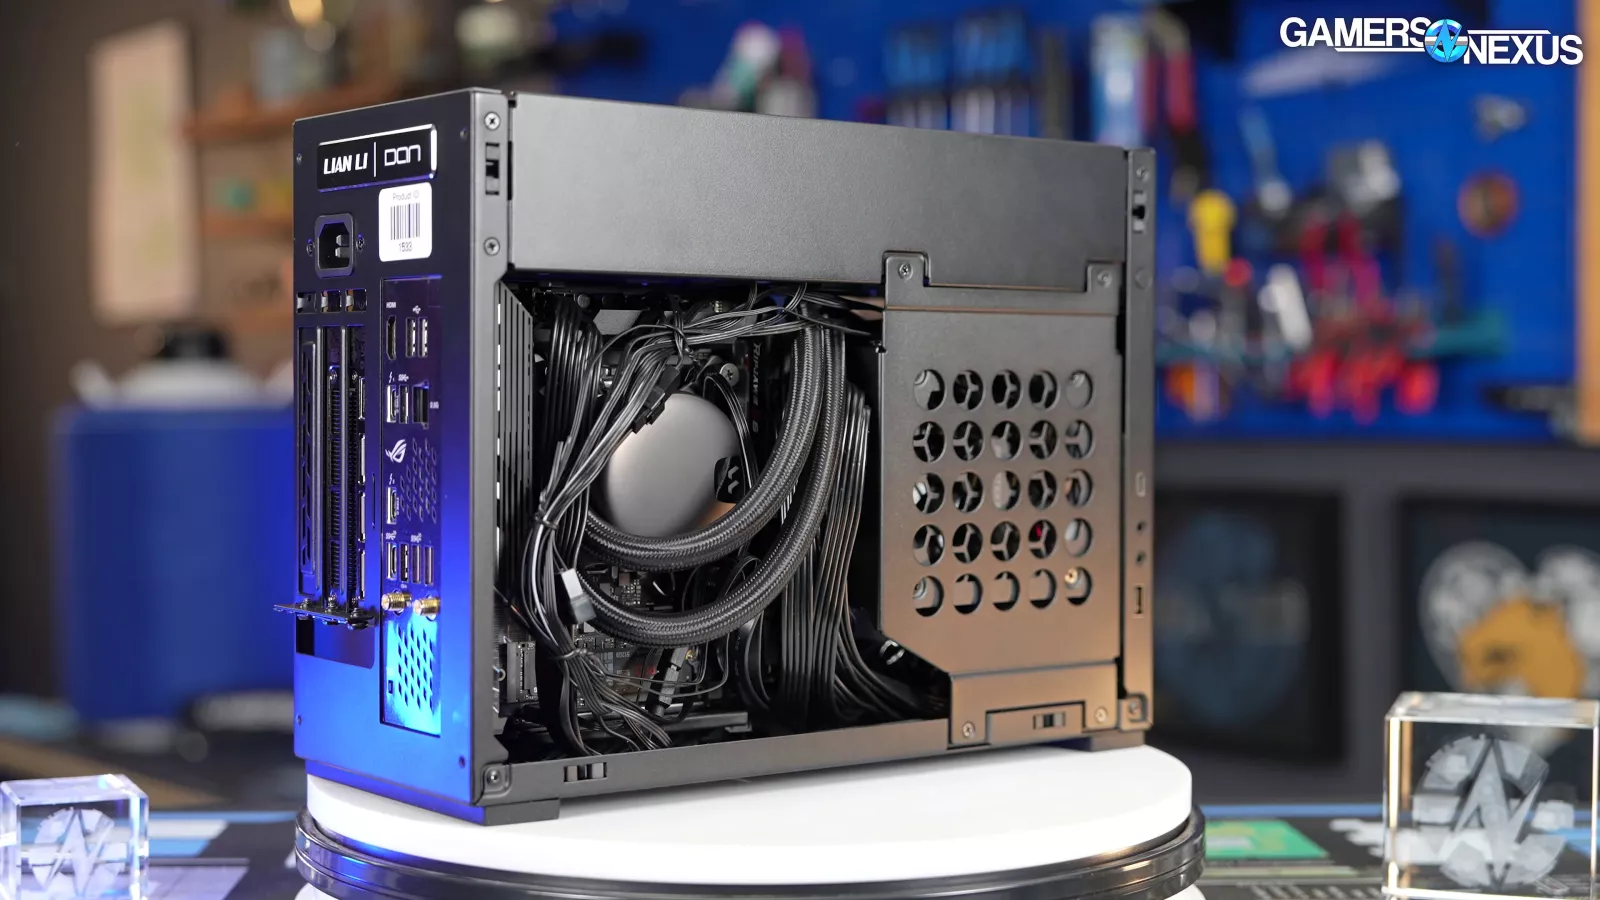
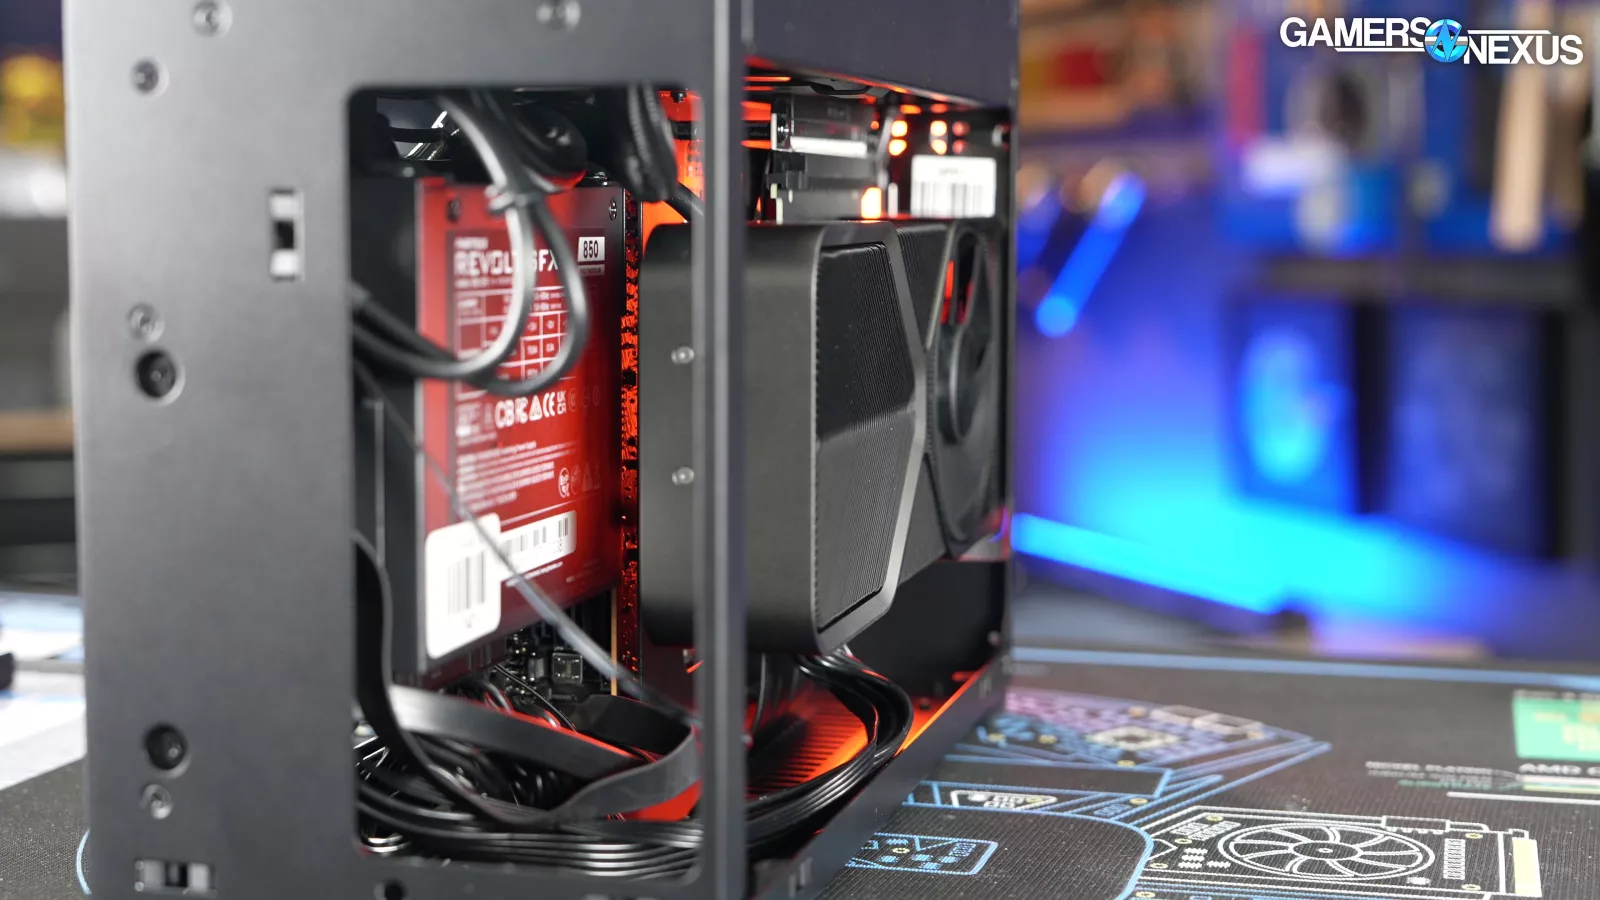
Cable Management Trade-Off
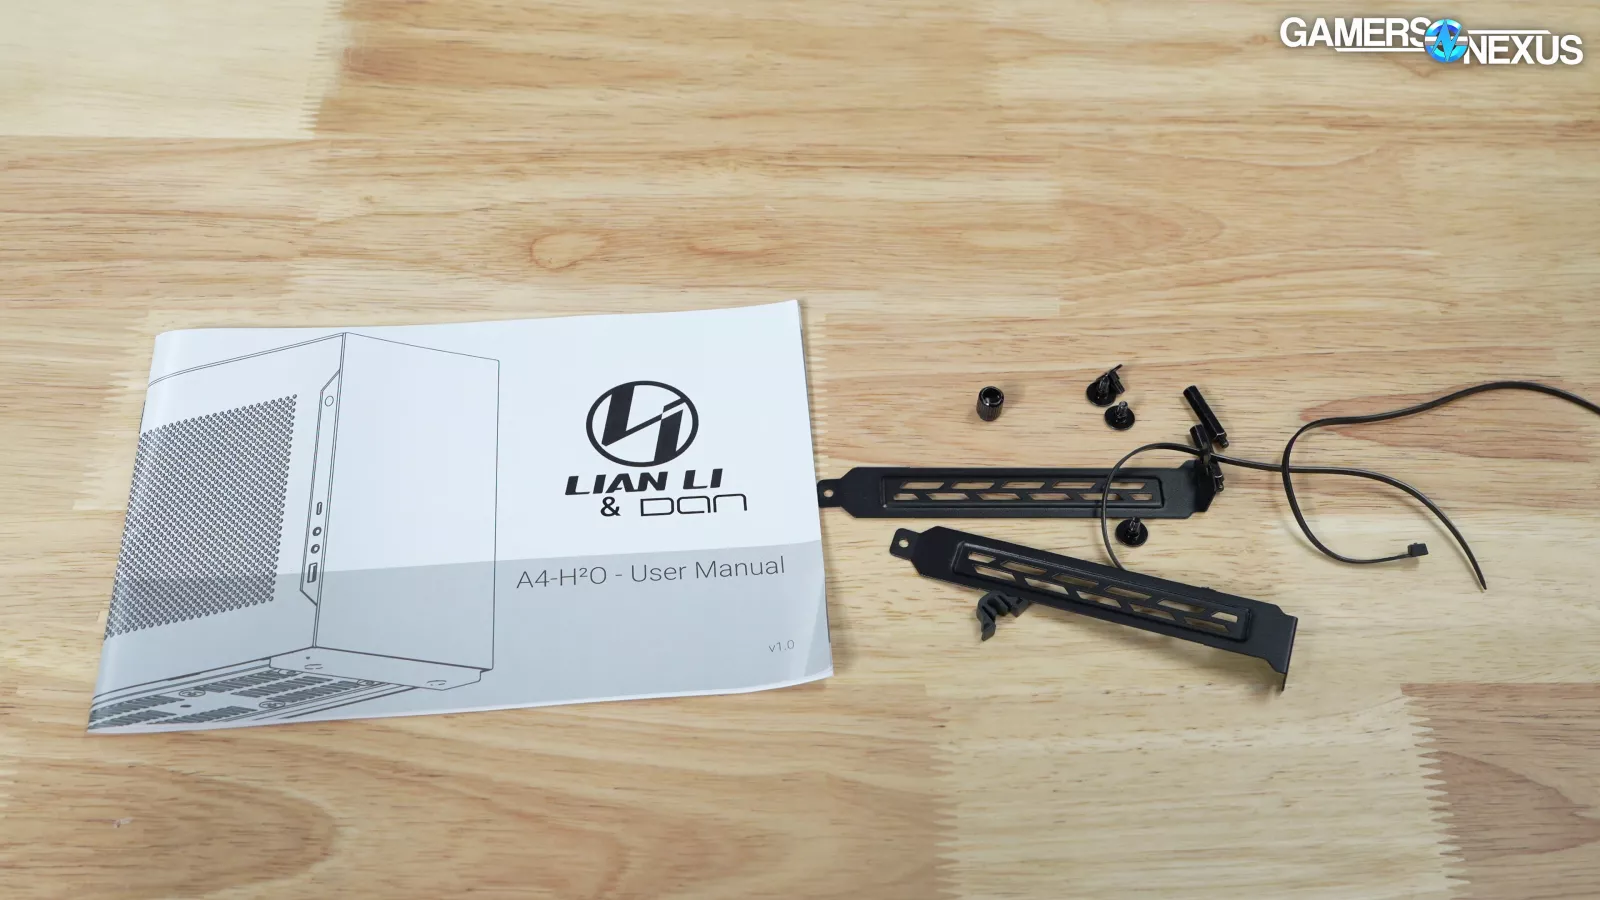
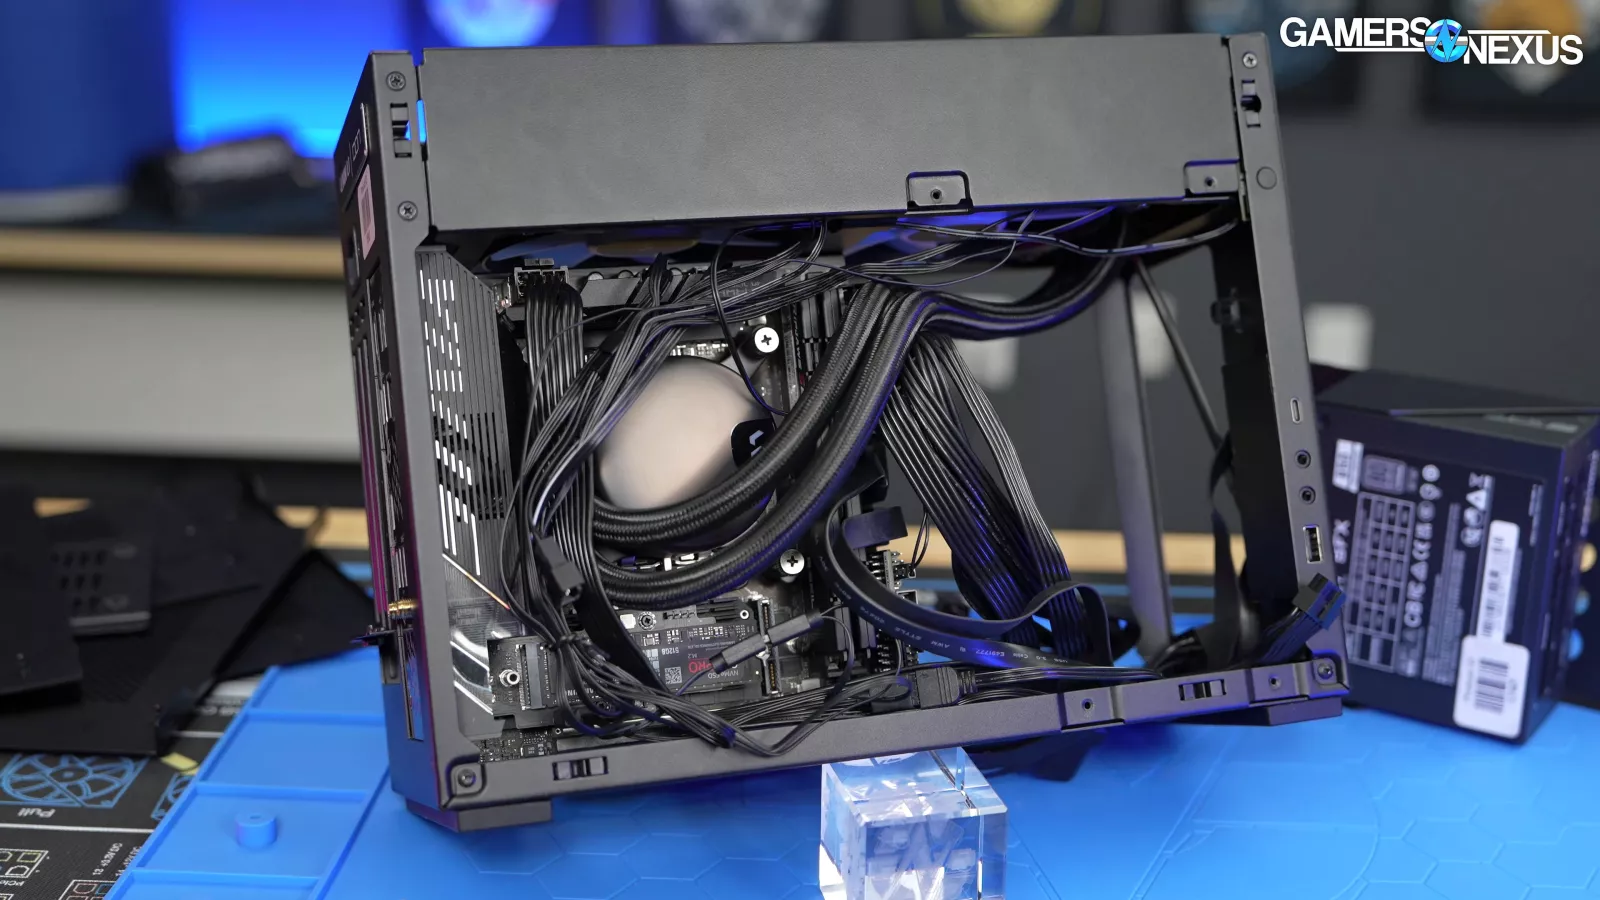
Our main complaint with the A4-H2O is cable management – it’s more non-existent than it is bad. There aren’t any dedicated cable management features or tie-downs. Lian Li just throws in two cable-ties and an implicit “good luck.” Compacting the components this close together leaves the user with very limited areas to shove or tie up cables. There’s really only under the power supply or in any area of the GPU side that isn’t occupied by the GPU itself. It’s definitely workable. You’ll just spend some time to get it really nice -- but in ITX, that’s expected.
Our Fractal Lumen S24 RGB has individual cables for the fans and RGB of every component, so fishing them into the case and later finding places for the excess length to go was a challenge. We could have managed the wires in a more tidy fashion elsewhere within the case, but we wanted to keep the GPU side uncluttered for GPU fitment testing.
The motherboard side of the case leaves the user without any other choice but to lay cables over the top of the board until they can go to an area of free space. With careful planning and a lot of patience we’re sure users could end up with a clean looking build, but it’s not easy. We’d recommend against fans with individual RGB cables for a start, though.
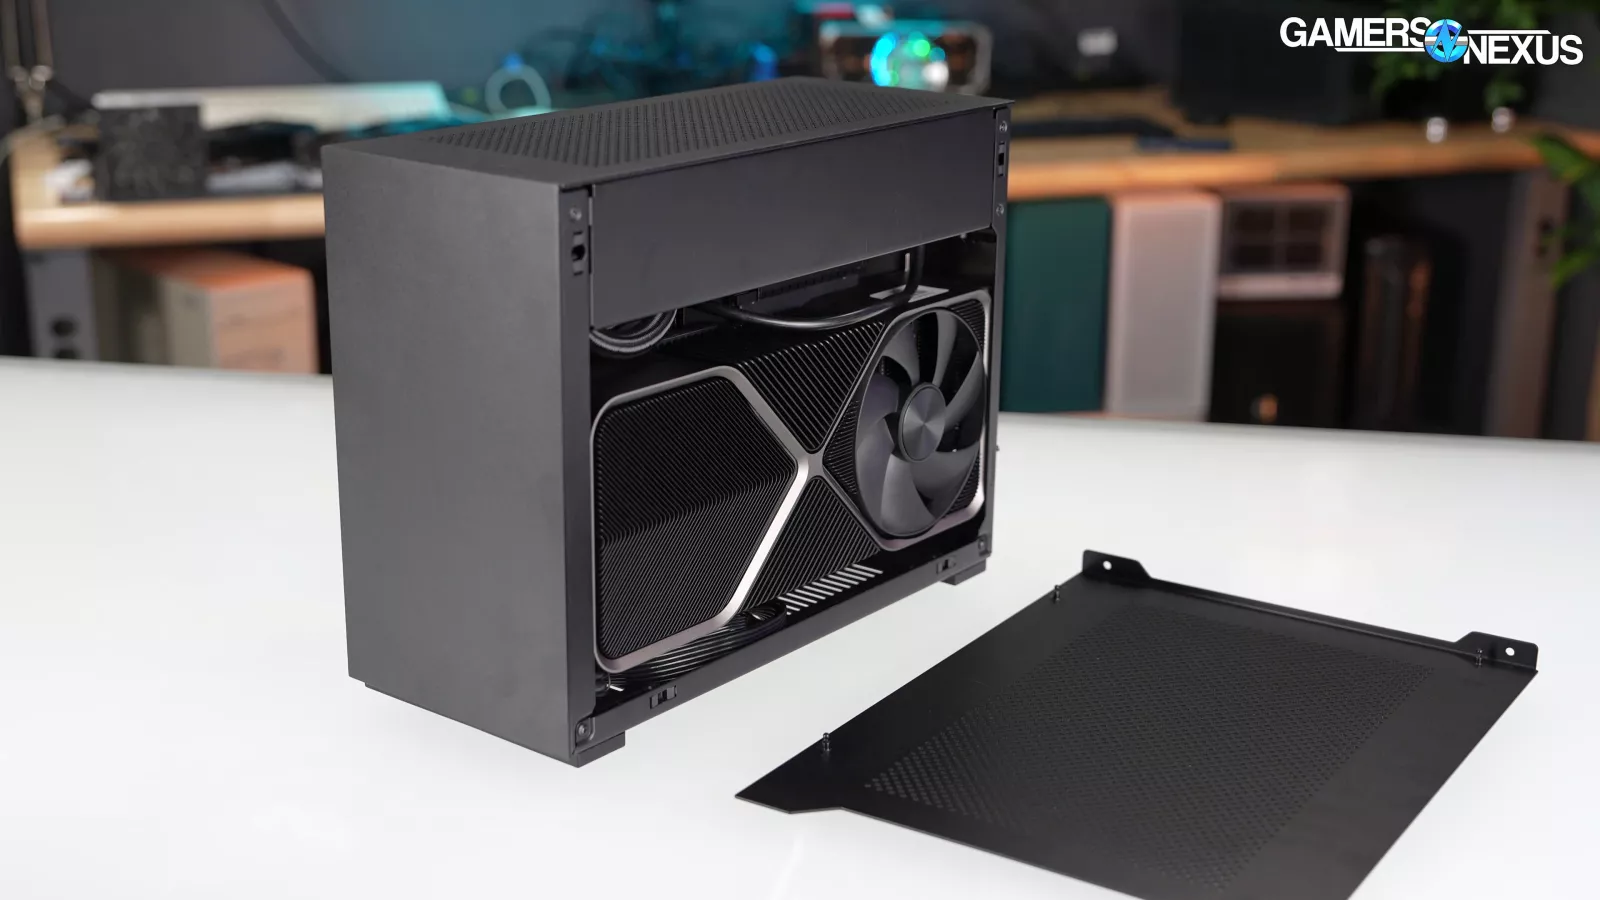
Fit and Finish

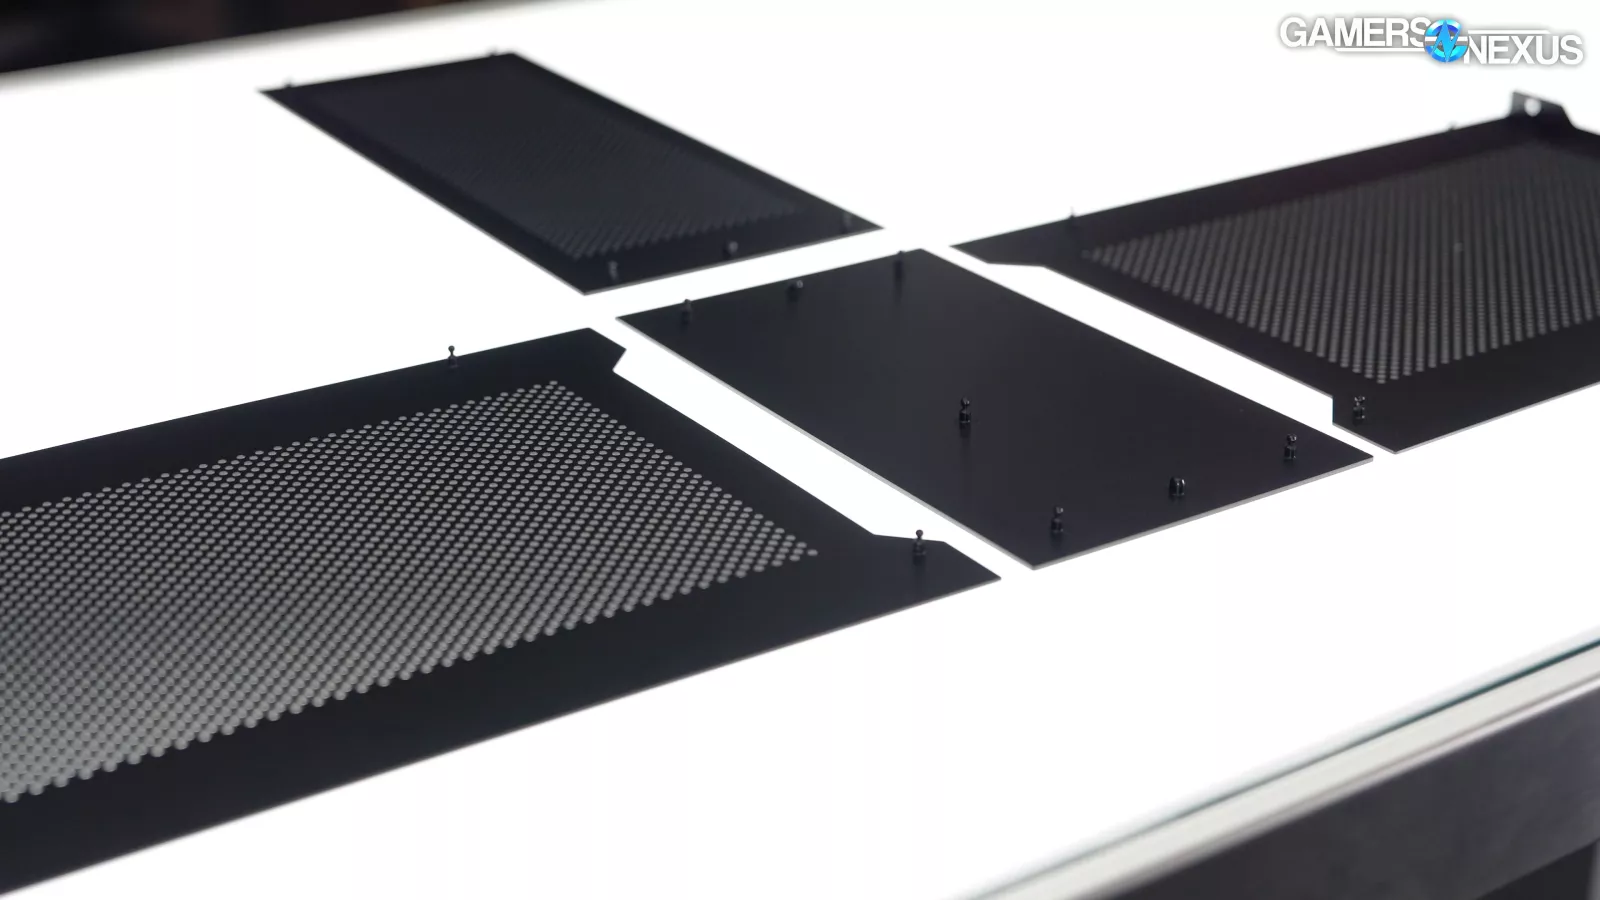
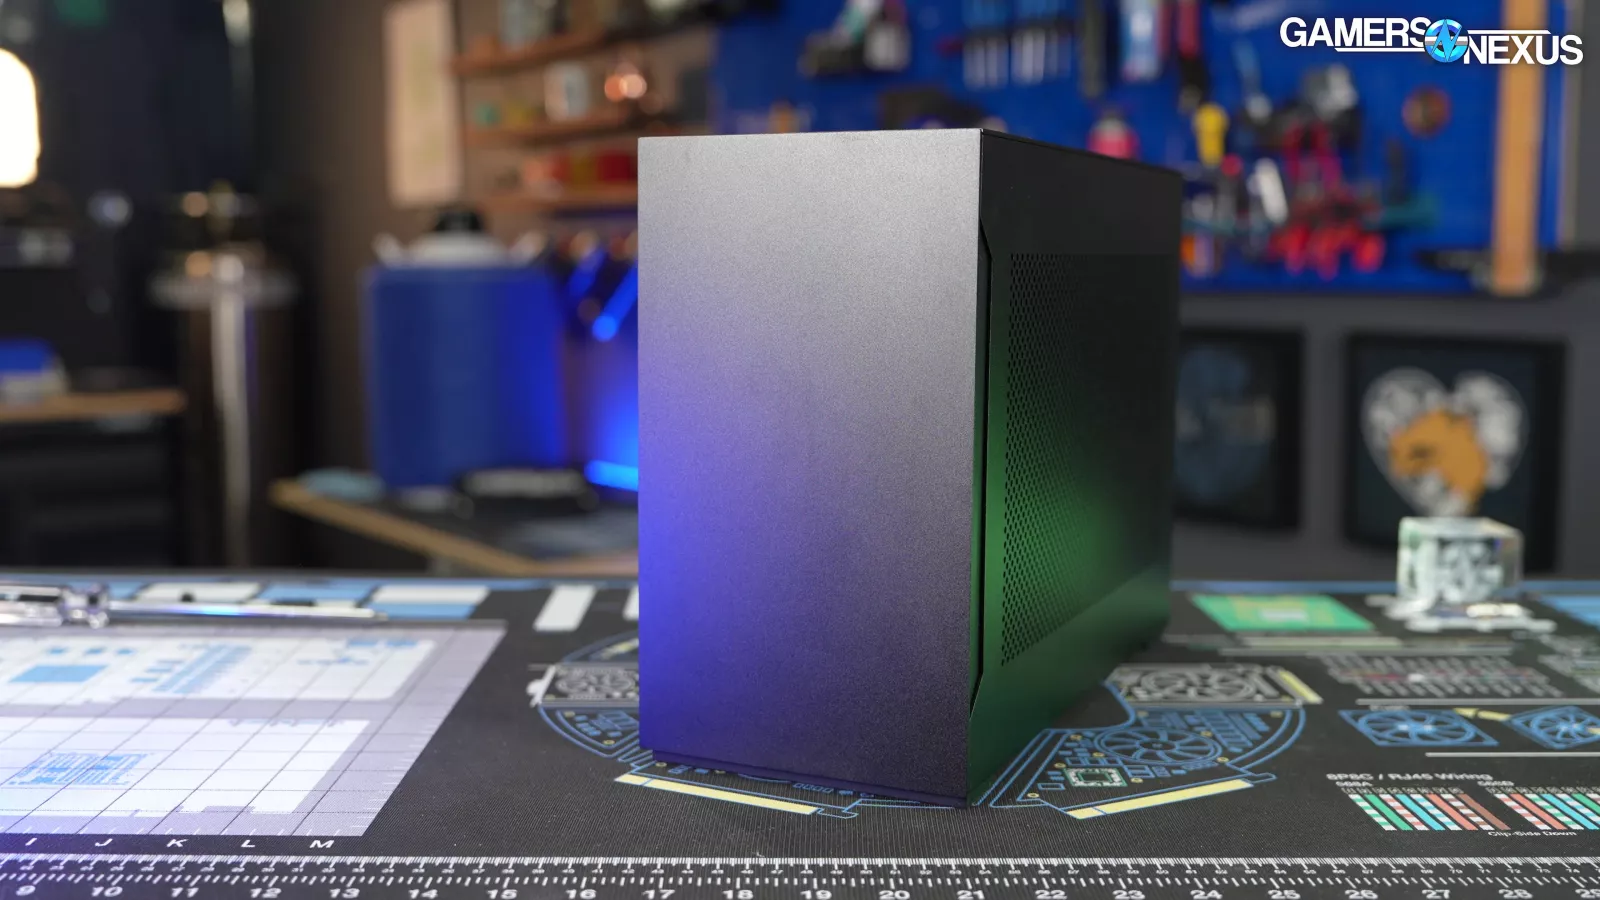
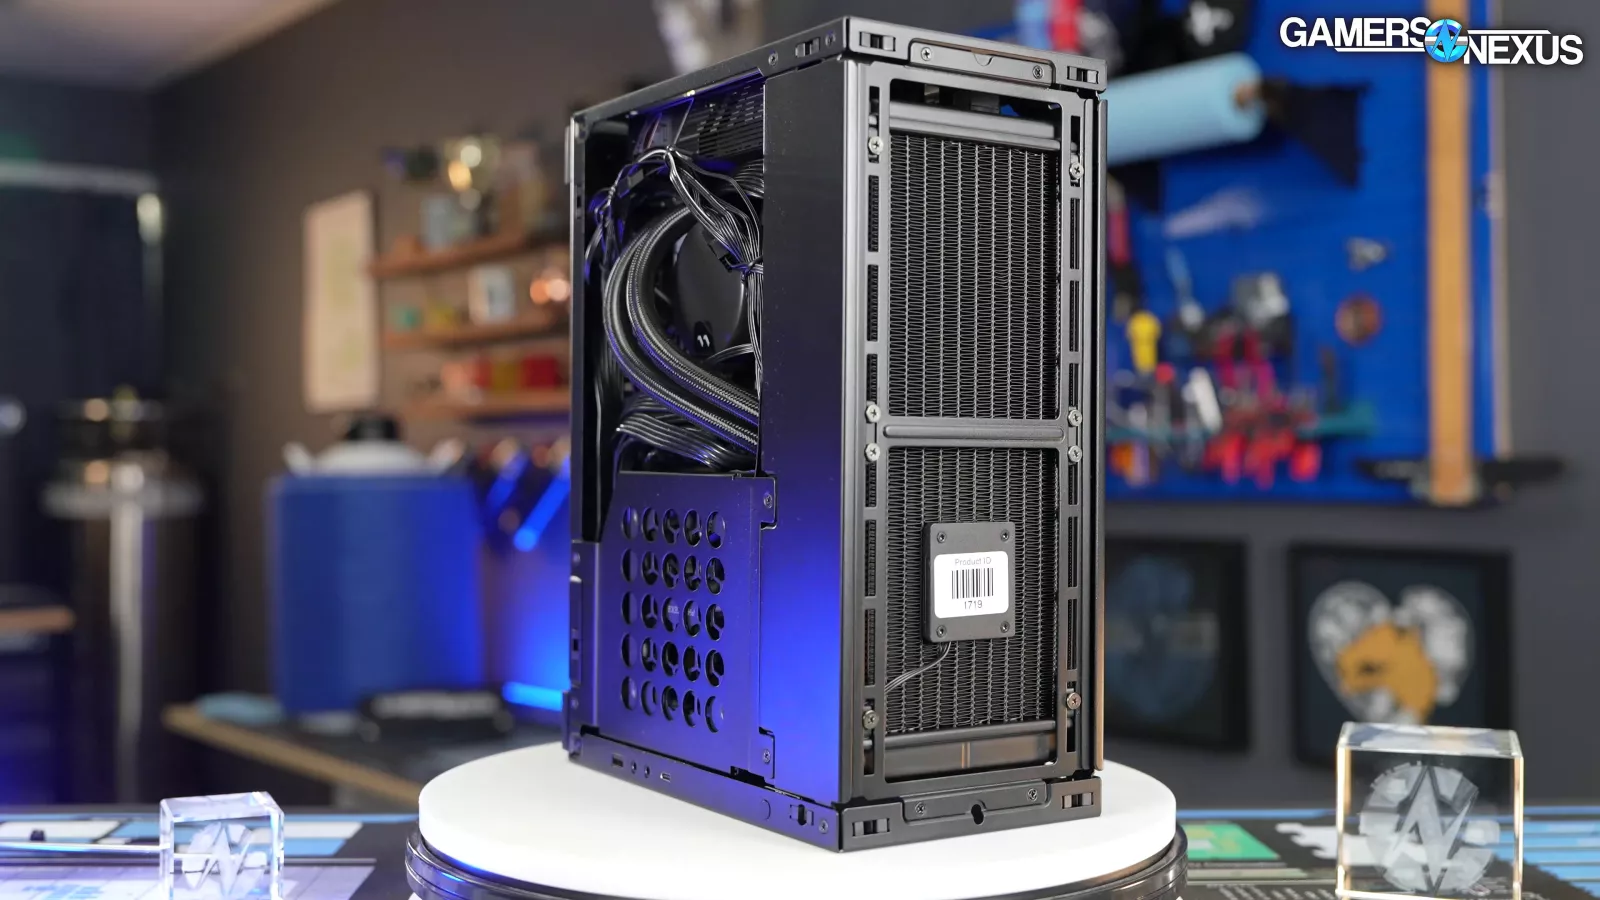
The case is constructed in a straightforward, almost formulaic way with flat exterior panels attached to an inner frame via pushpins. In this respect it’s similar to other Lian Li built cases like the SSUPD Meshroom and the original Ncase M1.
Despite the use of thin stamped metals throughout, the case maintains surprising rigidity. We were impressed with the overall sturdiness of the case. Thin internal pieces do flex when manipulated, but as assembled, the build quality is good. That’s important for a case that you might actually take from place to place in a semi-mobile setup. Lian Li has obviously gotten this method of construction down to a science – balancing simple materials and mature manufacturing methods to make a competent final product.
Fitment and Clearance
CPU Cooler Fitment

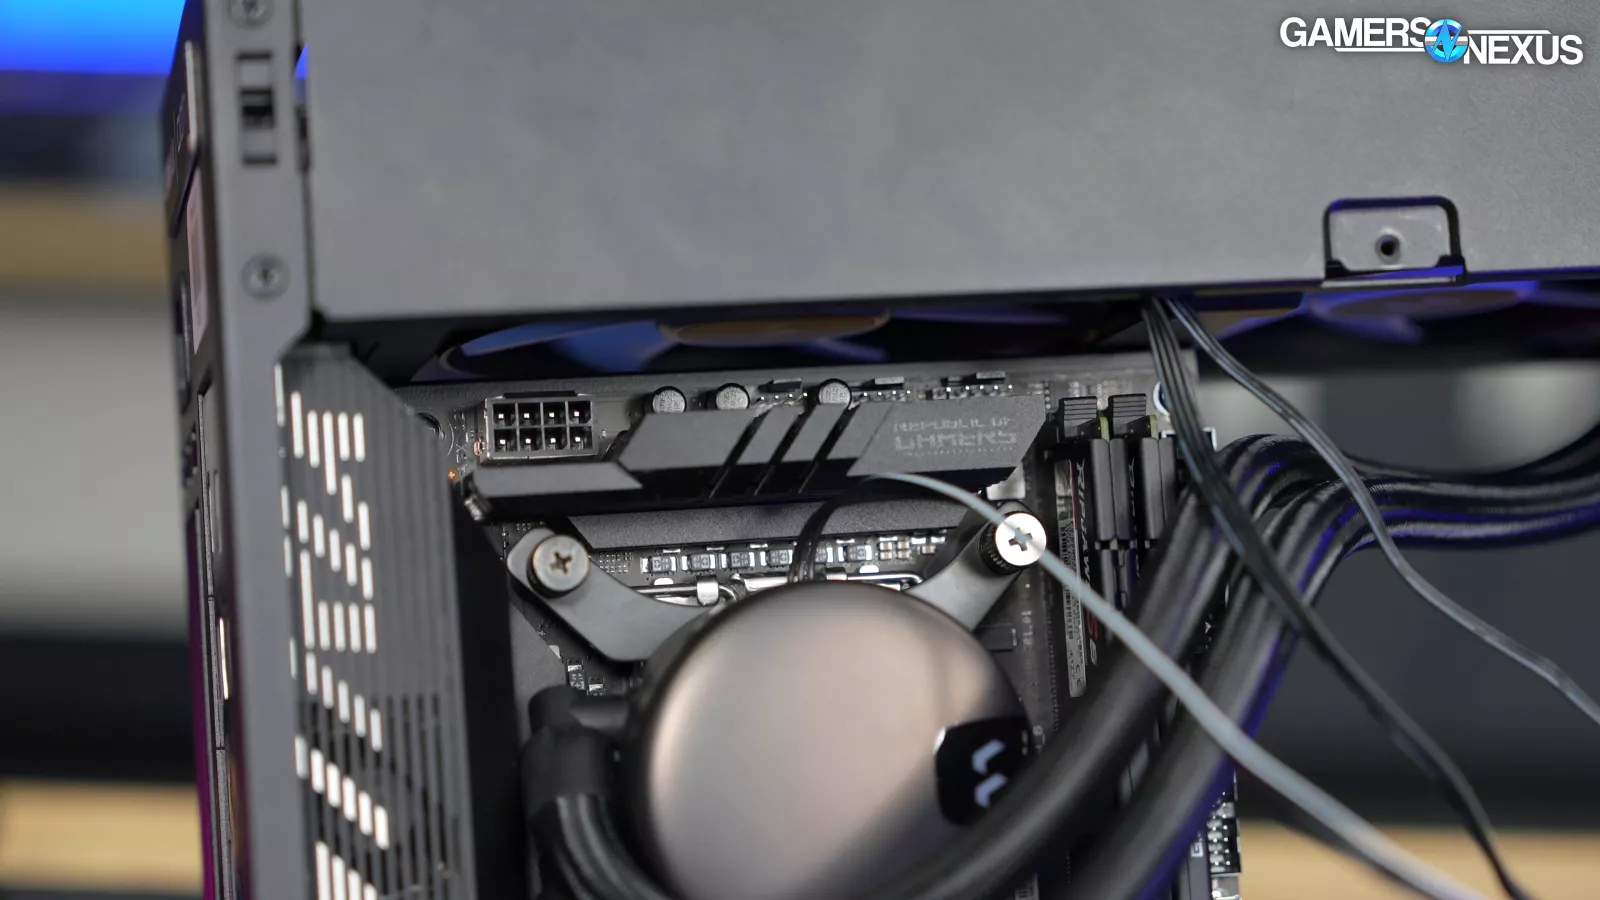
The CPU cooler clearance is only 55mm, but running an air cooler goes against the main selling point, which is support for 240mm liquid coolers. Though it is important to keep that clearance in mind for the CLC pump block – it’s best to opt for coolers where the tubes exit the side rather than the top.
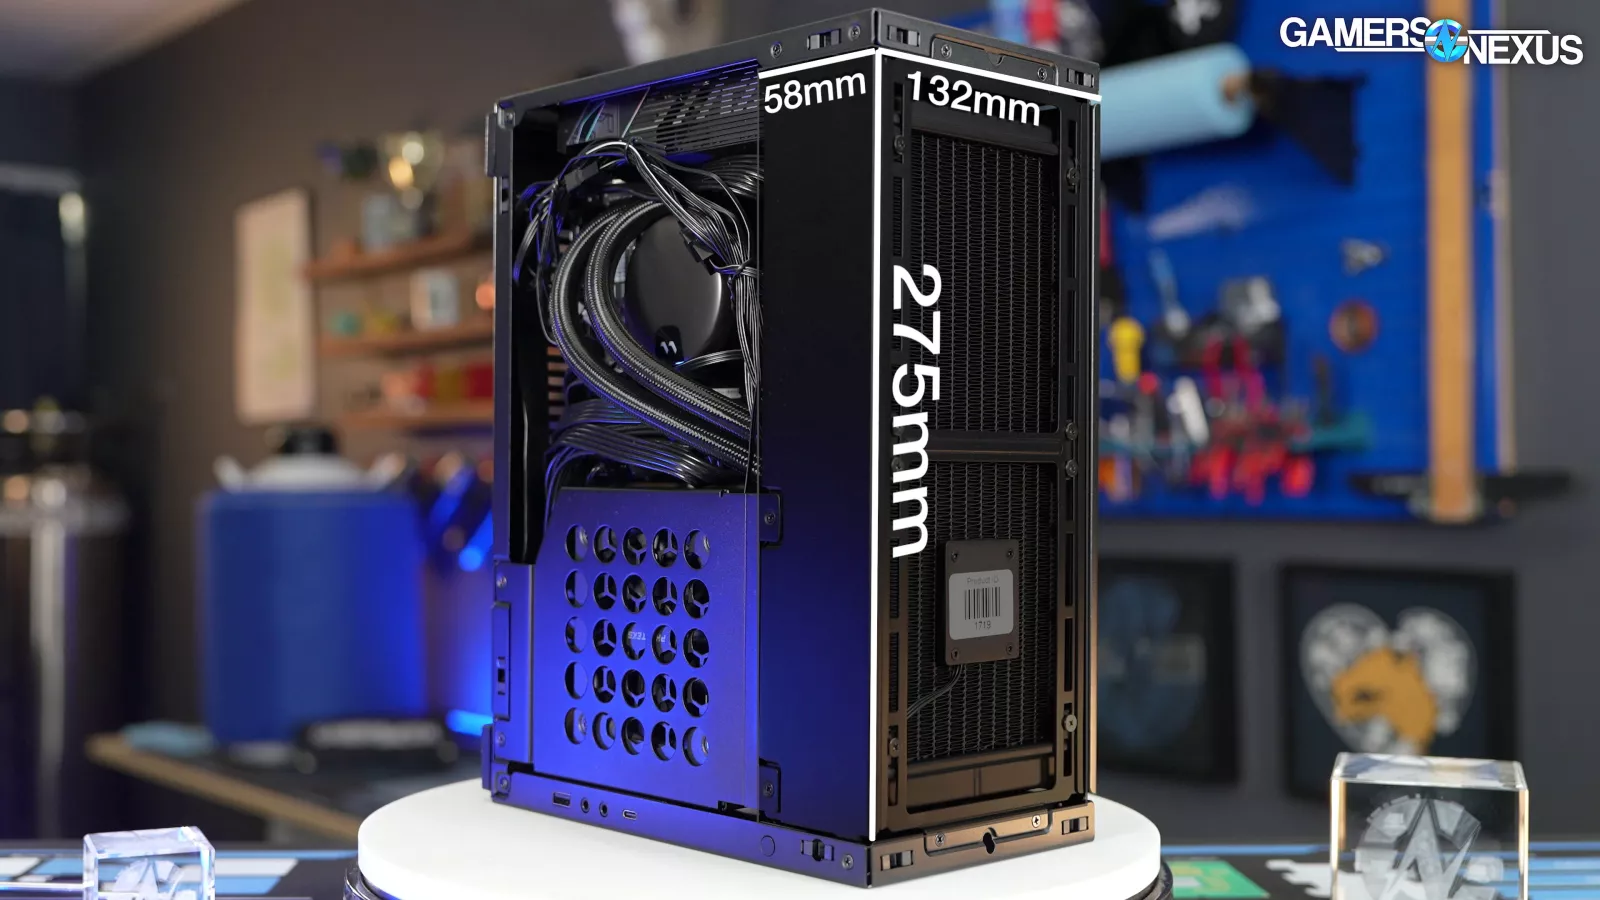
The upper area where the radiator and fans sit measures at roughly 275mm long, 132mm wide, and 58mm deep. This is tight enough that users need to pay close attention to the dimensions of the cooler they want to use. The Arctic Liquid Freezer II 240, for example, doesn’t fit.
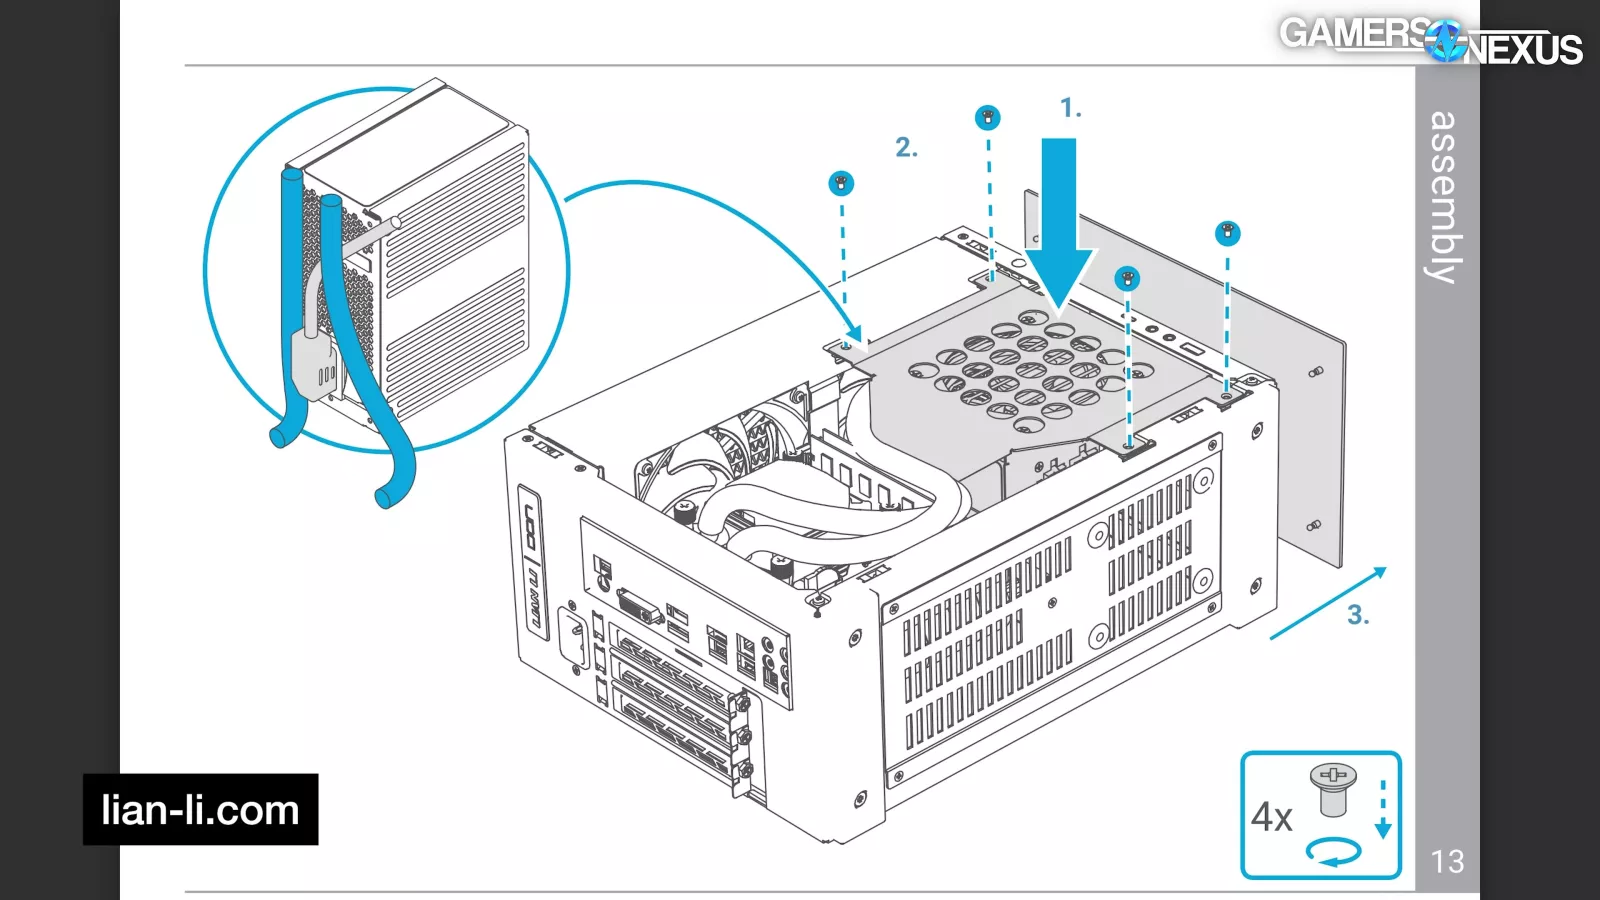
The manual’s suggested tube routing represents an ideal case that isn’t easy to replicate with the Fractal S24 CLC we have. We ended up needing to squish down on the tubes with the side panel to make it close, but we don’t think it’s to a problematic degree. Users should definitely experiment with different mounting orientations and tube directions for best results.
GPU Fitment
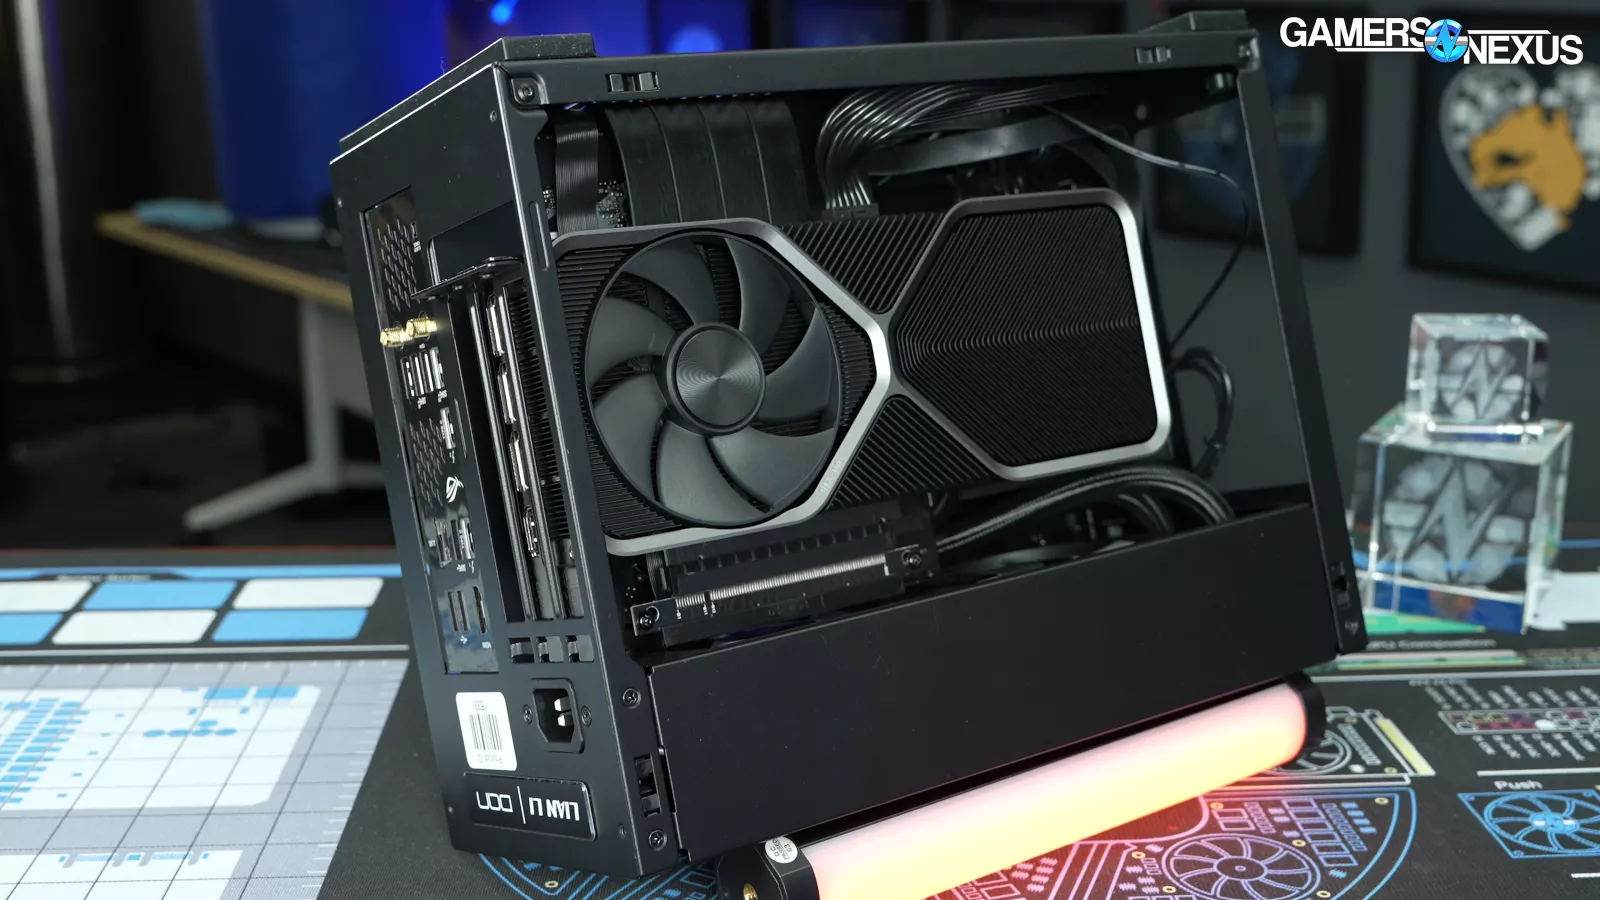
The GPU side of the case is spacious and forgiving compared to the motherboard side. GPUs up to 322mm long, 150mm tall, and 3 slots (60mm) thick are supported. There’s even considerable space (by ITX standards) over the bottom of the upside-down GPU.
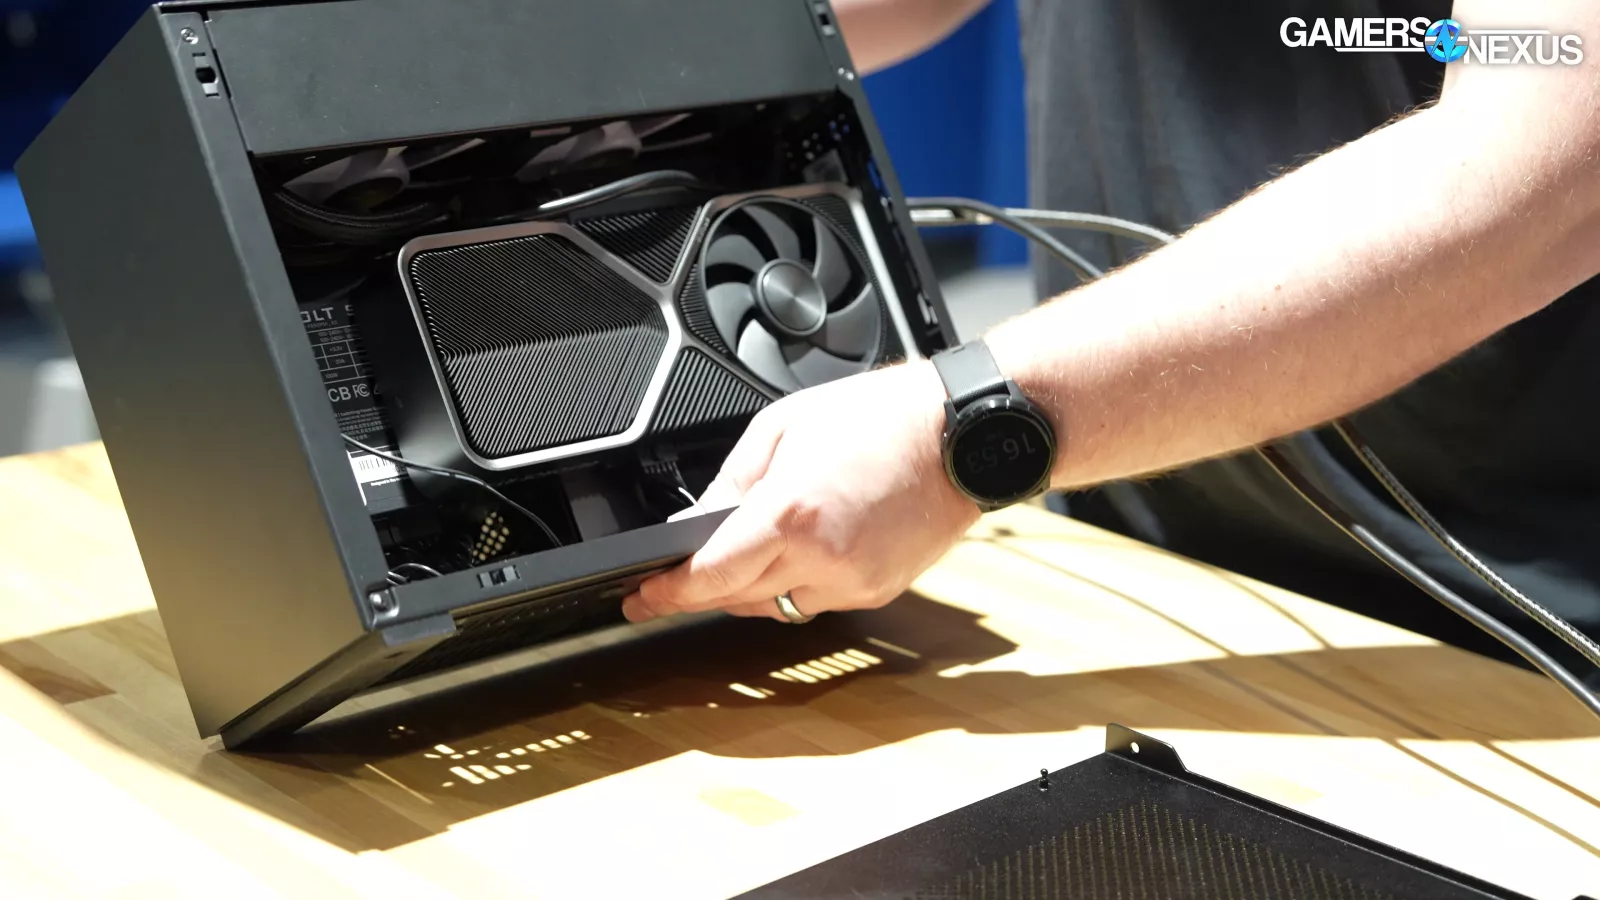
The front of the case has a hole that’s supposed to help with installing particularly large GPUs. Lian Li shows it being used to load the GPU in from the front of the case, but in practice it’s pretty awkward to do with the liquid cooler tubes in the way. More practically, the user can angle the long end of the card towards the hole from the inside, then bring it back in to slot the card.
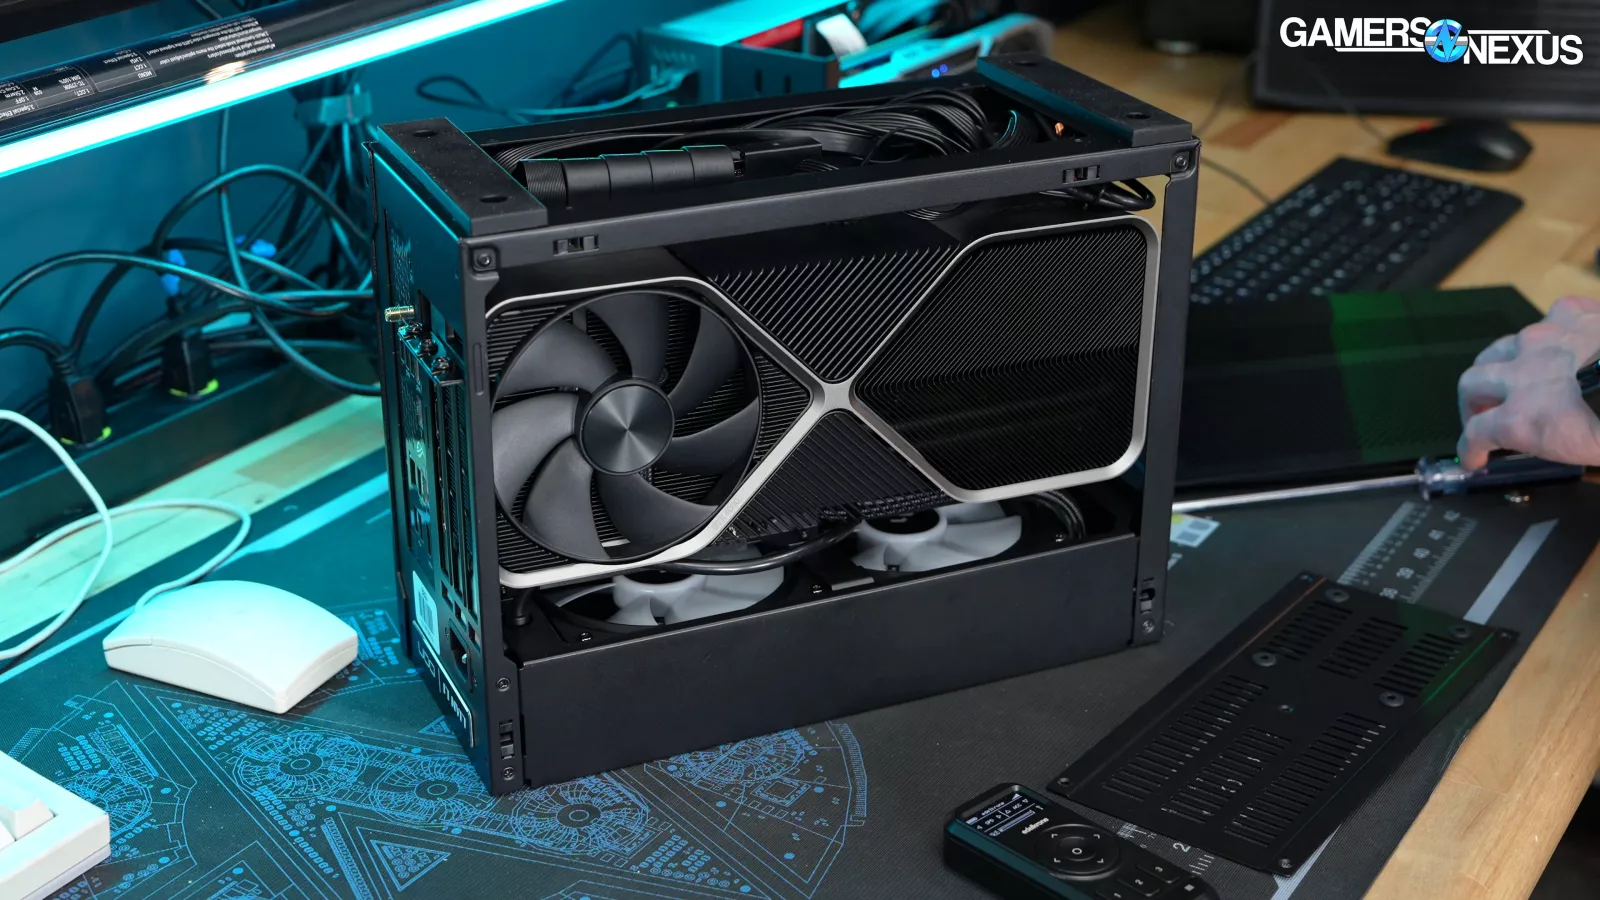
Installing the RTX 4080 or 4090 FE is difficult but not impossible. Once it’s in there it takes up almost all of the available space in such a way that makes us think the size of this cooler was a critical dimension during the design process.
Since the vertical space is so generous, even exceptionally tall cards like the (obsolete) ASUS Strix Vega 64 fit fine. The XFX RX 7700 XT is too long to actually fit, but thanks to the open hole at the front it’s technically possible for GPUs of infinite length to slot in.
PSU Fitment
Another piece of feedback we got after the Fractal Terra review that we actually agree with was that despite the power advantages of SFX-L, most small form factor builders still opt for standard SFX power supplies for ease-of-use sake.
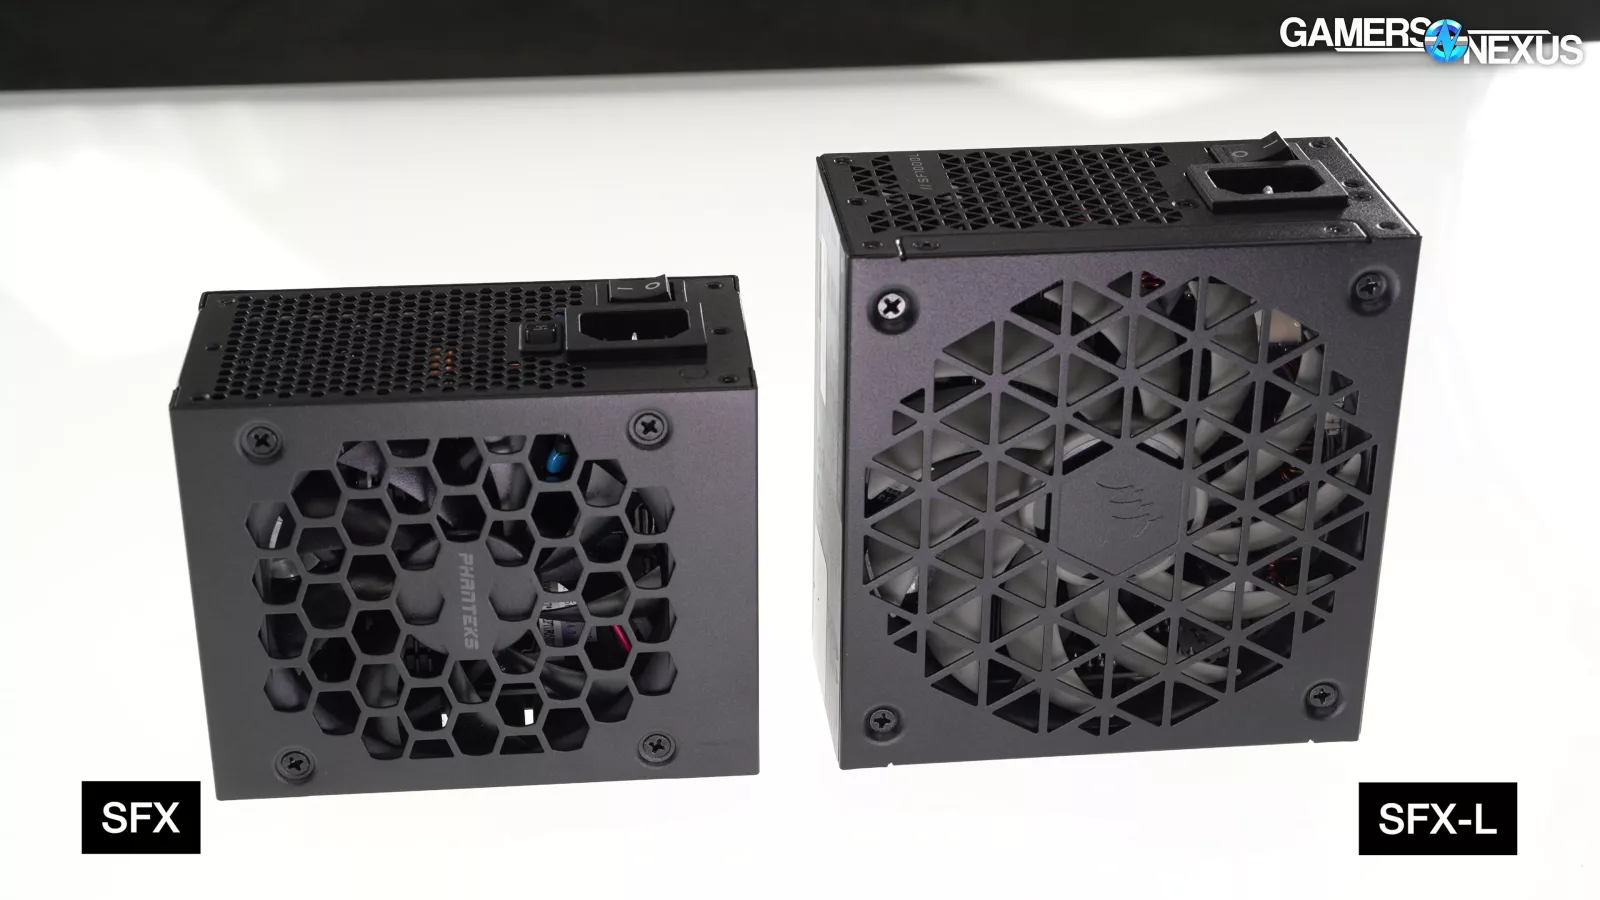
A proper ATX 3.0 compliant 850W unit is enough to power nearly any consumer build as well, so we’ll be opting for this Phanteks Revolt SFX as our standard going forward. We’ll use the Corsair SF1000L for SFX-L fitment testing.
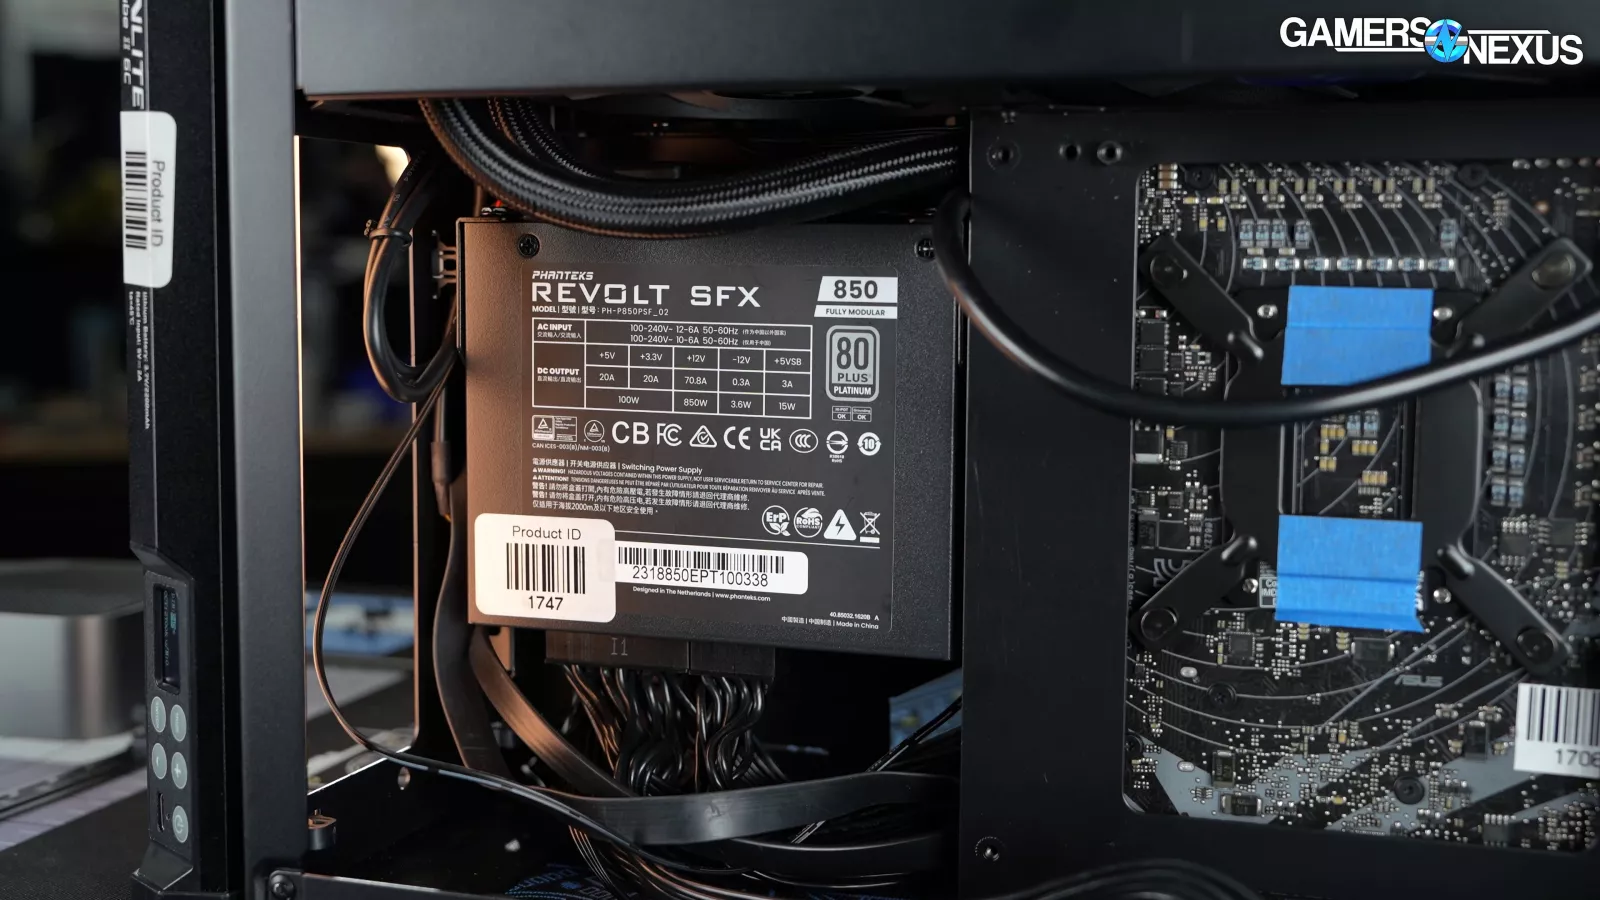
Phanteks Revolt SFX 850W 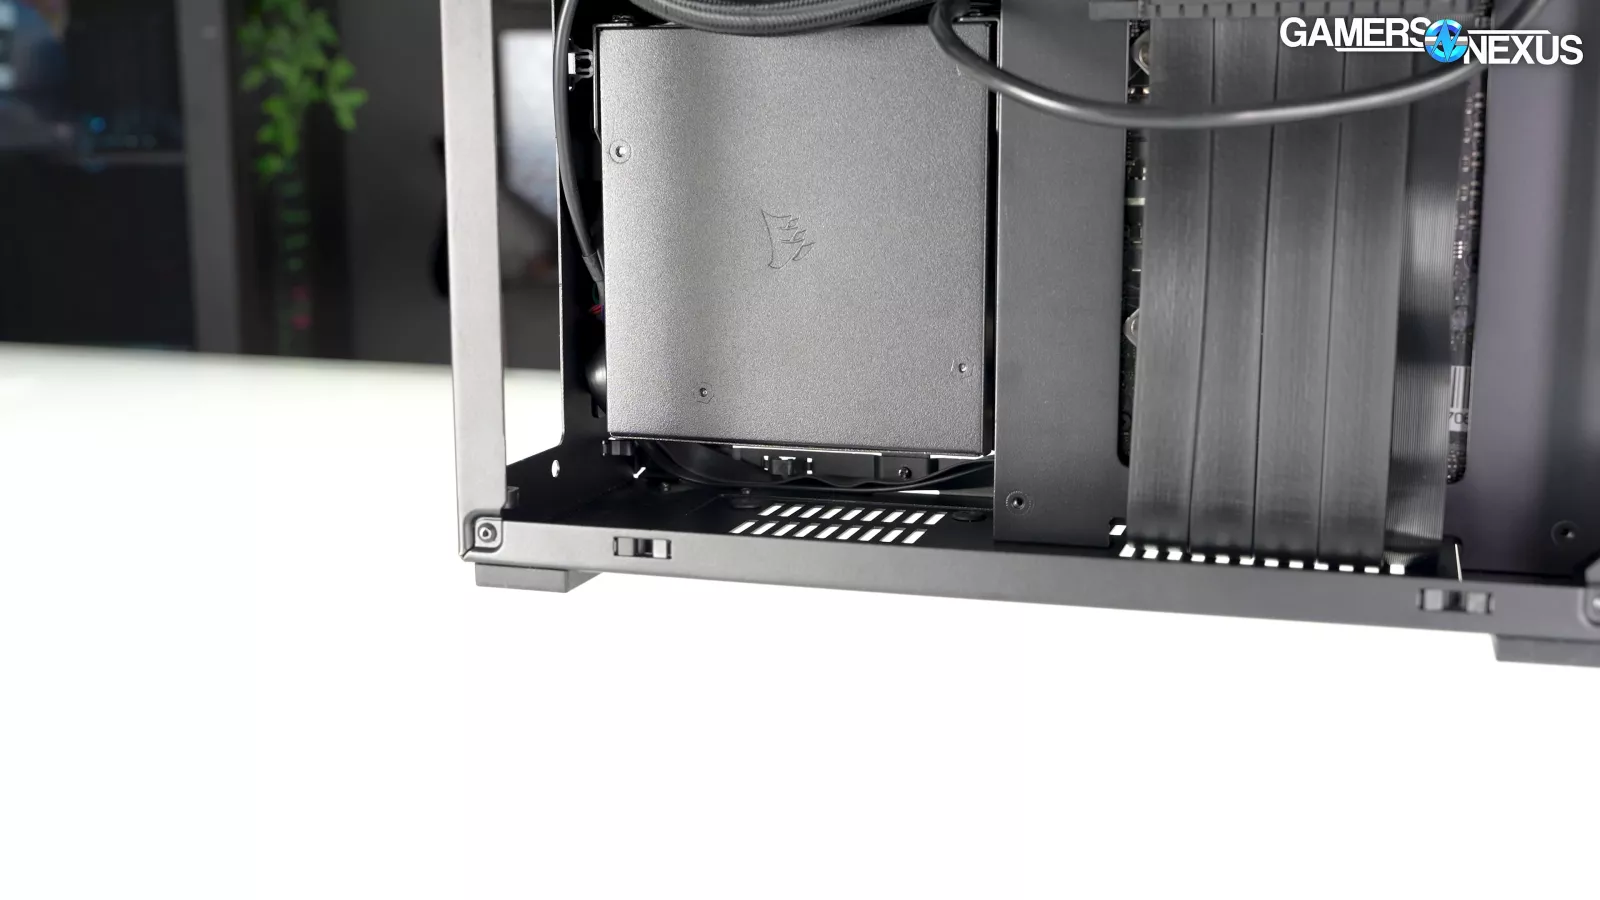
Corsair SF1000L
All that said, the A4-H2O supports SFX-L models, with the obvious reduction of cable management space below the PSU. Users will need all the space they can get here, so we recommend sticking with regular SFX.
Test Methodology
GN Mini-ITX Variable Test Bench (2023)
| Part | Standard Component(s) | Provided By |
| CPU | Intel i5-13600K @ Fixed clocks & voltages (clocks/voltages determined per case; we may settle on permanent settings once we get past our first few ITX case reviews) | Bought by GN |
| GPU | NVIDIA RTX 4070 FE | NVIDIA (review unit) |
| Motherboard | ASUS ROG Strix Z790-I Gaming WiFi | Bought by GN |
| PSU | Corsair SF1000L 1000W SFX-L Phanteks Revolt SFX 850W | Bought by GN Provided by Phanteks |
| RAM | GSkill Ripjaws S5 2 x 16GB | Bought by GN |
| SSD | Samsung 960 Pro M.2 NVMe SSD | Bought by GN |
| Coolers | VARIABLE Standardized options: 240mm CLC: Fractal Design Lumen S24 v2 RGB 120mm CLC: Arctic Liquid Freezer II 120 "Standard" Tower: Scythe FUMA 3 or Deepcool AK400 Short Single Tower: Noctua NH-U9S Mini-Tower: Noctua NH-D9L Downdraft Low-Profile: Deepcool AN600 67mm Alt. Downdraft: Noctua NH-C14S | Fractal Design, Arctic, Deepcool |
| Additional Fans (Optional) | VARIABLE Standardized options: Arctic P14 Slim PWM PST 140mm Arctic P12 Slim PWM PST 120mm Arctic P8 Max 80mm Noctua NF-A6x25 PWM 60mm Noctua NF-A9x14 PWM 92mm | Arctic Noctua |
Thermal Benchmarks
As we get into this, keep in mind that our goal with ITX reviews is to review only the case, so we're analyzing things like the impedance caused by the panels, the airflow path, and the compactness of the components affecting thermals. Because of that, these results can’t be compared to our other ITX case reviews due to different coolers. That just becomes a cooler benchmark at some point, and we already do those separately.

CPU Thermals - Full Torture
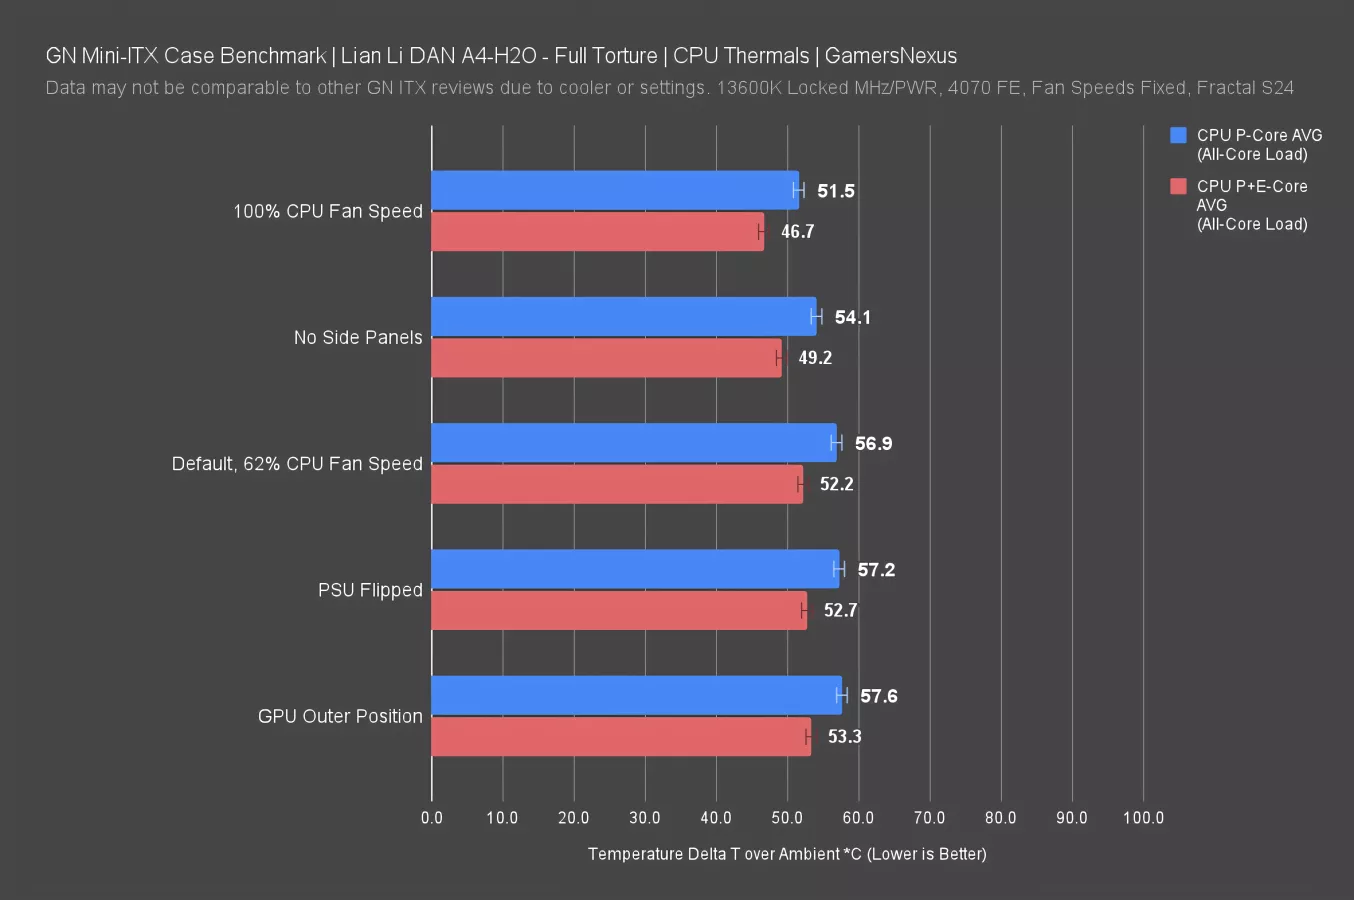
First up are CPU thermals under a full system torture workload. Our “default” setup for the A4-H2O has the system at a fixed 62% fan speed on the CLC, 100% on the pump, motherboard fans off, and the GPU in the interior position with fans at 44%. The GPU fan speed is chosen by the nominal speed of the fan under the standard VBIOS temperature targets, while the CLC fan speed is chosen based on noise targets. This results in 36.5dbA as measured in accordance with our old ATX case testing methodology, outside of the chamber in a noise floor of 26bA. Noise analysis from our hemi-anechoic chamber comes later.
The default setup at steady state had the P-Core average at 57C delta T over ambient. Locking the CLC fans to 100% dropped it by 5.4 degrees, actually outperforming the no side panels result (with reduced fan speed) too. That and the small change between no side panels and the default result stand as a testament to the efficient airflow pattern the A4-H2O provides. All of the airflow is directed through the top-mounted cooler, pulling air over most other components, and the panels aren’t too restrictive, as shown by the “No Side Panels” test.
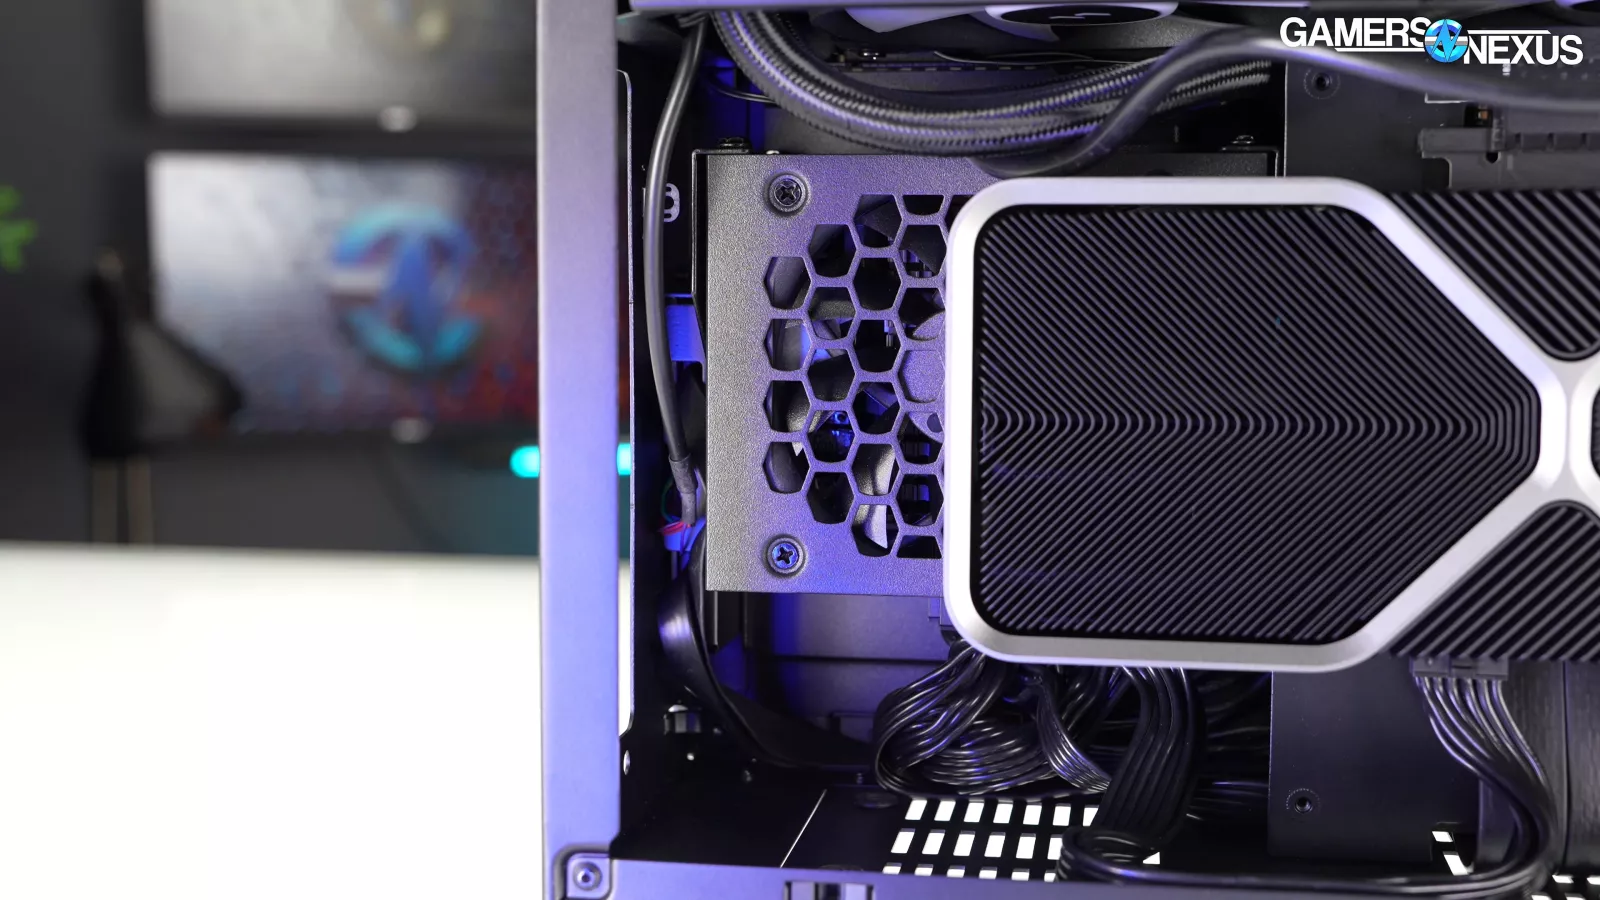
Flipping the PSU around so the fan faces the GPU isn’t covered in the manual, but it is possible. In our testing, it didn’t change CPU thermals. The same can be said for running the 2-slot RTX 4070 in the outer position, but the data leans slightly warmer on the averages.
GPU Thermals - Full Torture
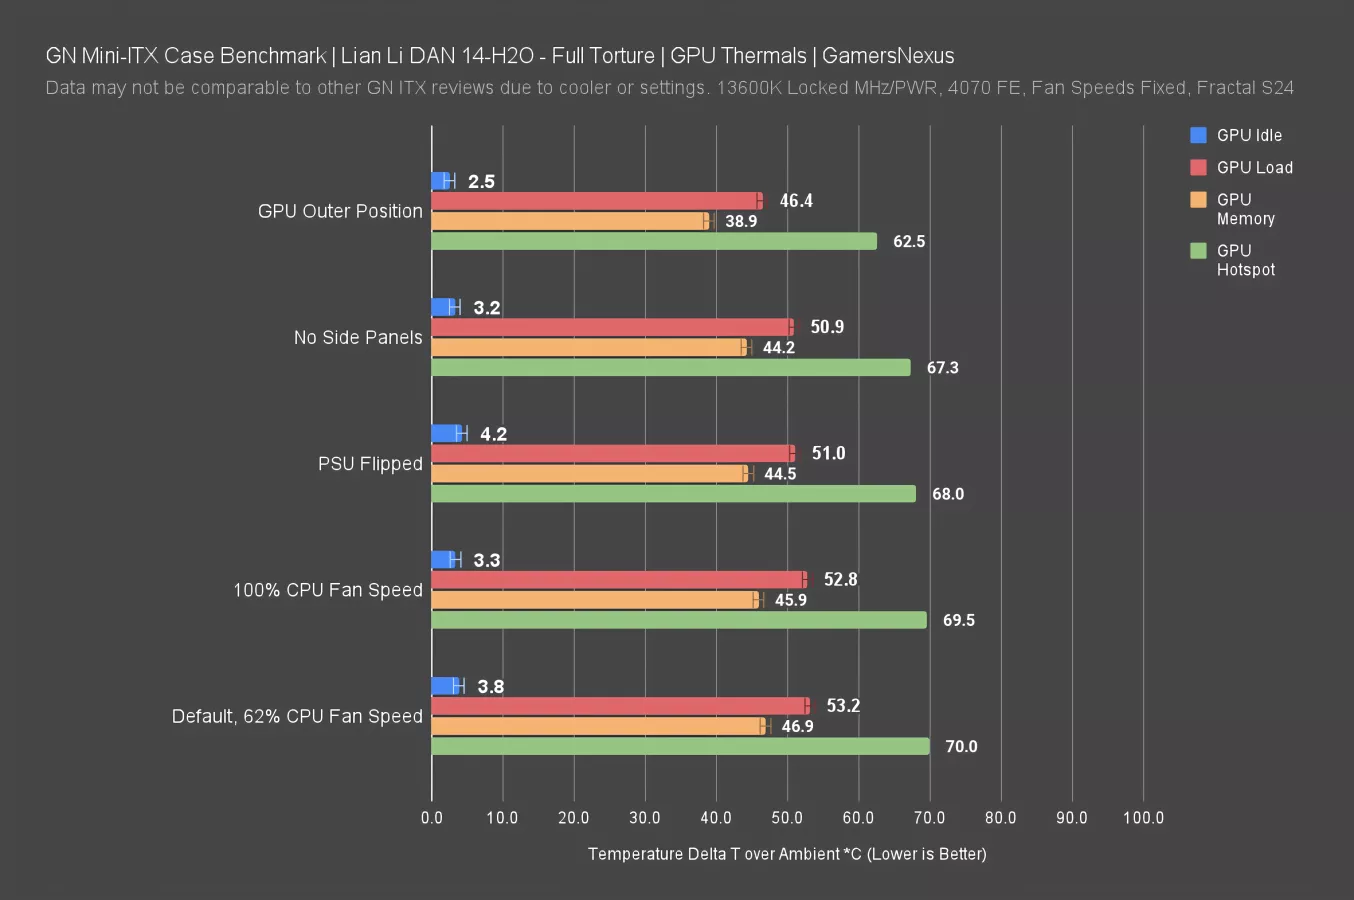
That brings us to GPU thermals, where we have GPU die idle, load, hotspot, and memory temperature. The default setup is actually the worst on the chart, but the 53-degree-over-ambient load average is still completely fine -- we’re in the 70s when ambient is added in. Running the CLC fans at 100% didn’t move the needle for the GPU, despite extra air movement into the case, but flipping the PSU to aid the flow-through 4070 FE dropped 2C off the load and hotspot readings versus default.
Pulling the side panels gained a little more, but as always, is just to illustrate impedance caused by case design. It’s not much. The real winner here is that outer mounting position for 2-slot cards. That setup gained us between 6.8 and 8 degrees off core load, memory, and hotspot. That’s a massive gain for a GPU, and that’s without any changes to fan speed whatsoever. That’s because the GPU is now in a position to draw in fresh air from directly outside the case, so the flow-through exhaust has more space to blow into, and that warmed air is immediately pulled out of the case by the CLC. This is what an efficient and less restricted airflow path can do.
Noise Testing
Noise levels are simple for this one. We’ve done a number of deeper explanations on our acoustic testing process now, including our video showing the build-out of the hemi-anechoic chamber, the news video that followed, the Terra review, and the ROG Ally review. Check each of those if this process is as cool to you as it is to us.
For this one, we’ll just look at one chart.
Because this isn’t comparative against other ITX cases due to a change in components between the smaller Terra and the Dan Case, we’re only going to look at the noise characteristics between the choice we found most impactful: The GPU positioning. If you’re running a 2-slot card, especially one with a flow-through area, we’d strongly recommend the outer position. But we need to see if that meaningfully impacted our acoustics. This will vary heavily based on fan blade design of the GPU behind the panel, but the FE card uses a fairly standard modern blade design.
Frequency Spectrum Analysis
Stock GPU Position
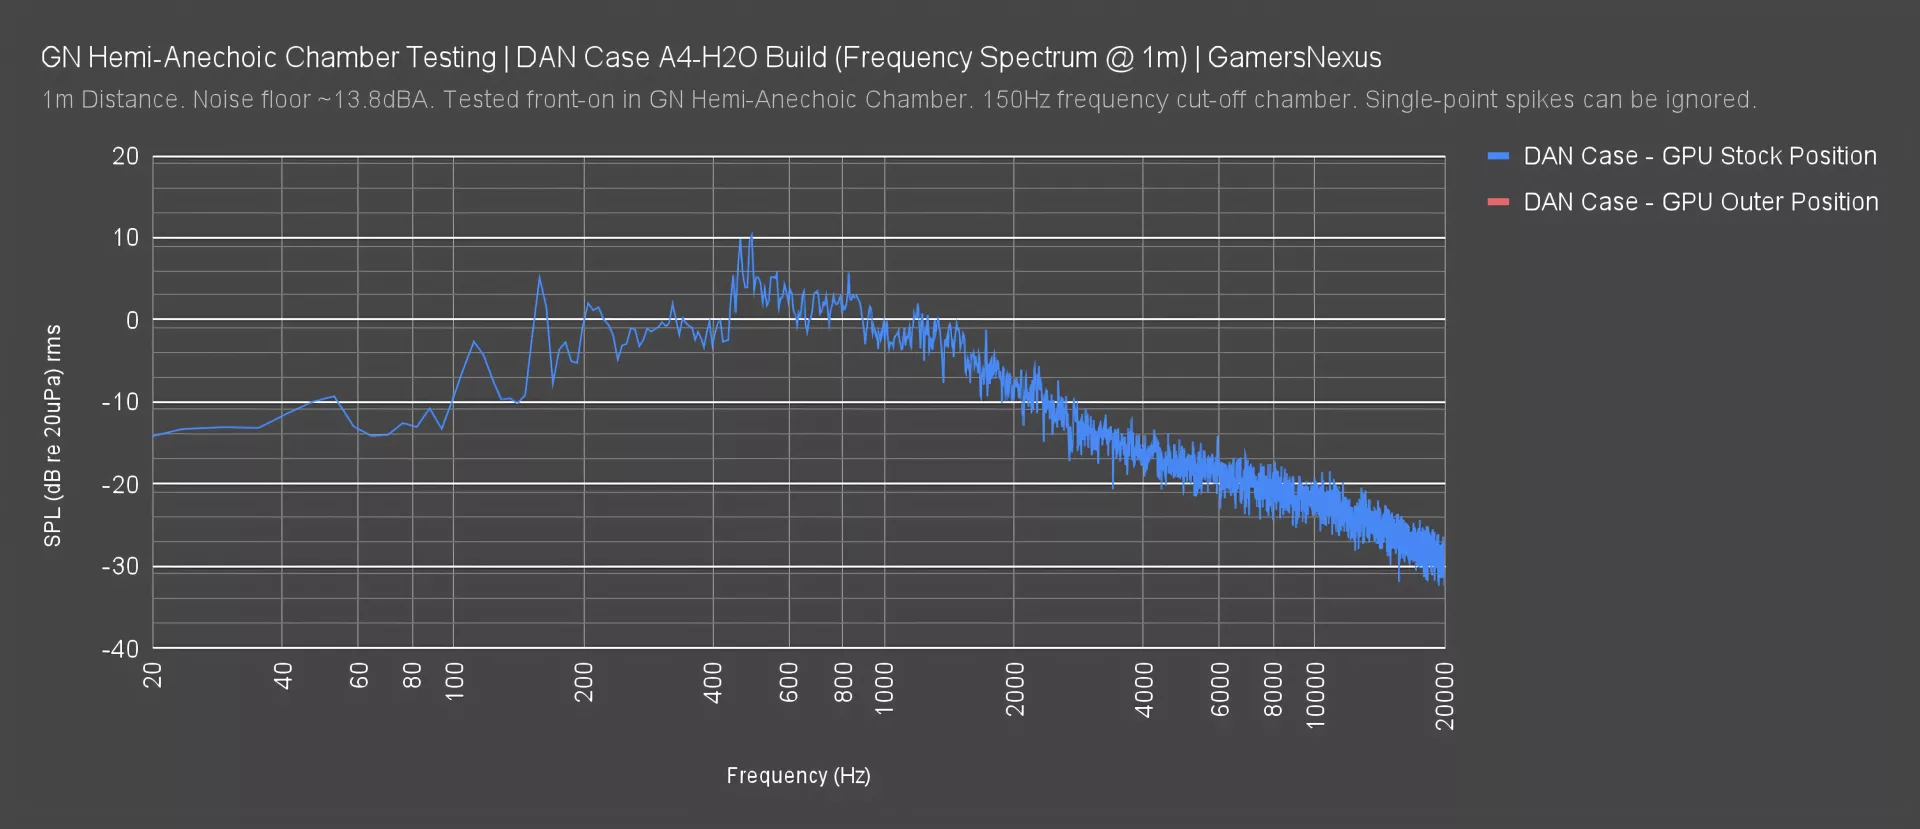
Plotting the GPU stock position first, we saw the noise profile of the case from straight-on at 1m distance was loudest in the 500Hz to 900Hz range. “Loudest” here just in the comparative against other frequencies, but not actually in a bad way. Overall though, even in this range, the profile is not indicative of any deviations that would be perceived as particularly unpleasant to a listener. This makes sense: As the panels aren’t perforated in a way that causes a whiny or turbulent noise from the fans and air movement, we have a frequency spectrum that primarily represents the components chosen and doesn’t reflect much direct negative impact from the case.
Outer GPU Position
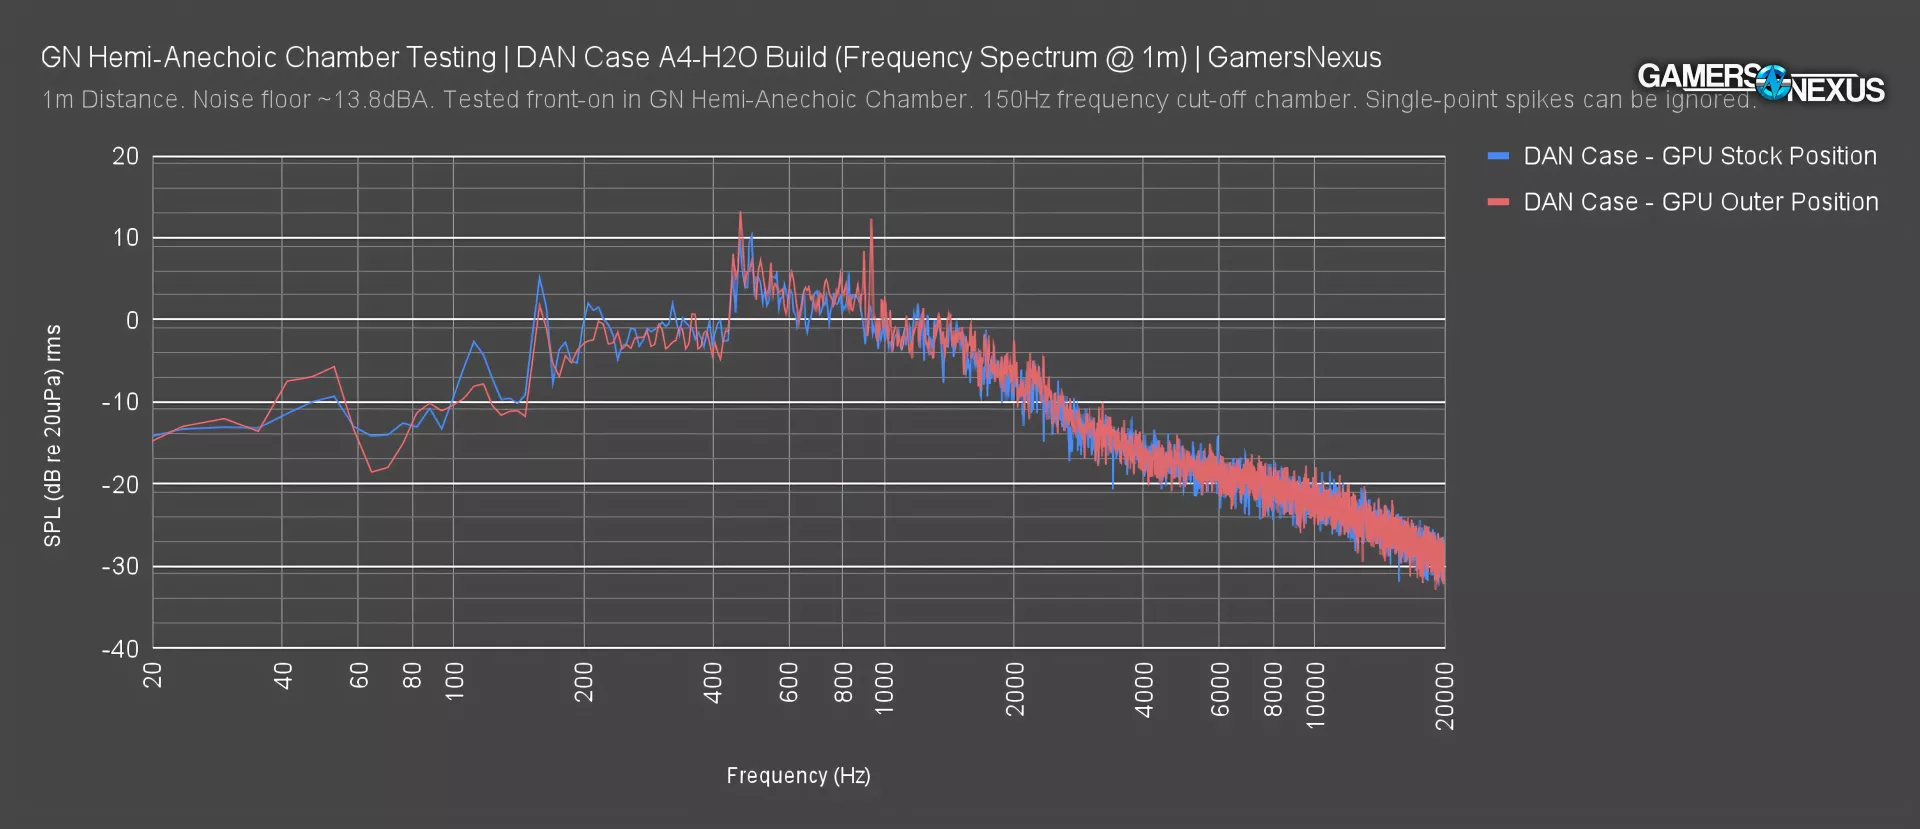
Adding the GPU outer position, there’s functionally no difference in results. Moving our card to the outer position had significant thermal benefit and no objective acoustic change. There’s really no downside to having it this way.
Conclusion

The Lian Li A4-H2O is a focused and competent mini-ITX case. There’s not a lot of freedom or choice in how the system is built, but that’s not what this case is here to do. It wants to do one or two things well, and it succeeds. That’s fine as long as the user is aware of it. The case probably shouldn’t try to do too many more things at a size like this. The experience in both the design by DAN and the manufacturing by Lian Li come through.
The thermals are good, bordering on impressive for the size – particularly for 2-slot flow-through GPUs like the 4070 FE. We wouldn’t recommend going wild with part selection, but compared to the Fractal Terra, we'd be more comfortable with running higher-end parts like a 13700K and RTX 4080. There’s some thermal headroom to spare from our configuration.
Mini-ITX cases tend to run on the expensive side. The Fractal Terra was $180, and there are plenty of other cases in the $200 range, plus or minus about $20. The price for the A4-H2O at $155 ends up being one of the more competitively positioned cases. Yes, there are some options like certain Cooler Master NR200P variants that are very worth considering, even today. We’re still adding cases to the list, and we’re looking forward to testing lower cost options as well.
Despite being cheaper than the Terra or a FormD T1 Sandwich, the A4-H2O does feel a little expensive in our opinion – just strictly based on what it is in isolation, given the construction methods and relatively simple design. It’s just not out of line for the mini-ITX crowd. This comes back to two factors. One is economies of scale – lower volume leading to higher manufacturing costs relative to high-volume ATX cases. The other is being adjacent to the boutique side of the market, where enthusiasts are willing to pay.
The people who might be the most frustrated by this are ones who want perfect cable management or those who want to retain unrestricted access to the motherboard. The removable bottom panel is a helpful feature in that respect, but ultimately has limits as to how much it can help.
Overall, we recommend the A4-H2O for anyone who wants to get higher-end components in a small package. That comes back to the 240mm CLC, it really opens up options for the CPU and creates a pressure system within the case that sucks out lingering hot air.