While we work on our R7 1700 review, we’ve also been tearing down the remainder of the new Nintendo Switch console ($300). The first part of our tear-down series featured the Switch itself – a tablet, basically, that is somewhat familiar to a Shield – and showed the Tegra X1 modified SOC, what we think is 4GB of RAM, and a Samsung eMMC module. Today, we’re tearing down the Switch right Joycon (with the IR sensor) and docking station, hoping to see what’s going on under the hood of two parts largely undocumented by Nintendo.
The Nintendo Switch dock sells for $90 from Nintendo directly, and so you’d hope it’s a little more complex than a simple docking station. The article carries on after the embedded video:
Nintendo Switch Disassembly: Tools Required
The Nintendo Switch Joy-Con and Dock require a few tools. We used our iFixit Pro Tech Toolkit for this teardown (they also sponsored the coverage, as we needed some specific pieces for this). The primary tools are:
- Phillips Head screwdrivers (small + medium A1 sizes needed)
- Y-Shape Tri-Wing screwdriver
- Rubbing alcohol if removing thermal compound
- Thermal compound if replacing
The iFixit Pro Tech Toolkit ($70) contains the uncommon Y-drive screws, alongside spudgers, pliers/priers, and other useful tools for PC building or disassembly. We would also suggest a magnetic mat so that you can draw an outline of the Switch and then track the specific locations of the screws. This will help reduce the chance of reassembling and leaving out a screw.
Nintendo Switch Dock Tear-Down
As previously, this isn’t a tutorial and we don’t recommend doing this. We’re just taking the thing apart for fun, frankly.
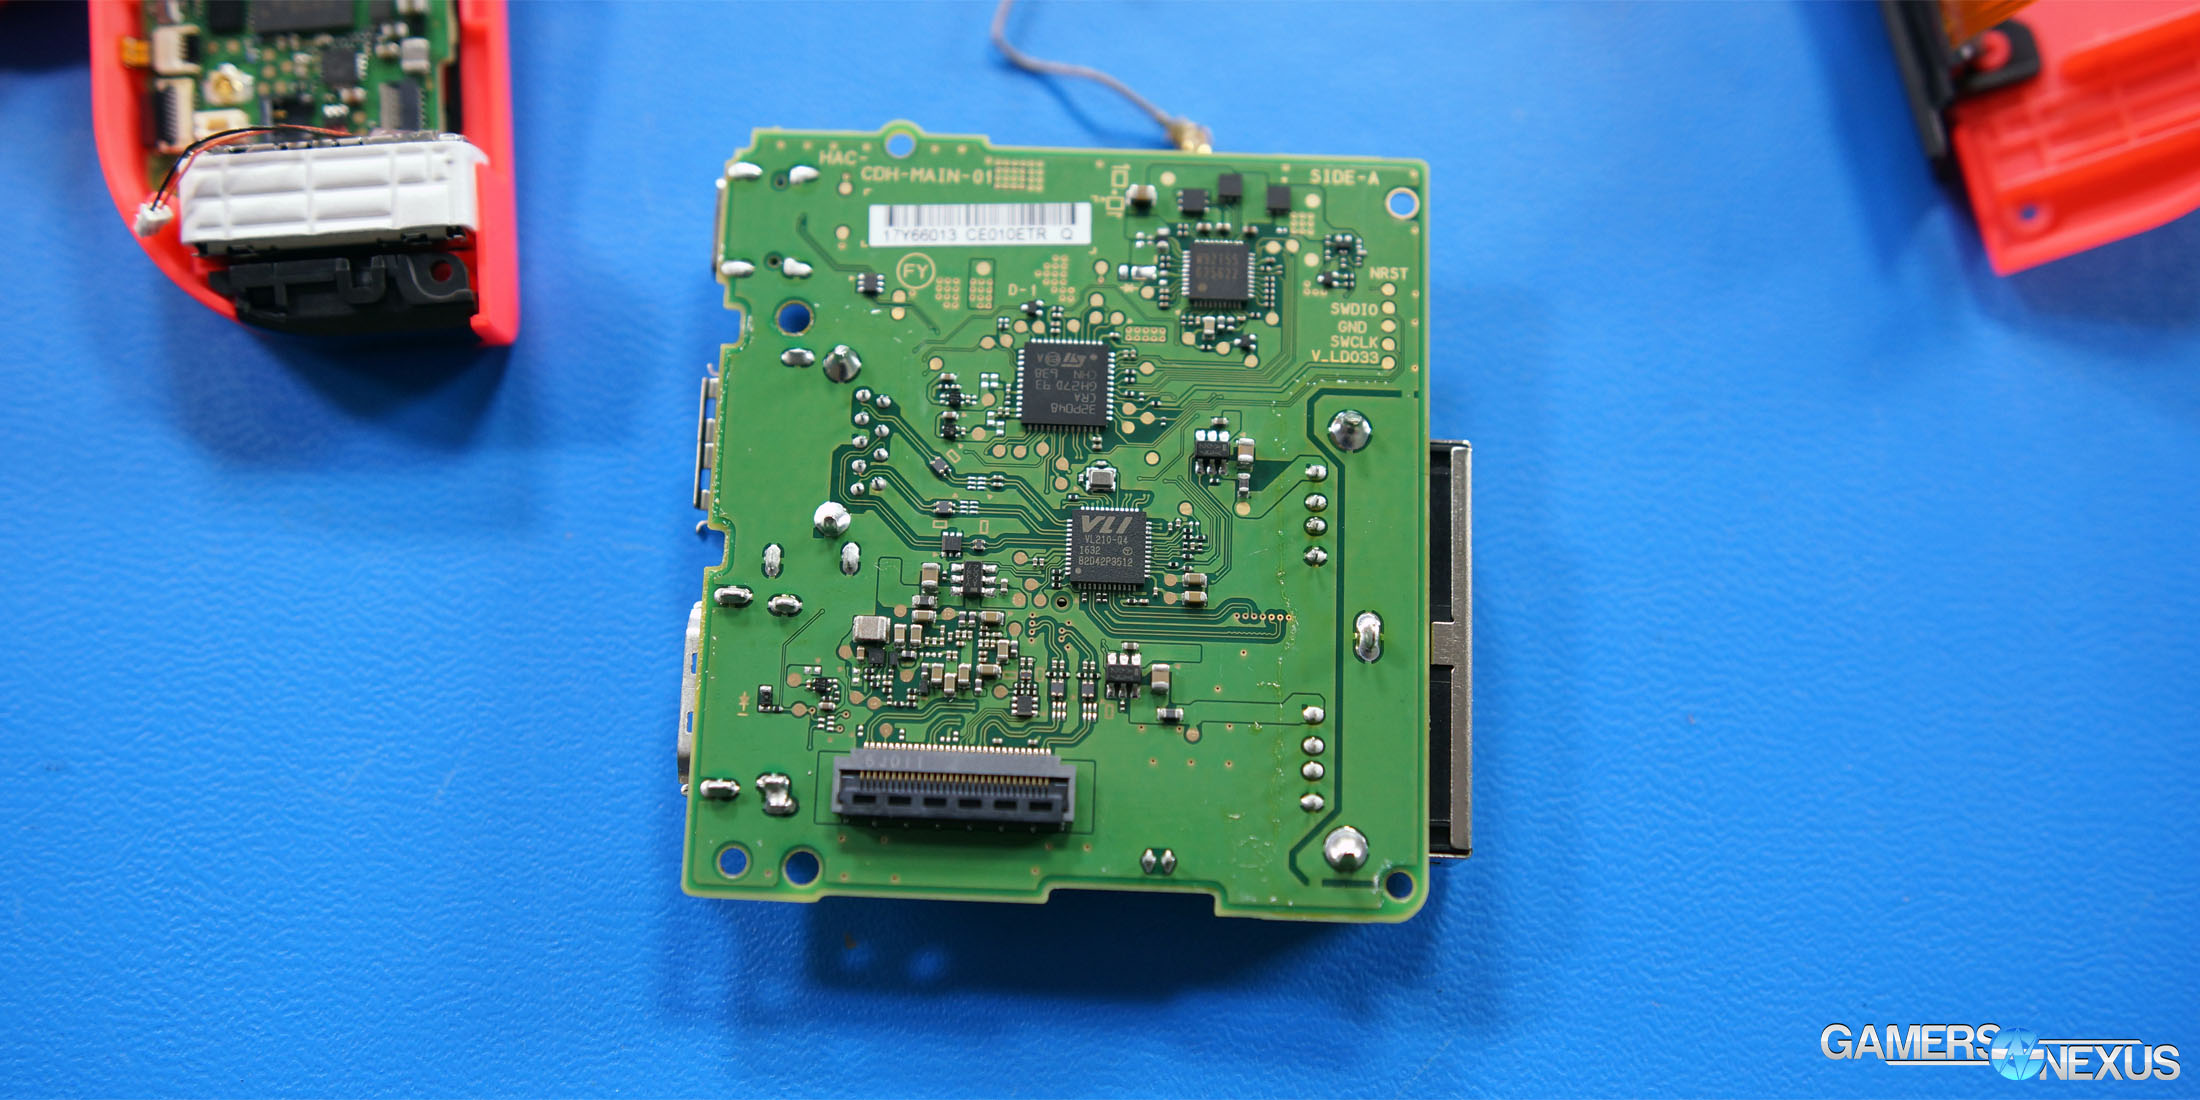
The dock is fairly simple. There are 8 Y-drive/tri-wing screws in the back of the dock, four of which hold the PCB housing to the controller board hosting the 2x USB2.0, 1x USB3.0, and 1x HDMI ports. Removing these four screws will unveil the PCB, and the next four (lower part of the plastic) will begin the process of splitting the dock in half. Once these are removed, a set of sunken screws can be accessed within the dock.
Separating the PCB enclosure from the housing leads us to a data ribbon cable and to an LED power cable. We can remove the PCB by disconnecting both, then lightly pulling on the securing prongs to release the PCB. Flipping it over, the PCB hosts an ST MCU and VLI USB controller (VLI VL210-Q4), a USB3.0 hub controller that supports rapid charging via USB. The VLI controller supports faster controller than the baseline USB standard, and the ST controller is some sort of ARM-based MCU (we are not positive exactly what).
This board is everything that’s in the dock, other than a few springs, an LED, and a charging PCB. It’s simple, and largely a plastic enclosure that’s built to host the Switch proper.
Nintendo Switch Joy-Con Tear-Down
For the Joy-Con tear-down, we selected the right side (red) Joy-Con as it’s host to an NFC and IR sensor. The IR sensor isn’t present in the left stick, leaving us with the right stick as the more complex of the two.
In terms of disassembly, they’re both equal in “difficulty” – it’s a handful of Y-drive screws for the housing, then careful pulling to split the housing and expose the PCB. There’s one main PCB within the housing, a battery opposing it, and all the switches for the top-side buttons.
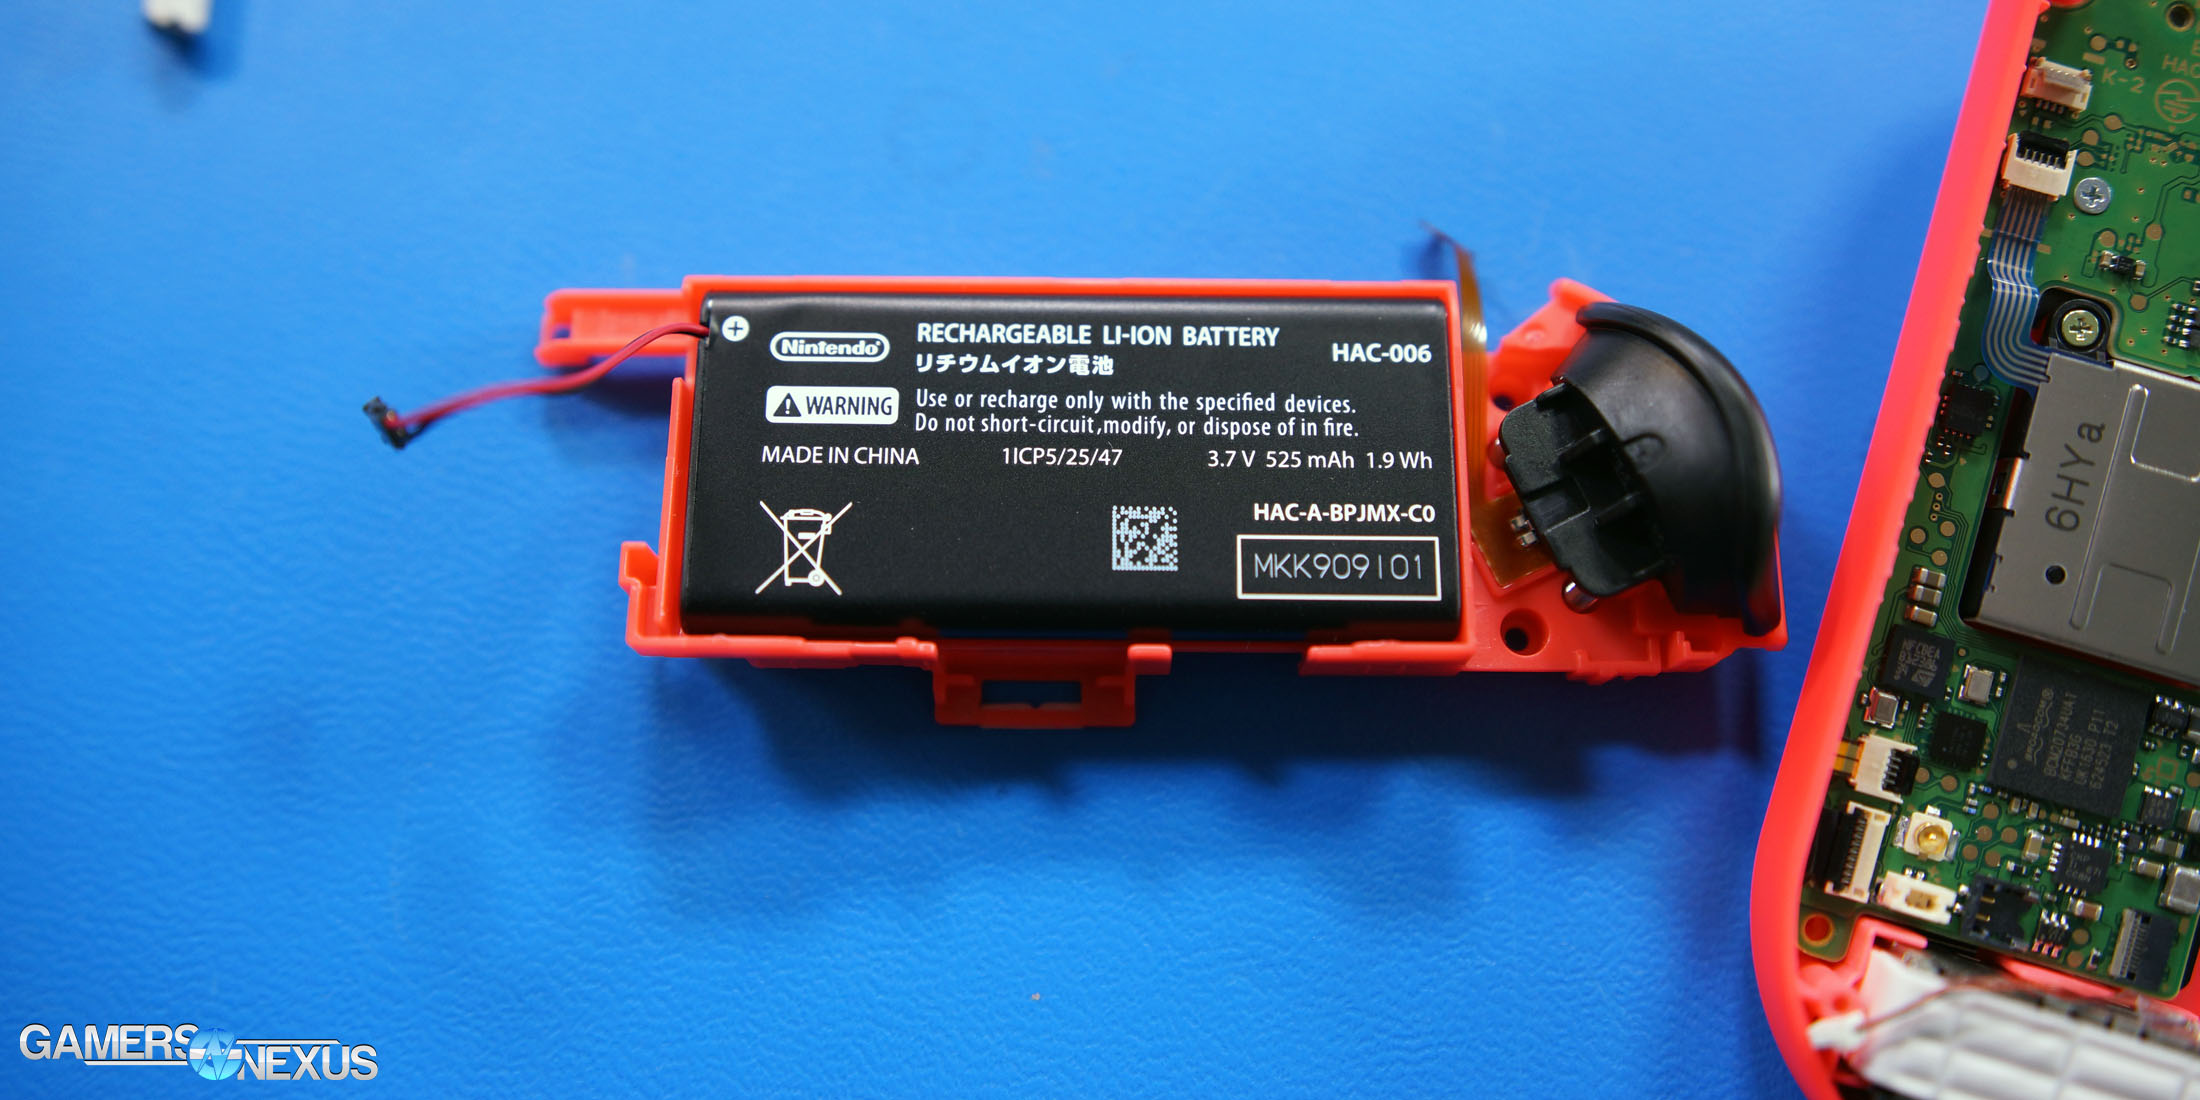
The battery located within the Joy-Con is 3.7V at 525mAh, 1.9Wh. The battery is labeled as HAC-006, HAC-A-BPJMX-C0. This should be user serviceable, assuming you could find a suitable replacement. Replacing the Switch Joy-Con batteries would theoretically be a trivial process – there’s one cable and a set of 4-5 screws, then the battery itself. Once the Switch has been out a while, we’d expect replacements should crop-up on eBay from China.
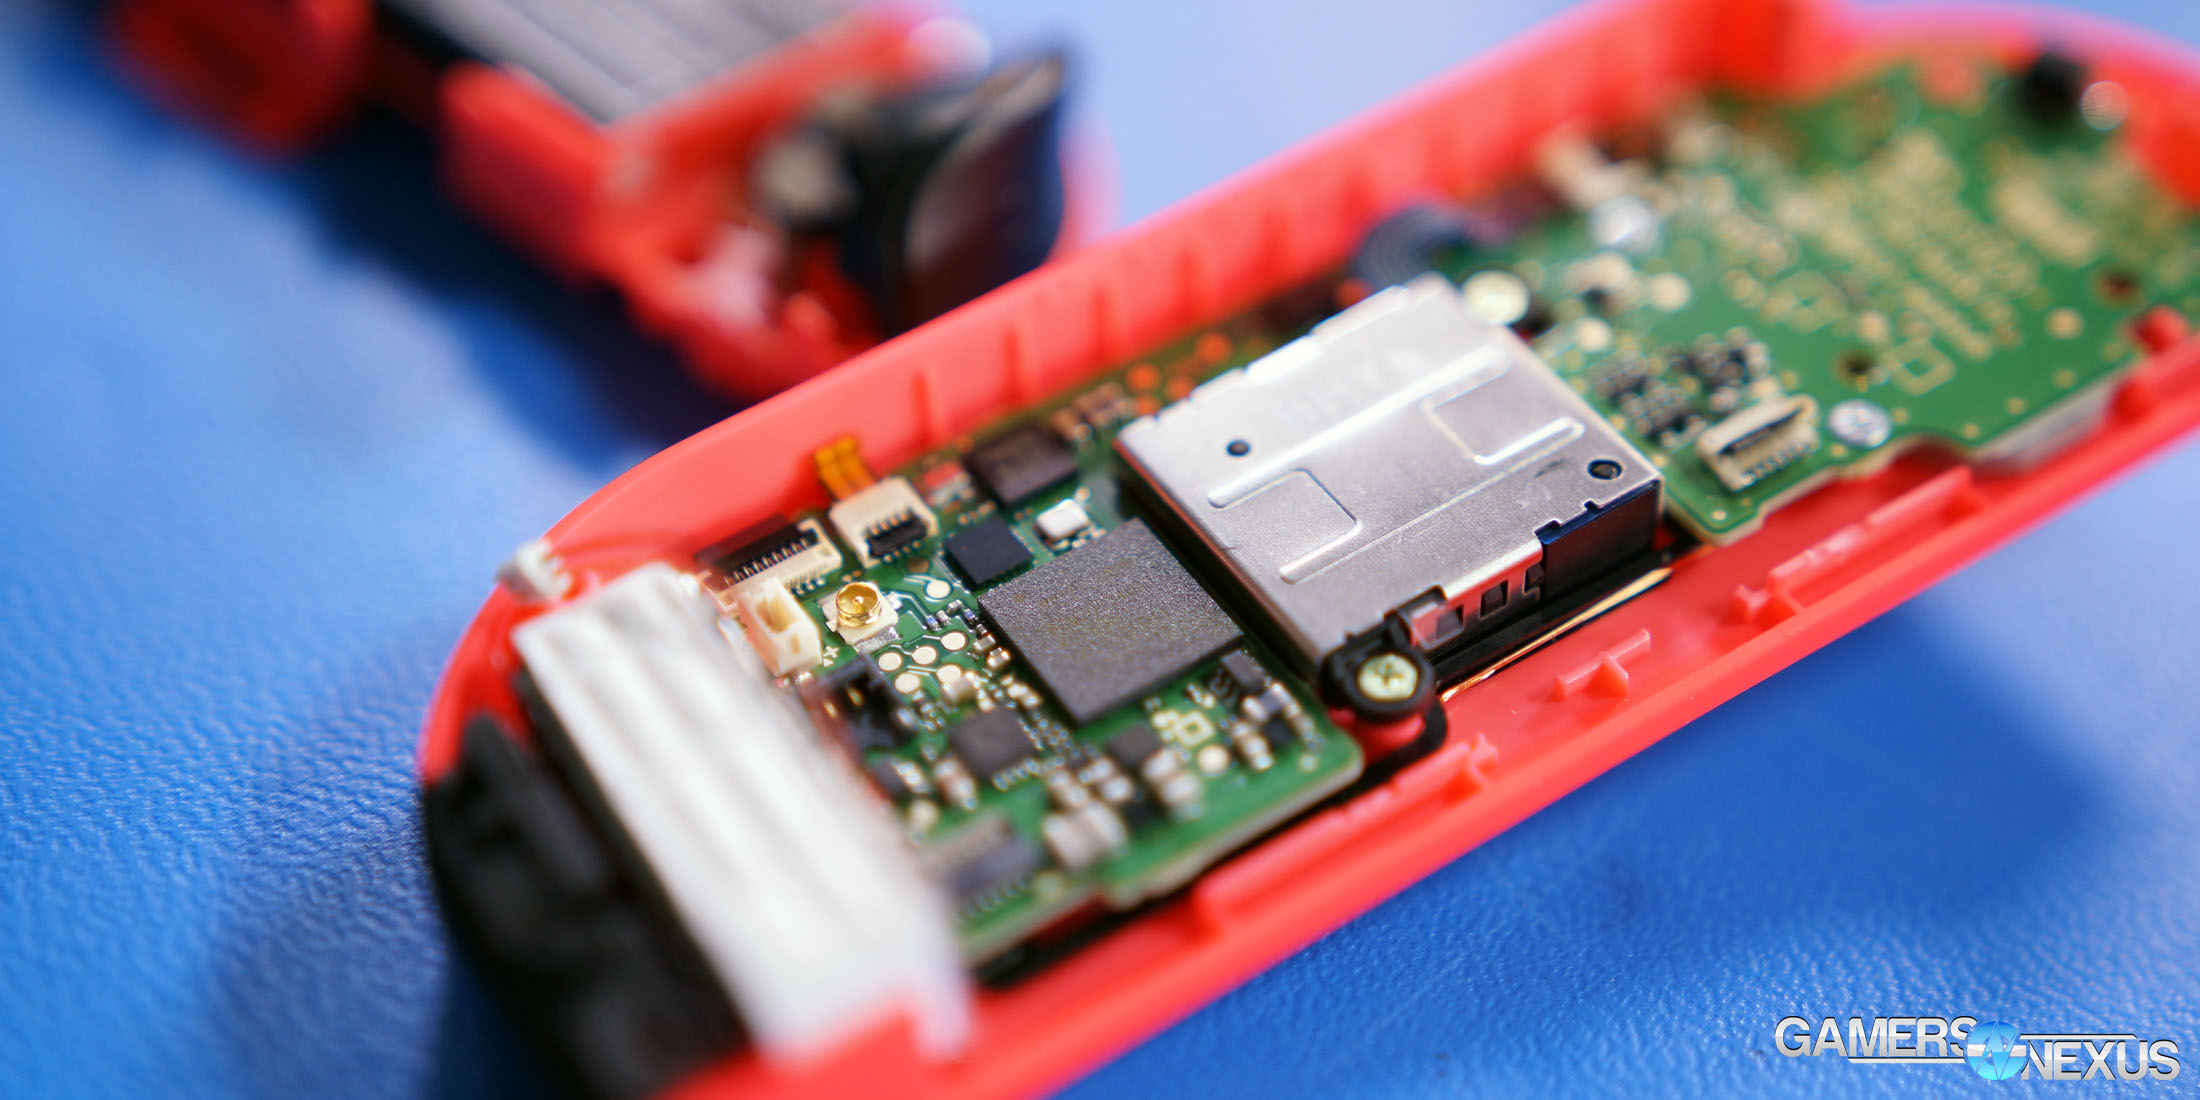
A Broadcom controller takes up a large part of the PCB space (BCM20734UA1, KFFB3G, UK1630 P11, 624523 T2) on the Joy-Con. Broadcom is a large maker of wireless and RF devices. A separate NFC IC is located adjacent to the Broadcom device.
Reassembling the Joy-Con (if fully disassembled) can be a bit frustrating, given the ribbon cables and all the small buttons to hold in place. Not as bad as the Switch proper, but not easy. Actually, none of this is particularly fun to reassemble, but it’s par for the course for the portable devices we’ve worked with.
Host: Steve Burke
Video: Andrew Coleman